So you have been developing Shopify apps, but you’re not creating the Shopify apps using React or Node.js. So in other words, you can NOT use Polaris. Now you’re wondering… “How am I going to design this app? and I don’t want to use Bootstrap anyway”.
Well, to be fair though, I’ve been in that very same spot and that’s why I am writing this article to guide you on how to design Shopify apps without using or installing Polaris to your Shopify app projects.
Video Tutorial
If you prefer watching video tutorials, the here is the video version of this article.
Getting Started
To get started, I will assume that you have followed our Shopify app development series and you have your own undesigned Shopify app. However, if you have nothing but installed Shopify app in your development store, then feel free to copy the following code and paste it into your index.php file. That being said, for this article, we will be using PHP.
<?phprequire_once( "inc/functions.php" );
$shop_url = $_GET['shop'];
$access_token = "ENTER YOUR SHOPIFY STORE ACCESS TOKEN";
/*** Install Shopify App*///header('Location: install.php?shop=' . $shop_url);//exit();echo"Hello " . $shop_url . '<br /><br />';
echo"The following table will list down all of your items from your store. You can delete an item using the action column";
$products = shopify_call( $access_token, $shop_url, "/admin/api/2021-01/products.json", array(), 'GET');
$products = json_decode( $products['response'], true );
foreach( $products as $product ) {
foreach( $product as $key => $value ) {
$image = '';
if( count( $value['images'] ) > 0 ) {
$image = $value['images'][0]['src'];
}
echo'<img src="' . $image . '" width="60"><br />';
echo $value['title'] . '<br />';
}
}
?>Code language:PHP(php)
The code above should give us the following output:
Design Shopify Apps without Polaris
If you’re developing Shopify apps and you’re not using React, then obviously, you won’t be able to use Polaris. Luckily, there is a free CSS framework that you can use for designing Shopify apps and it’s called Uptown CSS.
Navigate to their official website and click the Download CSS button. We’re going to import this into our project.
Once you have downloaded the css file, import it to your project. I will put it inside of my css folder like below:
Since we need to import the CSS, we’ll have to create the skeleton for our HTML. Update your index.php to the following:
Once you saved your files and open your app, your app should update to something like below:
Awesome! That means we’re making a progress and Uptown CSS is working! Let’s continue and create the container and sections for our Shopify app.
Open your index.php and copy the following code.
<?phprequire_once( "inc/functions.php" );$shop_url = $_GET['shop'];$access_token = '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';/** * Install Shopify App *///header('Location: install.php?shop=' . $shop_url);//exit();?><!DOCTYPE html><htmllang="en"><head><metacharset="UTF-8"><metaname="viewport"content="width=device-width, initial-scale=1.0"><title>WeeklyHow</title><linkrel="stylesheet"href="css/uptown.css"><style>body {padding-top: 30px; }</style></head><body><main><section><article><divclass="column twelve"><?phprequire_once("header.php");?></div></article></section><section><article><divclass="card has-sections"><divclass="card-section"><?phprequire_once("product_table.php");?></div></div></article></section><footer><articleclass="help"><span></span><p>Learn more about <ahref="#">this app</a> at <ahref="#">WeeklyHow</a> Help Center.</p></article></footer></main></body></html>Code language:HTML, XML(xml)
In the code above, we created the basic structure of our app. Now, if you’re wondering what is the basic structure, you may use the following code as a reference:
As you can see in the code above, it consists of three parts: header, section, and footer.
Now we never really used the header tag in our code so if you wish to add the header tag, feel free to do so. But, personally speaking, I never truly liked how it looks. (shrugs)
Now noticed that we have created two files: header.php and product_table.php.
For the header.php file, this is the code:
<h6><?phpecho"Hello " . $shop_url . '<br /><br />'; ?></h6><divclass="alert warning"><dl><dt>Read me</dt><dd><?phpecho"The following table will list down all of your items from your store. You can delete an item using the action column <br/><br/>";?></dd></dl></div>Code language:HTML, XML(xml)
So in the code above, we only retrieve the products through Product API and loop through each product, and render them using table rows. If you want an in-depth guide on how to get Shopify products using Shopify API, you may click the following button to learn more about it.
By saving all of your files, you should have the following output:
Conclusion
There you have it! You have designed your Shopify app without Polaris.
Now, what I really like about this CSS framework is that it doesn’t need jQuery or other JavaScript framework. It’s a very independent framework and can be easily customize especially if you are familiar with CSS or SASS. So, what do you think? Do you think this is a great CSS framework? Let us know in the comments below.
Building a brand is never an easy task for everyone especially these days. With too many competitors popping out of nowhere, the only way to get your brand well-known is by selling a completely new product that is not yet discovered in the market.
Shopify offers you mostly with everything for selling products but there are further steps that you can do to increase your chances of getting known to the public.
If you are a developer and you own a Shopify store, you are one step ahead of your competitors! You can use your programming skills to develop additional features that your competitors don’t have yet in their store. However, if you don’t know how to write codes then you can always hire Shopify developers to do the job for you.
One of the tricks is to customize Shopify themes that will make your online store stand out from other brands. Building Shopify themes can be also one of the tricks that you can do if you are a developer.
In this tutorial, we’ll guide you on how to customize Shopify themes using Theme API and Asset API from Shopify API version 2021-01.
Getting Started
Before we begin with this tutorial, we’ll assume that you already have your Shopify app installed in your development store. Also, we’ll assume that you are using the same script that we’re using to interact with Shopify API.
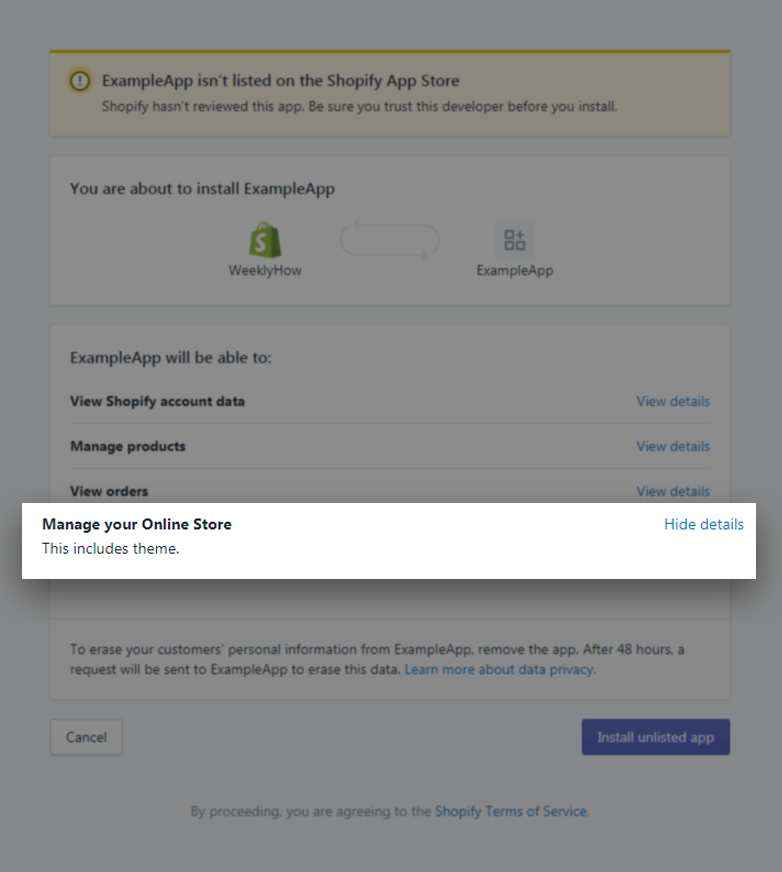
Whether it’s a premium Shopify theme or a free Shopify theme, you can customize that using Shopify apps. To start customizing themes you will need an app that has access to themes and its assets. Otherwise, you will see an error such as:
How can you have access to themes and their assets?
The answer is very easy and simple.
You only need to add additional access scopes to your install script.
Open your install.php file and look for the $scopes variable.
If you have been following our Shopify app development series then you probably have a$scopes variable that looks something like this:
Keep in mind that you should never add spaces between these scopes otherwise, you will get an error.
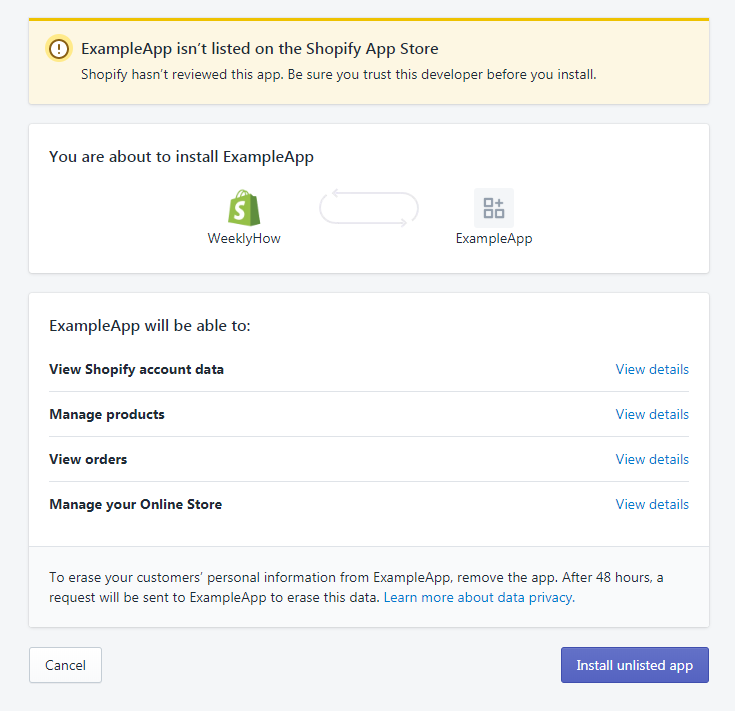
Save your install.php file and install the app in your store.
You should see the following page:
Shopify Theme API
Before you can customize your Shopify theme, you have to list down first all the themes you have in your Shopify store. You can do this using Shopify Theme API.
After getting all the themes available in your Shopify store, that’s the time you can select which theme you want to customize.
There are three types of themes that might be present in your Shopify store.
Main theme
Unpublished
Demo
Main theme is the published theme that is currently viewable by everyone. Whereas unpublished is the theme that is not viewable by everyone. The demo is the theme that you can’t publish unless you purchase the full version of the theme.
With that being said, we’ll be using the main theme and its assets to display a simple text in the homepage.
Replace the value of the $token variable with the token you have generated. Again, if you don’t have an access token you can always read our generating access token guide.
Next, replace the value of the $shop variable with your store subdomain.
For example, we have weeklyhow.myshopify.com.
Then we’ll only get the subdomain which is weeklyhow.
After that, we’ll use the shopify_call() function to get all the themes in our store using the theme API.
Next, we’ll use foreach() functions to get the main theme and then we’ll display which theme we’re currently using.
A theme is constructed by its assets. These assets consisted of templates, images, stylesheets, and javascript can be customized using asset API.
Before you can modify asset files, you will need to provide at least one theme ID which can be retrieved using theme API.
We’ll be using the theme ID displayed in our Shopify app (displayed in the screenshot above). This ID could be different from yours so be sure that you copy your own theme ID instead of ours.
Now, we’re going to add a little code inside of the foreach() loop.
Copy and paste the following code underneath the echo statements.
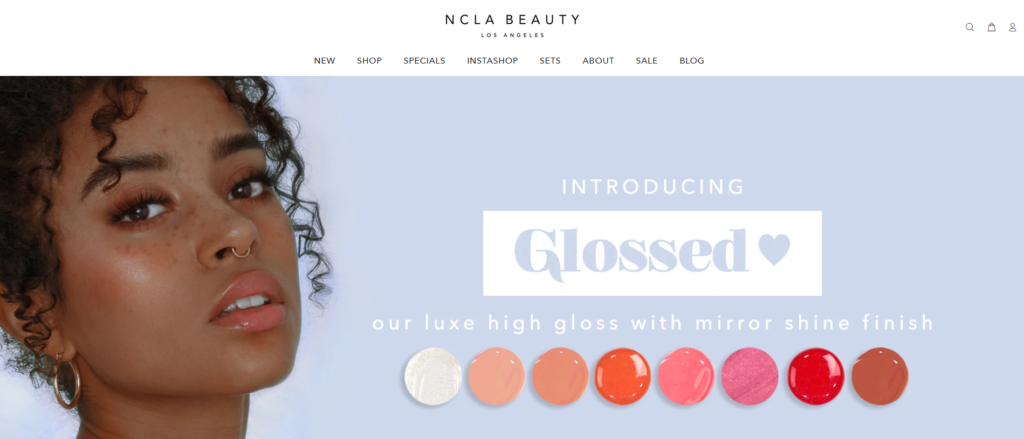
Before the app is installed, the storefront with the Debut theme installed should look something like this:
After installing the Shopify app, and running the app.
Your index.liquid file will be modified and the result will look something like this:
It’s important to remember that once you run the app using the code above, all of the code inside the index.liquid file will be replaced.
If you only want to append a snippet code then the best way to do that is to get first the content of templates/index.liquid and then append the code that you want to add.
If you mistakenly replaced the codes, you can always undo your changes using Shopify code editor and change the date from current to a date that you desire.
Conclusion
Customizing your Shopify store is one of the things that you can do to improve your customer’s experience. With Shopify’s Theme and Asset API, you can build additional features that your competitors don’t have yet in their brand.
For example, with Asset API, you can modify the theme.liquid file and add a script where it shows an alert window that you have an event or a promo.
We really hope that you have learned at least the basic usage of theme and asset API.
Let us know what you think in the comments below! If you encountered issues, don’t hesitate to contact us and we’ll do our best to help you.
When you develop a Shopify app, you are required to store merchants’ data such as access tokens and shop URLs. These two data are one of the most important data for using the API.
The takeaway with this is that- you are responsible for deleting their data as soon as they uninstall the app.
So, how can you do that?
It’s simple. Just use webhooks.
Video Tutorial
If you prefer watching video tutorials, feel free to watch the video version of this article:
What is Webhook?
Webhook is a method of sending notifications about particular events that have happened in a shop.
For example, when a merchant uninstalls an app, Shopify will send a notification to the developer that a merchant has uninstalled the app. This notification will have a set of data that the developer can use to determine which store was the one who uninstalled the app.
Webhooks are also available for the following events/topics:
For this tutorial, we’ll be focusing on how to implement webhook API for the event/topic: app/uninstalled.
We’ll assume once again that you have already set up your Shopify app and connected it with the database because we’re going to delete the stored data as soon as we uninstall the app.
We’ll also assume that you are using the same script that we’re using for this tutorial. So if you’re not familiar with everything we used in this tutorial, we suggest you follow the tutorial where we teach you how to create a Shopify app from scratch.
We’re going to be editing generate_token.php or token_generator.php for this tutorial. So make sure you have that file ready.
Implementing Webhooks
Before you can make a post request to webhooks API, you will need to create a payload that contains the topic and the target URL that will load once the event is fired.
Of course, for this tutorial, we’ll be using PHP to implement webhook API although using a different programming language will also have the same process.
Now, let’s open our token generator script.
For the moment, we have the following inside our code.
<?php// Get our helper functionsrequire_once("inc/functions.php");
require_once("inc/connect.php");
// Set variables for our request$api_key = "xxxxxxxxxxxxxxxxxxxxxxxxxxxxxx"; //Replace with your API KEY$shared_secret = "xxxxxxxxxxxxxxxxxxxxxxxxxxxxxxxxx"; //Replace with your Shared secret key$params = $_GET; // Retrieve all request parameters$hmac = $_GET['hmac']; // Retrieve HMAC request parameter$shop_url = $params['shop'];
$params = array_diff_key($params, array('hmac' => '')); // Remove hmac from paramsksort($params); // Sort params lexographically$computed_hmac = hash_hmac('sha256', http_build_query($params), $shared_secret);
// Use hmac data to check that the response is from Shopify or notif (hash_equals($hmac, $computed_hmac)) {
// Set variables for our request $query = array(
"client_id" => $api_key, // Your API key"client_secret" => $shared_secret, // Your app credentials (secret key)"code" => $params['code'] // Grab the access key from the URL );
// Generate access token URL $access_token_url = "https://" . $params['shop'] . "/admin/oauth/access_token";
// Configure curl client and execute request $ch = curl_init();
curl_setopt($ch, CURLOPT_RETURNTRANSFER, 1);
curl_setopt($ch, CURLOPT_URL, $access_token_url);
curl_setopt($ch, CURLOPT_POST, count($query));
curl_setopt($ch, CURLOPT_POSTFIELDS, http_build_query($query));
$result = curl_exec($ch);
curl_close($ch);
// Store the access token $result = json_decode($result, true);
$access_token = $result['access_token'];
// Show the access token (don't do this in production!)//echo $access_token; $sql = "INSERT INTO example_table (store_url, access_token, install_date) VALUE ('" . $shop_url . "', '" . $access_token . "', NOW())";
if( mysqli_query( $conn, $sql ) ) {
header('Location: https://' . $shop_url . '/admin/apps');
exit();
} else {
echo"Error installation: " . mysqli_error( $conn );
}
} else {
// Someone is trying to be shady!die('This request is NOT from Shopify!');
}
Code language:PHP(php)
As you can see in the code above, we have already implemented MySQL to save the merchant’s data.
However, we’re not just going to save the merchant’s data but we’re also going to register webhook on app uninstall.
Also, make sure you reference your functions.php file since we’re going to do some API calls.
Now let’s talk about the payload. Let’s assume we have the following:
$array = array(
'webhook' => array(
'topic' => 'app/uninstalled',
'address' => 'THE URL OF YOUR SCRIPT THAT YOU WANT TO LOAD WHEN THE EVENT IS FIRED',
'format' => 'json' )
);
Code language:PHP(php)
Copy the code above just before the header() function.
Since we’re going to delete the merchant’s data when the app/uninstalled event is fired, that means we’re going to create a PHP file that uses MySQL functions.
In your project folder, create a new folder and name it webhooks.
Open the webhooks folder and inside, create a new file and name it delete.php.
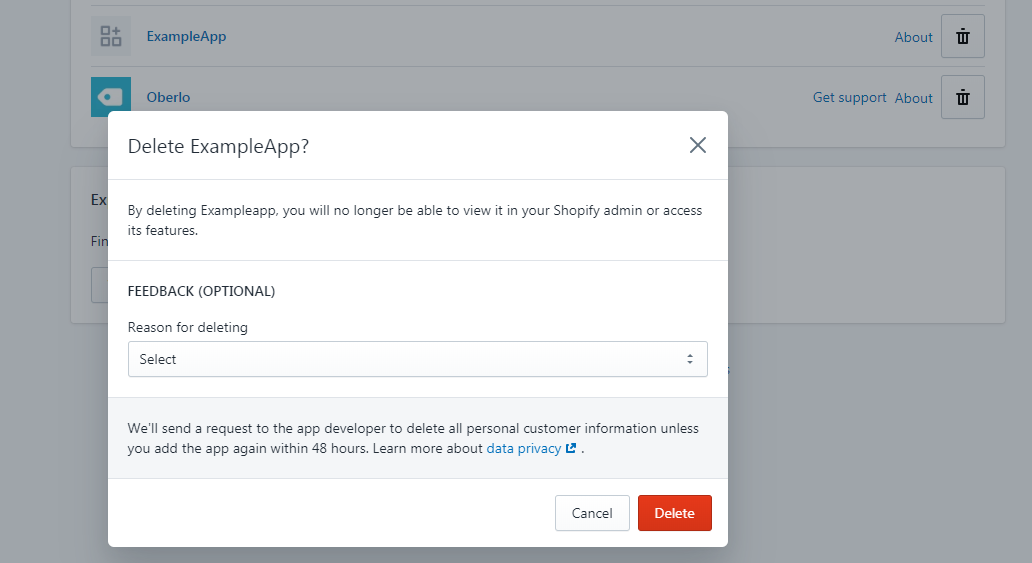
This time, we’re not going to open our app but uninstall the app.
Keep in mind though that the webhook is not yet registered which means we have to reinstall our app to register it.
Install your app.
Checking Applied Webhooks
If you are wondering how you can check the list of webhooks applied to your store, you have to do it by sending a GET request instead of just browsing the webhooks.json file.
Let’s open our index.php file and update our code to the following.
There you have it! You have successfully applied a webhook for the event app/uninstalled!
Now, the next thing we need to do is to actually create the delete.php file and use MySQL functions to delete the store data from the database.
So let’s open our delete.php file and add the following code:
<?phprequire_once("../inc/connect.php");
require_once("../inc/functions.php");
define('SHOPIFY_APP_SECRET', 'xxxxxxxxxxxxxx'); // Replace with your SECRET KEYfunctionverify_webhook($data, $hmac_header){
$calculated_hmac = base64_encode(hash_hmac('sha256', $data, SHOPIFY_APP_SECRET, true));
return hash_equals($hmac_header, $calculated_hmac);
}
$res = '';
$hmac_header = $_SERVER['HTTP_X_SHOPIFY_HMAC_SHA256'];
$topic_header = $_SERVER['HTTP_X_SHOPIFY_TOPIC'];
$shop_header = $_SERVER['HTTP_X_SHOPIFY_SHOP_DOMAIN'];
$data = file_get_contents('php://input');
$decoded_data = json_decode($data, true);
$verified = verify_webhook($data, $hmac_header);
if( $verified == true ) {
if( $topic_header == 'app/uninstalled' || $topic_header == 'shop/update') {
if( $topic_header == 'app/uninstalled' ) {
$sql = "DELETE FROM example_table WHERE store_url='".$shop_header."' LIMIT 1";
$result = mysqli_query($conn, $sql);
$response->shop_domain = $decoded_data['shop_domain'];
$res = $decoded_data['shop_domain'] . ' is successfully deleted from the database';
} else {
$res = $data;
}
}
} else {
$res = 'The request is not from Shopify';
}
error_log('Response: '. $res); //check error.log to see the result?>Code language:PHP(php)
Save the file and open your store.
As soon as you uninstall your app. Proceed to your webhooks folder and you should see a file called error_log. This file was generated by the delete.php file.
Open error_log file with your code editor. You should see the following if the process is successful.
If you see the same response then that means your store data is also deleted from the database.
Why add the webhook in the token generator? Instead of the index?
The reason why we have to register the webhook in token generator is because, merchants can always change their minds and uninstall the app without opening your app.
Conclusion
Webhooks in Shopify is very important, in fact, Shopify is encouraging you to implement this before you plan to publish your app to the app store.
If you have questions, don’t hesitate to comment down below. Let us know what you think by sending us your reaction!
Are you wishing to have your own business? Do you want to learn how to earn $214,057/month with dropshipping? Look no more because you’re about to learn how to dropship with Shopify. In this training course, you’ll learn:
What is Dropshipping
Why you should start a dropshipping business
Disadvantages of Dropshipping
How to create a dropshipping store with Shopify
Marketing Strategy for Dropshipping
Now before we go in-depth about dropshipping, let’s understand first what is dropshipping.
What is Dropshipping?
Dropshipping is a business that allows you to market and sell products without actually having the products itself or anything related to items like inventory and storage.
What happens is, when the buyer buys an item in your online store, your only task is to notify the supplier that someone is buying an item and the supplier will take care of the delivery.
In other words, your online store is only the facade of the business.
Why Should I Start a Dropshipping Business?
There are many reasons why you should start a dropshipping business:
Easy To Get Started, running a dropshipping business is much easier than building an actual store. With drop shipping, you won’t have to worry about warehouse management, orders, inventory, returns, etc.
A Little Capital is Enough, you don’t need to spend thousands of dollars to start a dropshipping business. In fact, you don’t have to spend anything at all! For 14-days, you can start running an online store (Free trial) using Shopify. Once you have created a store, you may start using free apps like Oberlo to import products to dropship.
Location is not a problem, you can run your dropshipping business anywhere you like! It could be in your home, office, or outside as long as there is an internet connection that will allow you to communicate with the suppliers and customers.
Stable Growth, Since 2018, e-commerce started to grow by 10% and it is expected to grow at more than 20% rate by 2022 and it is also predicted to exceed its total amount up to $5.5 trillion. If you start building your own e-commerce business at this point in time, you can expect your business to grow as time goes by but of course, you need to work hard for that to happen.
You might be thinking that it’s really simple to run an e-commerce business and tell you what, it is! However, these conveniences always come with disadvantages.
Disadvantages of Dropshipping
Too many competitors, this is one of the biggest disadvantages of dropshipping. Since dropshipping is easy to get started and the costs are so small. Everyone will hop in and start there own business and sell items at the very minimum prices just to grow their revenue.
Suppliers issue, if your products come from different suppliers- You may not be able to track all the items that are in and out of stock. Also, there will be times that you can’t contact the suppliers at any time and that will cause you lots of problems and you may lose customers. Another issue with suppliers is that there will be times that they can’t fulfill the orders and when that happens, you’re the one who’ll be getting the blame and responsibility. This could ruin a business if not taken care of seriously.
Shipping fees, let’s say you have too many products and they are being handled by different suppliers. Now if a customer buys three items, these items could have different shipping fees due to the items are being handled by different suppliers and the fees are up to them.
Is it worth a try?
Yes! I do believe it’s still worth a try. Sure, you may encounter issues on the run but there will be always a solution for each problem and it’s all your responsibility to handle them.
If you haven’t started building your dropshipping business yet then I highly suggest you do multiple research first and make sure you have enough knowledge to make sure you succeed in this industry. But don’t worry, we’re also here to make sure you’ll be getting enough knowledge for you to start building a profitable e-commerce business.
I’ve tried recently if Shopify dropshipping still works in 2021. Here’s my research:
How can I start dropshipping?
One of the easiest ways to start a dropshipping business is by using an integrated product marketplace and an e-commerce platform. That may sound too complicated but don’t you worry. It’s very easy and will cost you a very minimal cost.
One of the most used apps to start dropshipping is Oberlo, it is a Shopify dropshipping app that makes it very easy to manage products directly into your store so you can start your business as soon as you create your store.
If you don’t have a Shopify store yet, you can sign up and get a 14-day trial for free! Wait, I thought you said it’s free? Didn’t you say that? What if the 14-day trial ends? Am I gonna need to start paying? Well to answer your question. You can start a dropshipping business for free by building your website yourself using free web hosting. Unfortunately, that will take you a lot of time and that’s why we are going to mainly focus on using Shopify instead to build a dropshipping store.
Now, to start the process of building a dropshipping e-commerce business. You’re required to have the following:
A concept that is marketable
A source of goods
Sales channels
Marketing Strategies
Marketable Concept
Now here’s where it starts to get a little rough. When you conceptualize, ask yourself.
What’s the name of my store?
What could be the niche of my business?
Which theme am I going to use for my store?
What items am I going to sell for customers?
How am I going to promote my store?
What is my budget?
Store name
Naming your store is very easy. However, you’re gonna need a little time to make sure that your name is not taken by other stores. Don’t use Google search! You don’t need to use that to come up with names. Use your ideas. Go brainstorm and actually come up with a catchy name. Now hear me out, there are many things that you should consider before you come up with a name like what niche is your store is gonna be? what products are you going to sell? and who are your target customers?
These questions are really important because you’re making a brand name and that’s something that your customers’ gonna remember for the rest of their life.
Store design
This is also important. The design of your store is not just to serve your customers with a good looking shop. This is also needed to be considered in both style and speed.
Keep in mind that your store is an online store. If your online store is slow to load, chances are you won’t be getting many customers. Because they’ll be leaving your store if it’s not loading fast enough. I have written an article about Shopify themes that you can use as your inspiration and I have found out that some of them are really fast to load. So I highly recommend you to check that out.
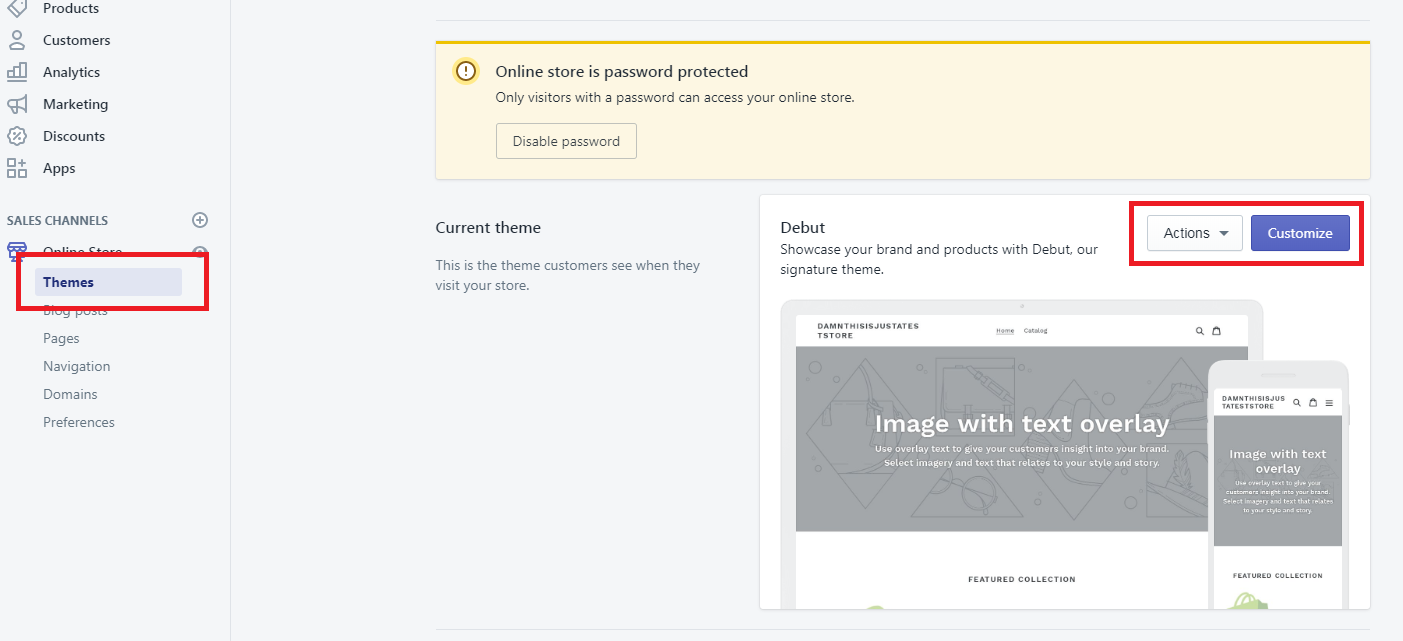
Designing your Shopify store is not that hard anymore since Shopify themes are customizable and very easy to edit. Just go to Shopify store admin dashboard and proceed to your sales channels. Then you can see under sales channels the themes navigation.
There you can customize your current Shopify theme.
One of the reasons why you should choose Shopify to run your dropshipping business is because your shop is mobile-friendly. Most people nowadays are using smartphones especially when they shop online. So if you’re worried about your store not being responsive to mobile phones then you don’t have to worry much about that. Shopify will save your day.
The source of items
Let’s say you have finally created your Shopify store and it’s already designed with a cool and fast Shopify theme. What do you think is the next thing you should add to your store? That’s correct. The items. There are many ways for you to easily find items to sell as long as you know what your niche is.
Oberlo
Oberlo is a dropshipping Shopify app which allows you to find all trending products to sell online, and then add them to your Shopify store. Oberlo is 100% free and no credit card required.
How to Install Oberlo to Shopify?
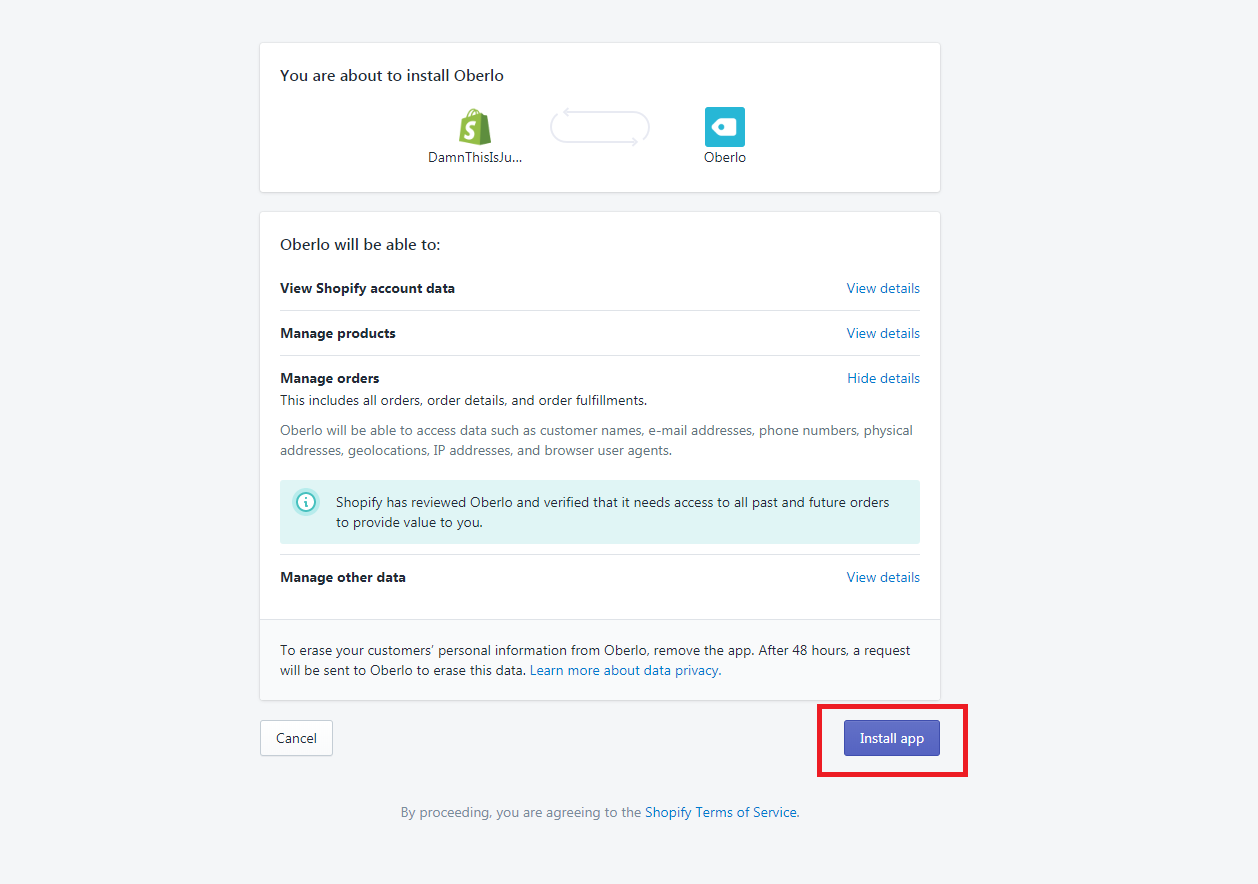
Installing Oberlo to your Shopify store is just really easy. All you need to do is go to Shopify App Store and search for Oberlo.
Then click Install app.
How to add products using Oberlo?
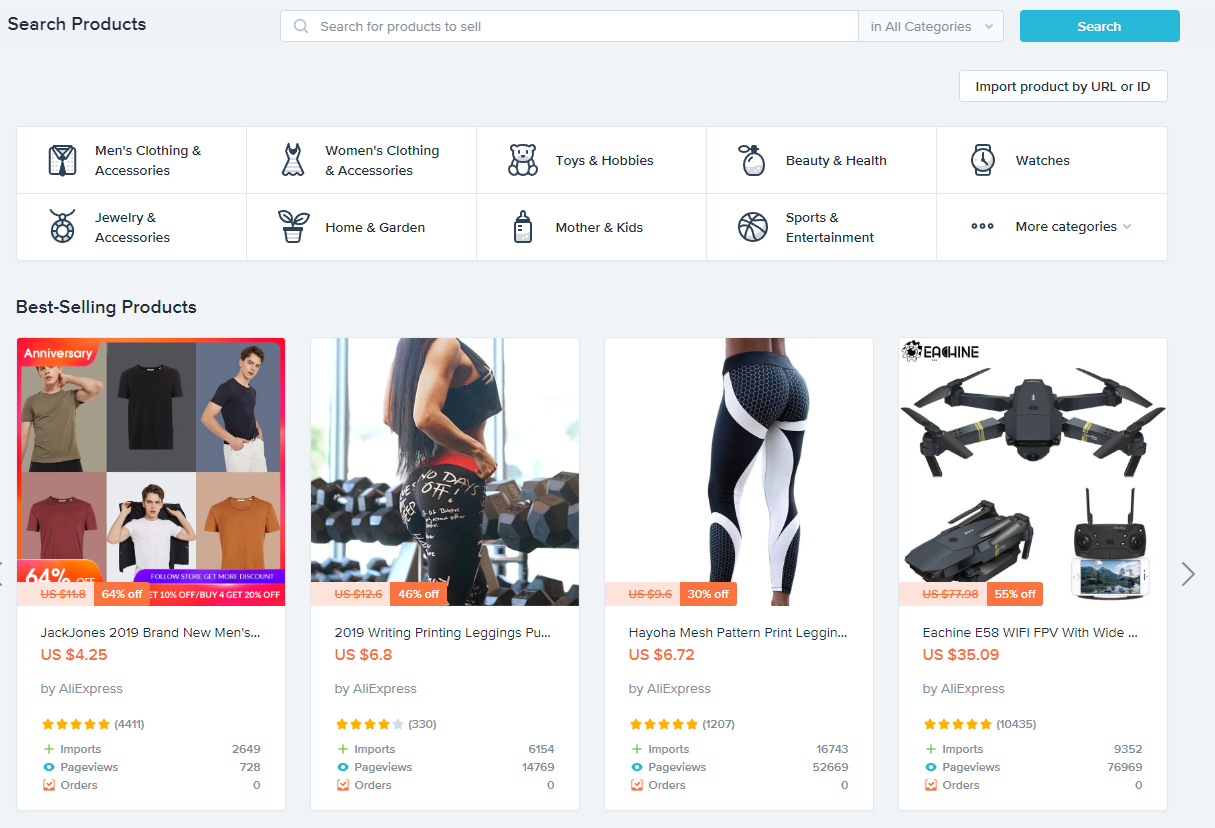
To add new products to your Shopify store using Oberlo, go to oberlo app and navigate to Search products.
Below, you can see the best-selling products that are being suggested by Oberlo. However, we’re not going to import any of that unless you wish to.
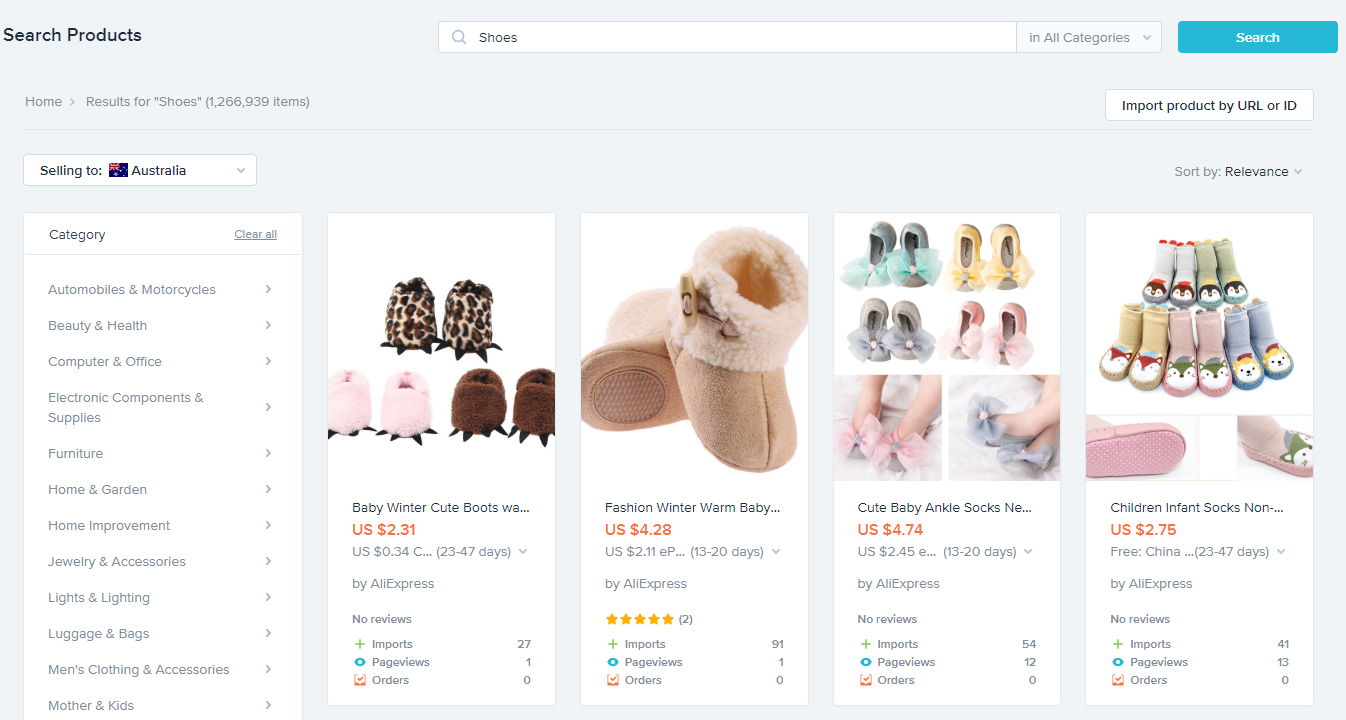
Let’s use the search bar for tutorial purposes. Go ahead and type in whatever item you want to search. For example, let’s go with Shoes.
Above, you can see that the search result gives us shoe products which we can import to our store. Let’s go and do that.
To do that, hover to any product you wanted to import and then click Add to Import list.
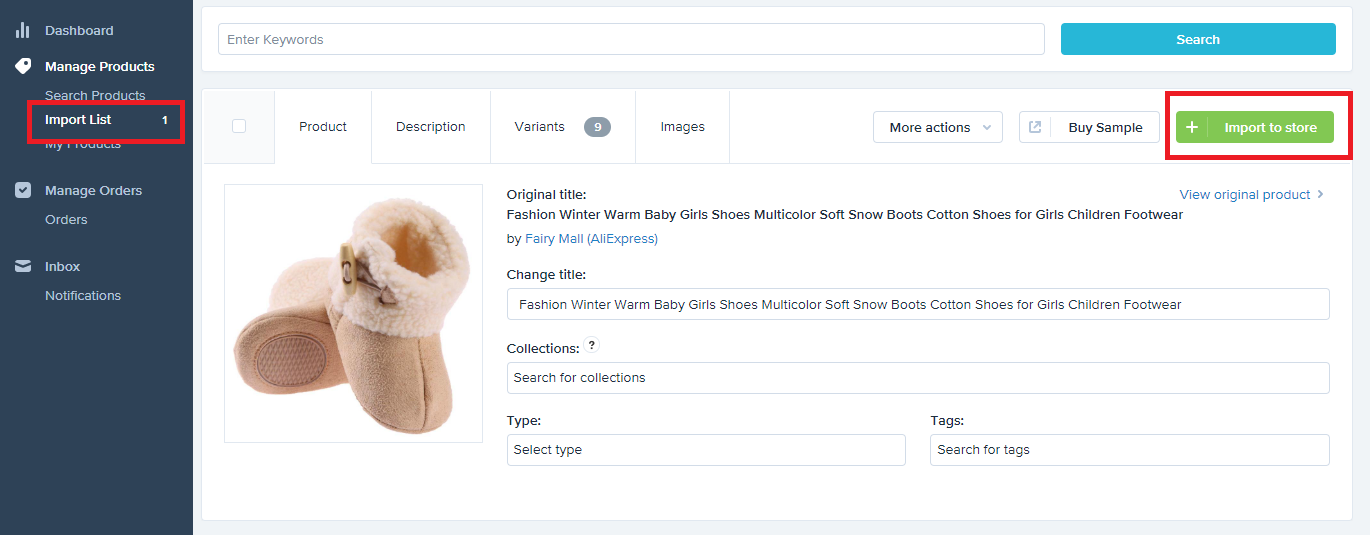
After Importing, proceed to left navigation panel and click Import list right below the Search products.
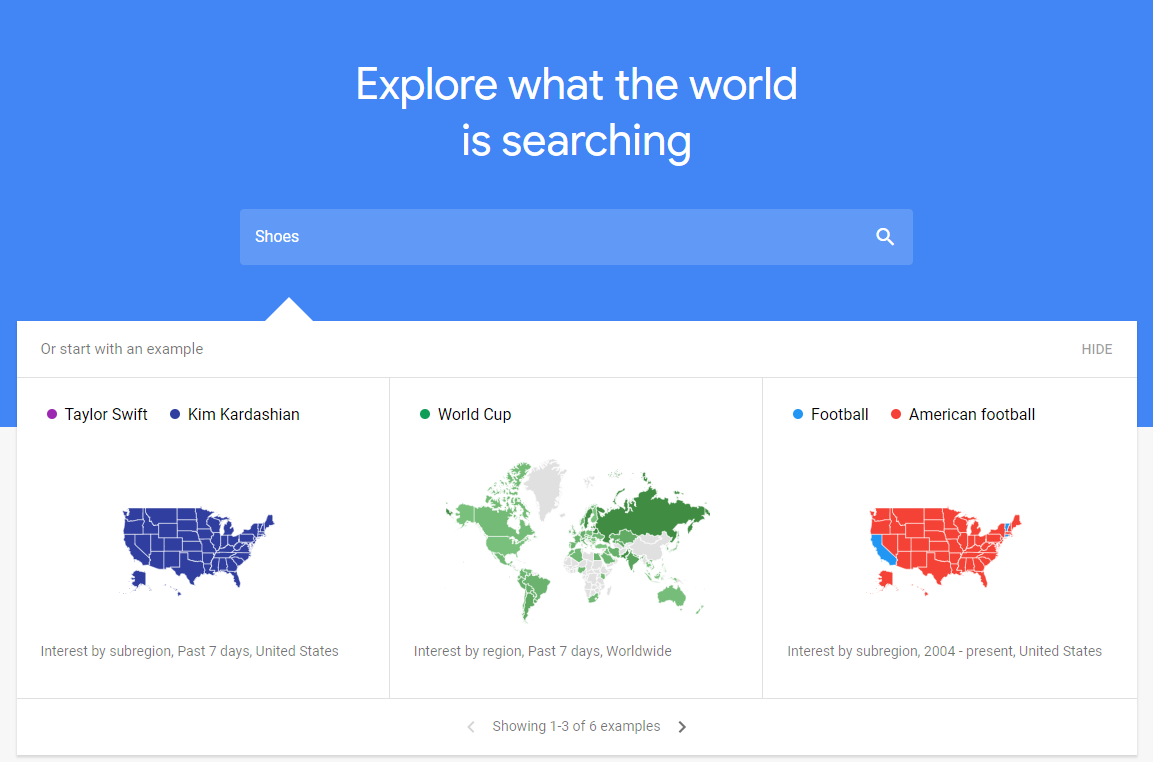
In the image above, you can see that Oberlo already provided descriptions, collections, images, variants and so on. If you wish, you can customize these item. However, we’re going to do that here so go ahead and click Import to store.
And there you have it. The item is now on your store ready to be purchased.
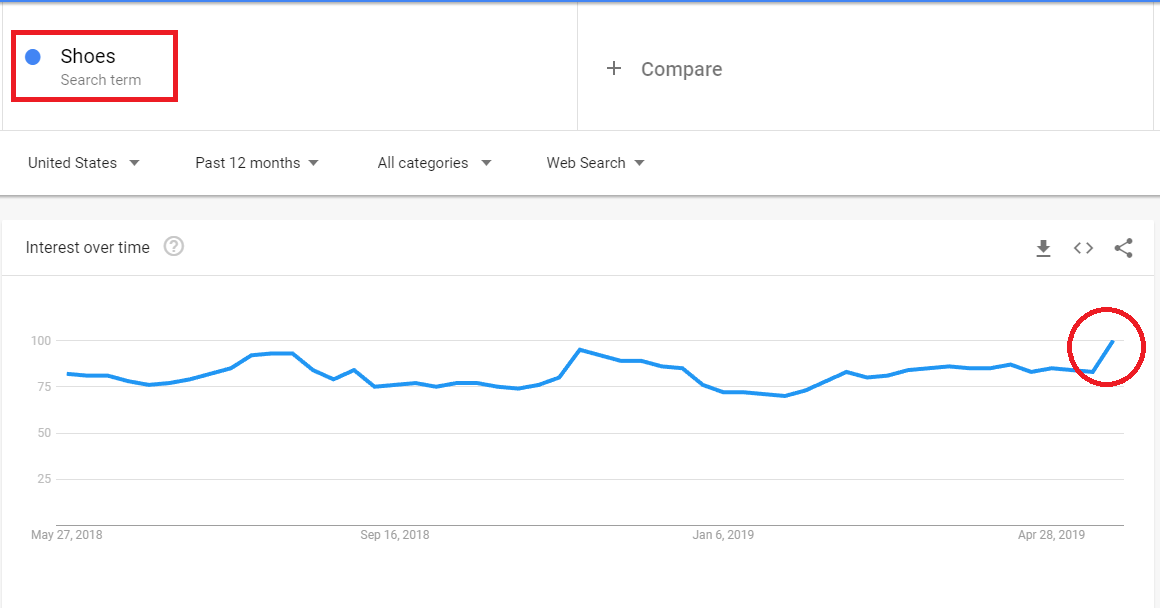
Google Trends
If you are looking for a niche, Google Trends is a good place to start. It’s very simple, all you needed to do is to type in which item you’re most likely to sell for example shoes.
Now you can see how the interest over time of this product in Google Trends.
Keep in mind that the search term “Shoes” is just an example. You can search for a specific brand or item and see how it’s trending.
Marketing Strategies for Dropshipping
Marketing a dropshipping business is no different from marketing a website.
If you are new to our blog, we provide effective marketing strategies for bloggers and these strategies are personally found by us, and let me tell you it’s 107% effective. So if this is effective for websites, then what more to e-commerce?
Conclusion
Building a business takes time and patience especially if it’s an e-commerce business. However, with tools like Oberlo. It is much easier to build a shop and start earning money.
But like I always say, there’s no guarantee that you will succeed in this industry. But if you work hard and managed to keep loyal costumers, surely you’ll be successful in the future.
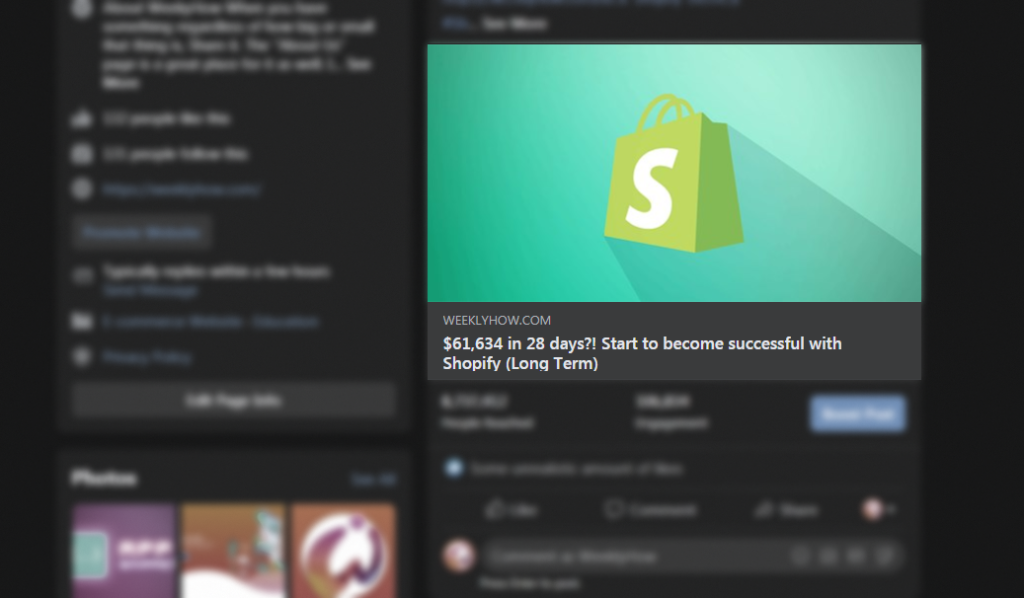
So you’ve seen this ad somewhere, maybe on Facebook, that says that making an online store can bring you success easily- especially at this time of crisis.
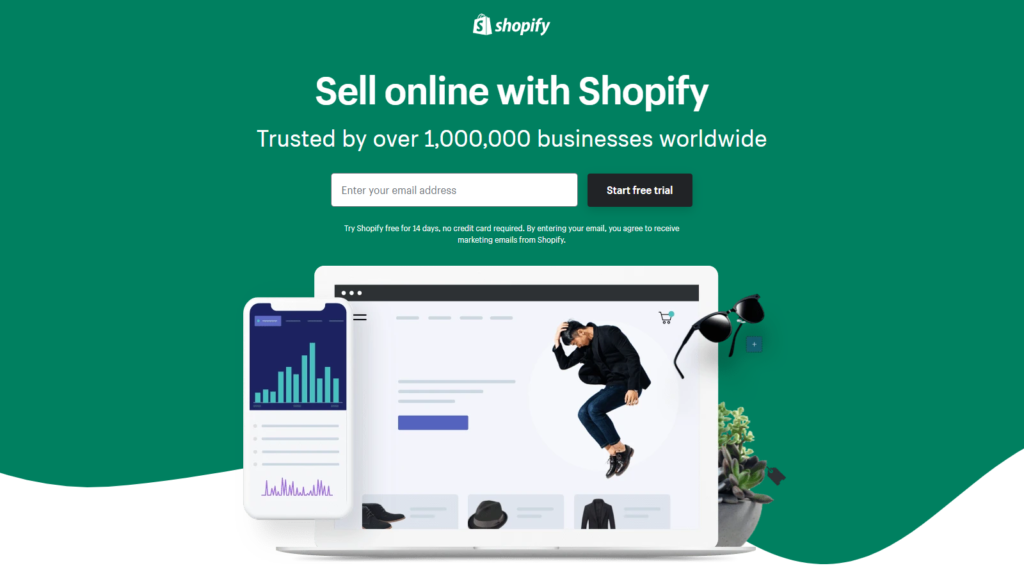
There’s no doubt that Shopify is one of the best eCommerce platforms that help merchants create an online store in just very few steps.
However, should you really start a Shopify store in 2021?
The answer is yes. In fact, 2021 is the best year for you to start an eCommerce business. Why? because everyone is staying indoors browsing the internet and maybe doing online shopping.
If this is your first time and you have no idea what is an eCommerce then you may have to take a few more days or even weeks to do some research about building a successful Shopify store. In fact, I’ve studied eCommerce and Shopify for 12-months just to understand how it works and now I’m earning $2,305/monthly.
Don’t worry, we’re going to guide you through the basics and hopefully, you’ll understand what it is like to work as a Shopify store merchant.
Creating a Shopify Dropshipping store in 2021?
I’ve recently tried if Shopify dropshipping still works in 2021. Here’s my research:
Getting Started
Before you start building an online store, know that there are two possible outcomes to your business, success, and failure. Duh.
Like in most things, success happens if you truly know what you’re doing and you’re putting every time you have to your business. However, there are also instances that even if you believe that you know what you’re doing and you’re putting most of your time to your business, failure still comes and destroys your business.
Why are we mentioning these?
Most starters often think that eCommerce is an easy money maker or a very easy way to get success. That’s not true at all. Building an online store takes a lot of work, time, money, and patience.
But if you truly feel confident then keep on reading as we’ll cover more topics about building a Shopify store.
How much $$$ do you need to start a Shopify store?
You’ve probably heard somewhere that you’ll only need a few dollars to start a Shopify store. If that ‘few’ dollars means $50, then no, that will never take you somewhere. Yes, you can build an online store with that amount but it won’t bring you any profit at all.
Short answer, you’ll need an amount of $2000 or more.
But to be honest, the amount you need will depend on the niche of your Shopify store.
Why do you need that much money?
The reason why you need to have as much money as you possibly can is because you’ll be paying for the following fees:
Shopify fees
Transaction fees
Plugins (possibly)
Promotion fees
and other fees…
Not only that, but you’ll also have to pay for other services like web designs, logo designs, photography, and more. Especially if you can’t do those things by yourself.
Hopefully, everything made sense to you now that building an eCommerce business takes a lot of time especially if you’re doing it all by yourself.
For the Shopify fee, you’ll most likely spend $50 max especially if you just picked their basic plan. Shopify also offers the following plans:
Features
Basic
Shopify
Advanced
Online Store
✓
✓
✓
Unlimited Products
✓
✓
✓
Sales channels
✓
✓
✓
Staff members
2
5
15
Discount codes
✓
✓
✓
Abandoned cart recovery
✓
✓
✓
Transaction fees
2.0%
1.0%
0.5%
Professional reports
✓
✓
Advanced report builder
✓
Transaction fees
For the transaction fees, if you’re using the basic plan then you’ll have to pay their processing fee of 2.0% per transaction. Notice that the more you upgrade your store Shopify plan, the lesser transaction fee you’ll have to pay. Some people might think 2.0% is low but it’s actually very high and so you should upgrade to Shopify once you earn a good profit.
Plugins
For the plugins, you may have to install Shopify apps that may charge you monthly. If you’re just starting, then look for the free ones like Oberlo.
Promotion fees
Promotion fees. You’ll mostly spend all of your money on promotions like advertising or paying someone to promote your brand. This is the best way to get a profit.
How to start a Shopify store
Now that you have an idea of what it’s like to manage a Shopify store, let’s actually get started creating your Shopify store.
The first step to create a Shopify store is to obviously sign-up. Click the button below and get your free 14-day trial with Shopify.
It’s best to use this 14-day trial to study and roam around the system of Shopify. We suggest you learn as fast and much as you can because your time is very limited.
Store settings
For the first day, you should set up your store, payment methods, domain name, etc.
You should also start adding your products to your store through the product page. If you have a lot of products to sell, make sure you compile them into collections.
Store design
For the next 2 days, you should have your online store designed and ready to be published.
Most starters use the Debut theme but if you have a little knowledge with HTML/CSS, then we highly recommend you customize your store especially its colors and text fonts. Make sure everything blends together. If you’re looking for a store-design inspiration, we have made a list of the successful Shopify stores that you can look up to. They have great designs that you should definitely try to get inspired by.
It’s very important to make your store design as user friendly as possible and it should also have a personality. Do NOT bombard your store with too many Shopify apps as it will not only annoy your customers but also slow down your online store.
If you’re looking for Shopify app recommendations, we recommend the following apps:
The last 10 days should be the time you are promoting and selling your products.
There are many ways to promote your products.
Facebook Ads
Google Ads
Instagram Pages
Email Campaigns
Upselling
Advertisement
For Facebook ads, it’s best to keep your ads optimized otherwise you’ll end up spending a LOT of money. Make sure to target the people that are actually looking for your products. Same with Google Ads, although you’ll barely use Google Ads. Honestly, personally speaking, skip using Google Ads. It’s expensive and not really effective for Shopify stores.
Instagram Pages
For Instagram pages, you’ll have to prepare a few things. An HD video/image, depending on where you want your video to be posted (Instagram story or feed).
And of course, the cash to pay the page for promoting your video. Just make sure that they add the link to their bio.
The cost for this kind of promotion depends on the following of the page. The higher the follower, the higher the price. But be careful! A lot of Instagram pages have fake followers so make sure to check if their followers are actually active and interacting with the page’s posts.
Email Campaigns
Another way to get more sales is by using emails. When you want to notify your customers that you have a promo sale, sending them an email is the best way to do it.
Getting an email subscription is actually very easy. Luckily, there are hundreds of free Shopify apps that offer this kind of promotion.
Last day of trial
The last day of the 14-day trial should be the day that you decide if you’re going to keep the store or not. Otherwise, you’ll have to pay for the first month and you’ll have no choice but to keep going.
If you don’t have a product, then you’ll probably end up doing a dropshipping. If you don’t know what it means, it means that you’ll be selling products that are not in your hands. Once a customer purchases from your online store, you’ll have to buy the product from the wholesaler/retailer and they will take care of the delivery to the customer. We created a course on how you can create a dropshipping store for free.
Conclusion
There’s no denying that 2021 made our lives difficult. A lot of people lost their jobs and maybe you’re one of them and now you’re looking for an opportunity to earn a profit through Shopify. Yes, Shopify is definitely worth a try this 2021 especially that you can’t go out and find a new job. It might be scary to take risks but you’ll never know if you don’t try. Luckily, Shopify offers a 14-day trial so you can try eCommerce without risking any money.
Hopefully, this guide gave you an idea of what it is like to work as a Shopify store merchant or drop shipper.
We truly wish that your Shopify store become successful. Good luck!
Due to the pandemic, a lot of people are trying to learn how to create an online store with Shopify. These new merchants are looking for Shopify themes that are effective enough to bring them sales. Why not become one of the new Shopify developers and create an amazing Shopify theme from scratch?
In this course, we’re going to learn how to create a Shopify theme using ThemeKit and Liquid. We’re going to cover all of the important parts of Shopify Theme Development so you will be ready to create your very own Shopify theme as soon as possible.
In this course you will learn:
Private apps for theme development
Liquid files
Theme assets
Designing your own theme
Adding events to your theme
Liquid language (Referencing asset files, loops, conditional statements, Shopify objects, filters, and many more)
If you think you’re ready to start, signup now and let’s create the best Shopify theme together!
I have been working with so many businessmen that I already know “their” secrets and how they successfully grow their business.
Running a business is genuinely fun, but it comes with its own set of challenges. When you start a business, it’s all on you.
You’re responsible for its growth… You’re responsible for its fall…
If you want to start a business to earn some money, then there are plenty of ways to do that. You can start a business like a coffee shop and sell… coffee or tea. If you’re a freelancer you can provide services in exchange for profit. etc. etc.
But let’s set the real-life business for now and focus on building yourself an online business since that’s what everyone is doing now.
Shopify Store Development
Welcome to the Shopify Store Development tutorial for beginners. In this tutorial, you’ll be learning how to set up a fully functional Shopify store from scratch ready to make sales in under an hour.
If you don’t have knowledge of Shopify, it’s okay. We’ll be guiding you through on how Shopify works and what else you can do after you set up your Shopify store.
After reading this tutorial, we’re hoping that you learn:
How to set up a Shopify store
Product researching
Dropshipping
and so on...
Now.
What is Shopify?
Shopify is an e-commerce platform that allows you to start, grow, and manage a business. With Shopify, you will be able to create a store and sell regardless of your location. You can sell your products literally to everyone around the world and not just that, with Shopify, you will understand how your business is doing. You’ll find how much sales you have earned in a month and so on.
Now, I’m sure that you already know that building yourself a business will require you a budget. Shopify requires you to pay for subscription fees. However, they can give you a 14-day free trial for testing purposes.
How Does it Work?
Some people say that if you want to start an online store, you should know how to design or develop a website. But that’s not the case at all! You don’t have to be a designer or developer to start a Shopify store. Shopify can help you design your store. Thanks to Shopify themes and apps.
Now that you already know how Shopify works. Let’s begin by signing up to Shopify’s 14-day trial. However, if you already have an account. You can skip this step and proceed to the next process.
Signup to Shopify 14-day Trial
To help every entrepreneur start their online business, Shopify provided a 14-day trial. With this, you can learn how to use Shopify and kickstart your business to earn more sales.
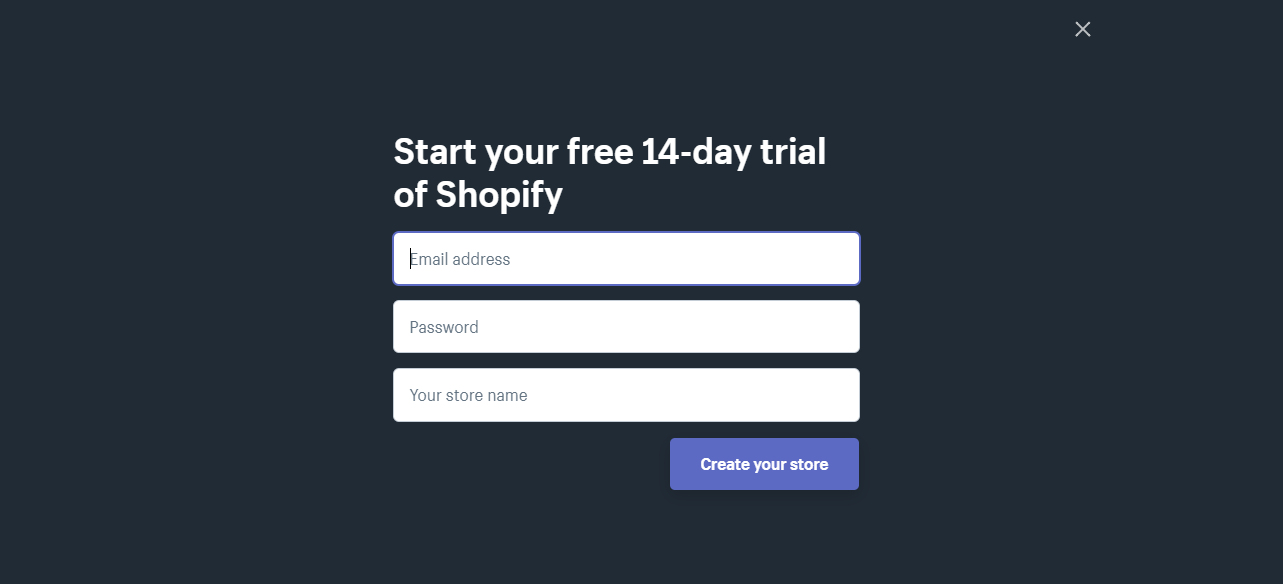
To start, go to Shopify and click on Start free trial button located at the top right corner of the webpage.
Next, you will be prompted to fill the following form:
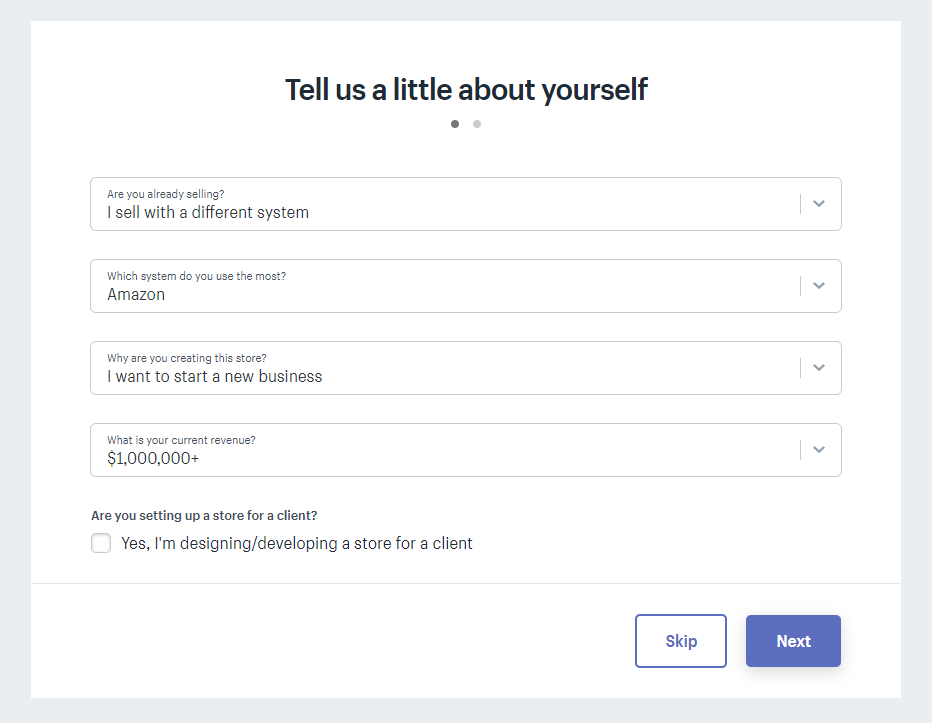
There’s no proof about this. But, there is a theory that if you put a higher value at your current revenue, your store will be prioritized more. Maybe because they think that you’ll be able to pay Shopify and its customer services for longer.
This won’t hurt if you try. So go ahead and put the following values instead.
After that, just fill up the proceeding forms and create your store.
After filling up the forms, you’ll be redirected to your Shopify partner dashboard. We’re going to walk you through kind of what’s important in the sidebar menus and how to actually set everything up.
Online Store
When you jump into the online store section, Shopify will give you its default theme which is the Debut theme. It is important to pick yourself a new theme based on your niche. So for example, if you’re niche is about Men’s clothing. Then your store should portray its niche or to put it simply, it should look manly.
The point is, the frontend of your store is going to have a bigger role in your success. Make your store visitors feel like you’re a professional seller and make them trust you. Make them think that you’re worth their penny.
Some entrepreneurs think that the design doesn’t matter at all, it’s the product that you’re selling that matters.
I’m not gonna lie, it’s true that the quality of your products will give you more opportunities to be referred by your own customers to others.
But think about this for a second, every aspect of your store matters. The design, the products, the service, the cost, the price, everything. If you don’t take at least one of those seriously, then it will make an impact on your business.
Now go back to Shopify Partner Dashboard, and in the Online Store tab, theme section.
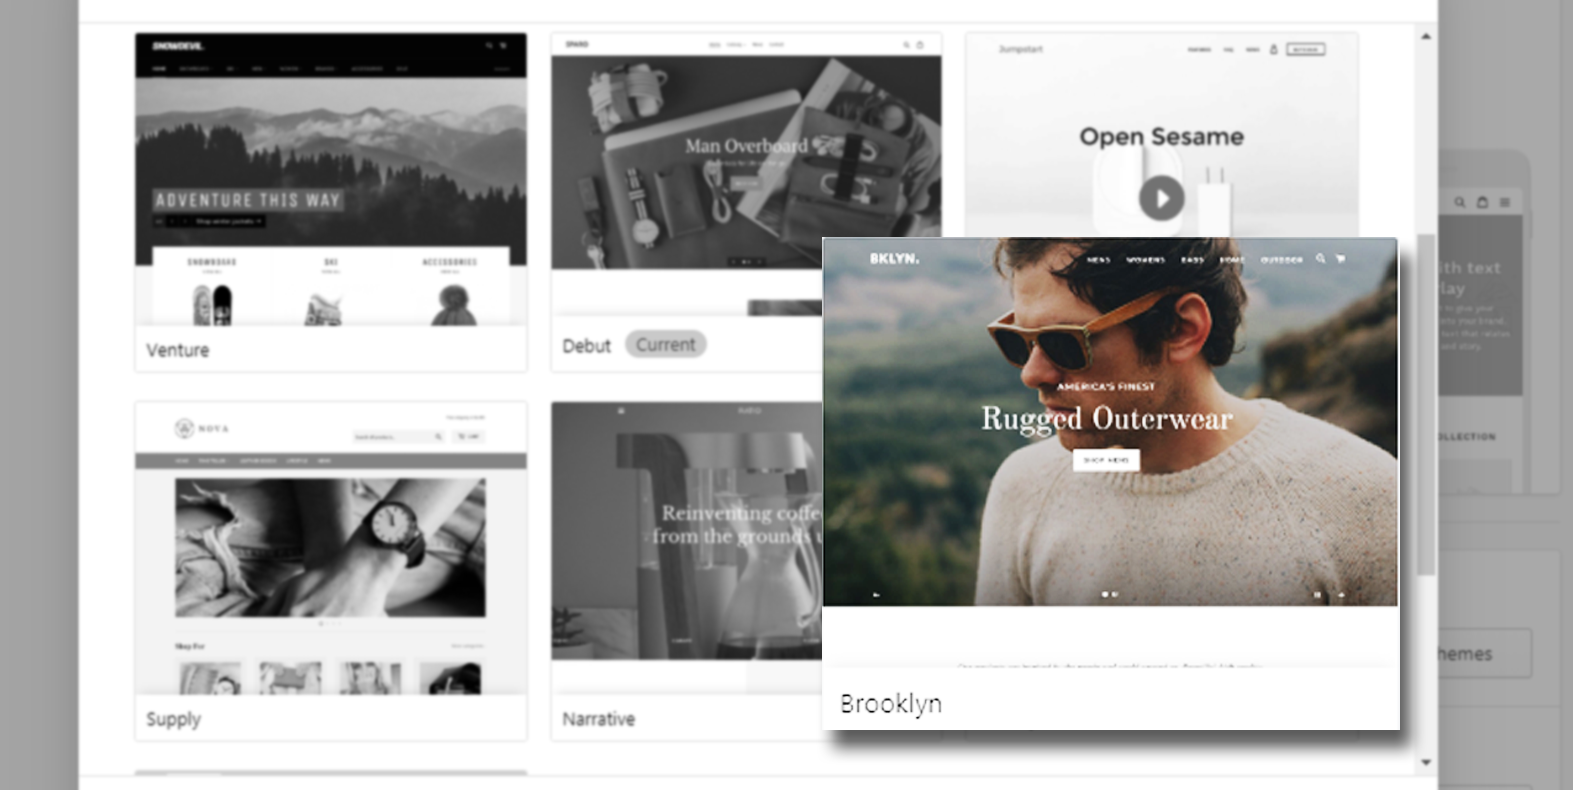
Underneath the current theme tab, you will see the theme library section. There are free themes and a Shopify theme store.
Select the free themes.
One of the themes that I recommend is Brooklyn, it is a free Shopify theme that you can use for any kind of niche that you can think of. It’s hella fast and responsive meaning it’s compatible with any device available.
If you don’t know already, most consumers buy their stuff using their mobile phone. So with this responsive theme, you’ll have the advantage of getting more sales.
Choose the classic version and click Add to theme library.
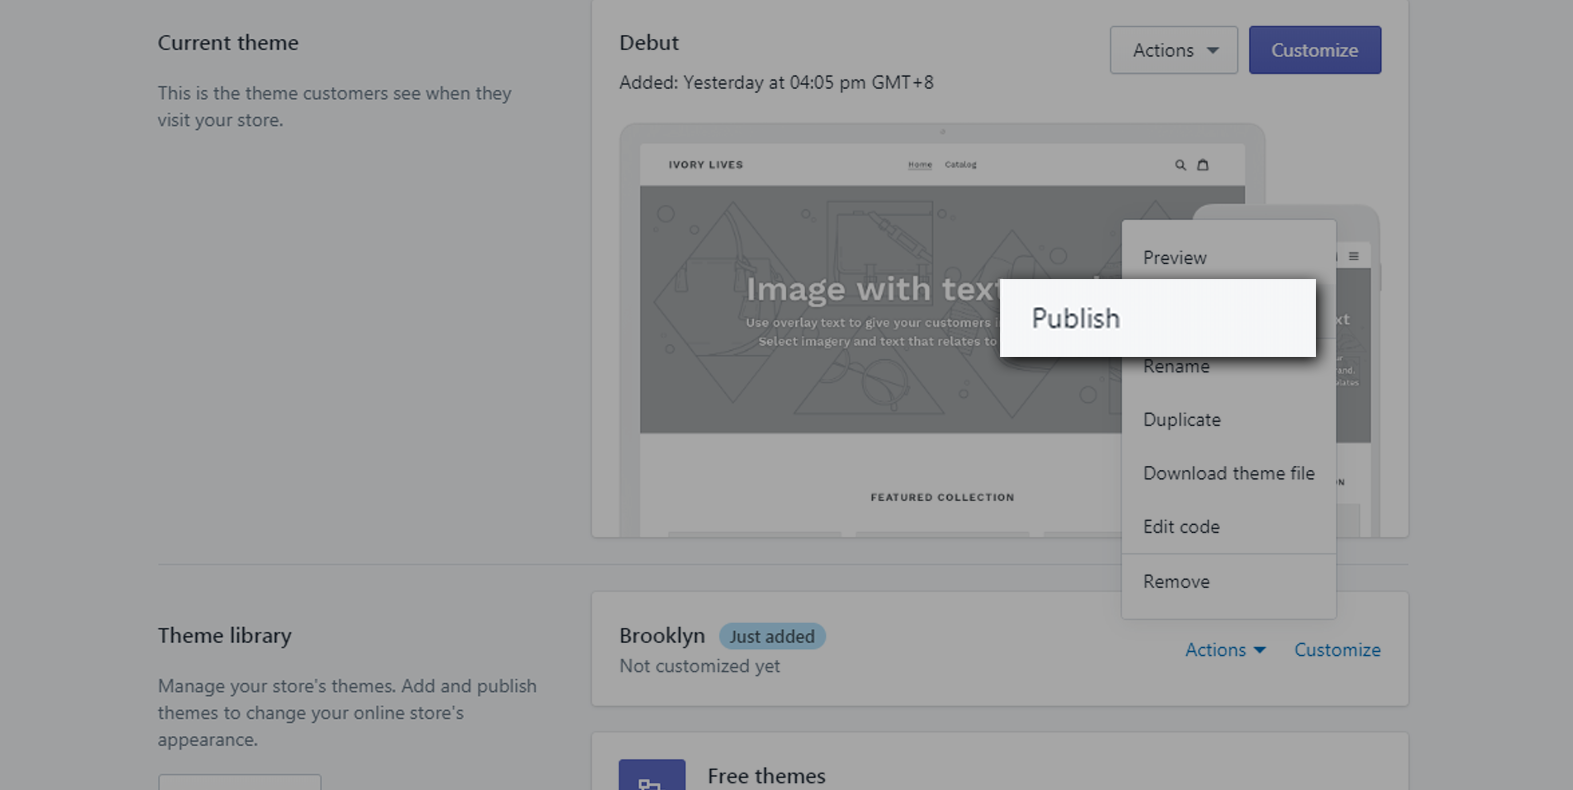
After its upload, click Actions and select Publish
Now, after publishing you may take a look at your store and you will see the similar design as such:
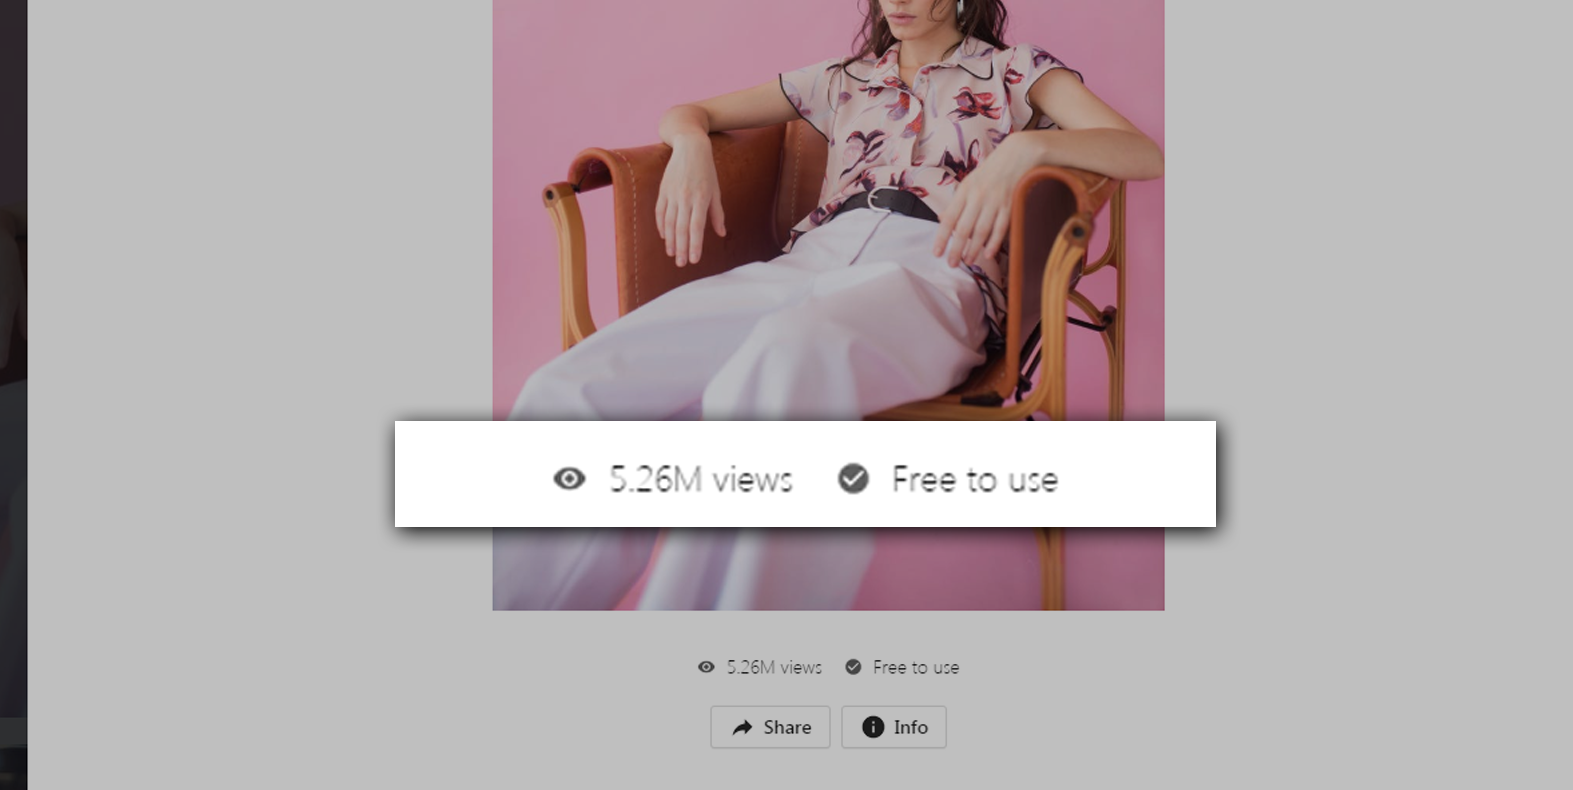
With Brooklyn theme, you can make announcements using the top bar and a showcase of your products using the Hero Banner. If you don’t know where to get free images, you can get some in Pexels or in Unsplash.
Keep in mind that if you download images online, you should be careful of using copyrighted images. Always verify if it is non-copyrighted or copyrighted.
Shopify Theme Customization
To customize your theme, go back to the Shopify Partner Dashboard and click on the Online Store menu and in the current theme section click Customize.
There are seven sections in your Brooklyn themed store.
The header
The Slideshow
Rich text section
Collection list
Featured collection
Newsletter
Footer
Each of these section has its own purpose. For the header, this is where your logo or business title is located. In addition, this is where your customers can navigate through your entire store using menu.
If you’re looking for a logo for your business and you don’t know how to make one yourself, you can go to Fiverr and hire a talented designer to make the logo design for you. I usually go for someone who has a price tag between $5 to $10 and I ask them to design us a logo related to our niche.
There’s the slideshow section where you can upload the images you have taken or downloaded from Unsplash or Pexels.
For the rich text section, you can introduce your brand with your customers. Describe what kind of products you’re selling, or you can welcome your guests using this section.
Collection list section is a section where you can display the collection of your products. It could be a collection of priced off items or a collection of shoes or anything you want to display here. It’s up to you.
Same goes with the featured collection section. The only difference is, you can only feature one collection. That’s why I recommend you pick the best collection you have.
Newsletter section is more about getting your customers email. Therefore you can notify them whenever you have a new item or whenever there’s a sale in your store.
For the footer section, it’s where you put all the necessary links that you can provide.
We know we haven’t gone through the products and collections yet but we’ll get back to this later on. So for now, let’s design our web page. You can make changes to your header and slideshow.
As you can see in the image above, I have designed my store and uploaded an image for the slideshow. Just a tip, make sure the image that you uploaded is high quality and compressed. Make sure it looks clean and crisp.
Compressing images for SEO
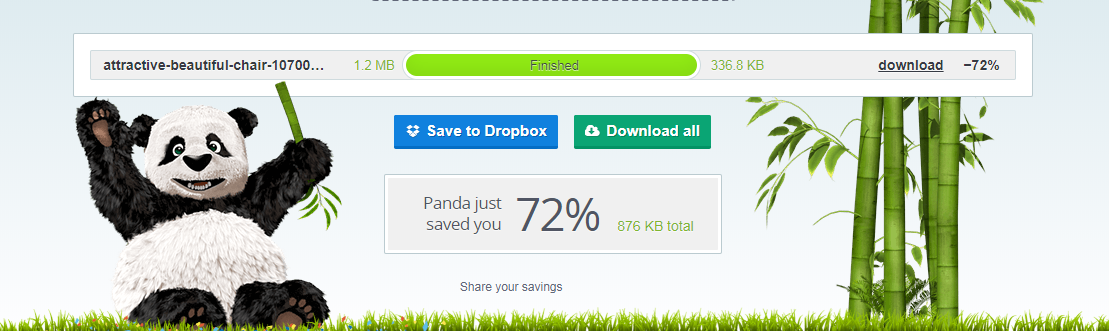
One thing about images is that their file size is quite heavy. Especially if they’re high quality. Making their file size small will make a huge impact on your Shopify store speed so before you upload your images, make sure you compress them using TinyPNG. TinyPNG is an online image compressor that will convert your images into lightweight images without losing its quality.
As you can see above, I have saved 72% of filesize! Before, it was 1.2mb. And right after the process, it became 329kb. That’s a huge difference!
This will make a huge improvement to our Shopify store performance.
Now, after compressing the image, download it and use that image for your slideshow section and see how much it improves your web loading speed.
File naming your uploads
Another thing you can do to improve your SEO is to make sure that the file name of your images/files is related to your niche. For example, I have an image of a woman wearing my latest product. Then I’ll probably name that image, New clothing for women this 2021.png or something like that.
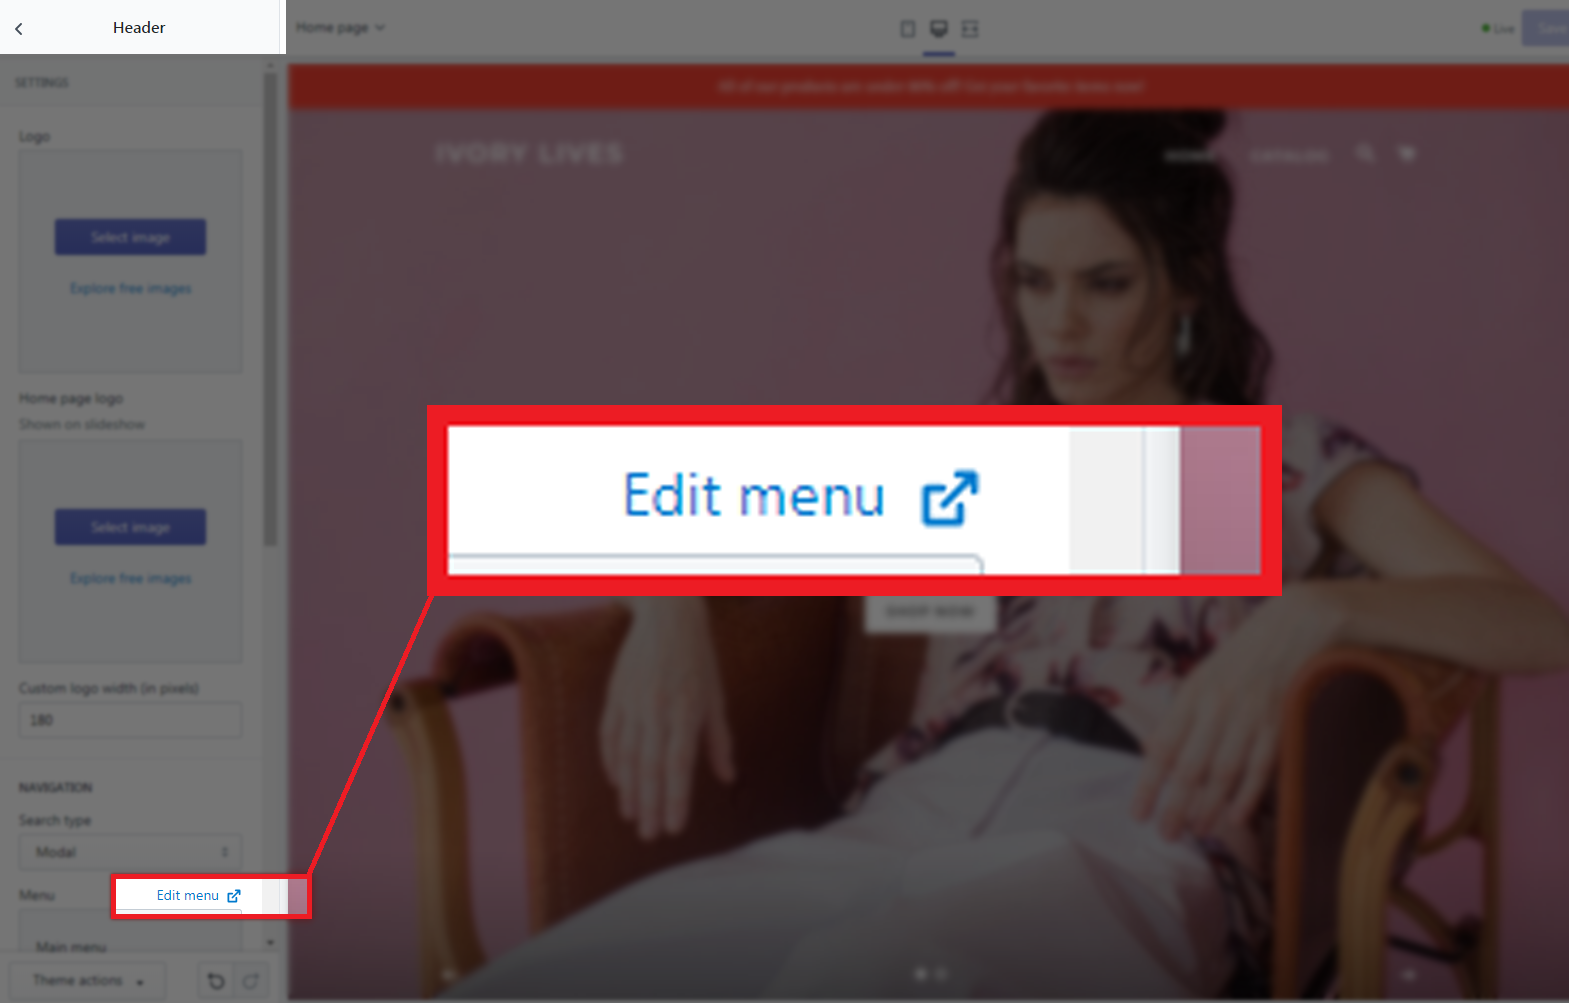
If you look at our Shopify store, you will see that we only have two links in our navigational bar and that is Home and Catalog. We can customize that and add a few more links to help visitors to navigate through our store. So for example, you want to bring your customers to your best selling products, you can do so by making a new menu and call it Best Sellers.
Another thing that I recommend is to change the Home menu, instead of saying Home, call it Shop. This way, your customers will know that they will be redirected to your store not somewhere else.
To navigate to your edit menu, go to your header section and scroll down to the menu section.
Now, that is basically how you customize your Shopify store. If you want to go in-depth on the customization, obviously, you can do that. But for the sake of this tutorial, we’re only going to show you where to go. So basically in the store customization, you can edit the color of your text, the color of the links or buttons, the size of the header, etc. etc.
Shopify Newsletter
If you have noticed in Brooklyn theme, there is a section where it allows you to get the email of your customers. This is called subscription or newsletter.
This section is very powerful because it allows you to communicate with your customers especially if they have devoted their life to your business.
Whenever you have a promo or sale, you can send a message to your email list informing everyone that you have a promo and they should check it out.
Now, most sales came from Email Marketing and other marketing strategies. We’ll go deep into this topic soon but for now, we just wanted to let you know what this section is about.
Shopify Store Settings
Now that we’re almost done with our store design, let’s go back to our dashboard and take a look at our Shopify store settings because it’s also important to know what’s happening behind the store.
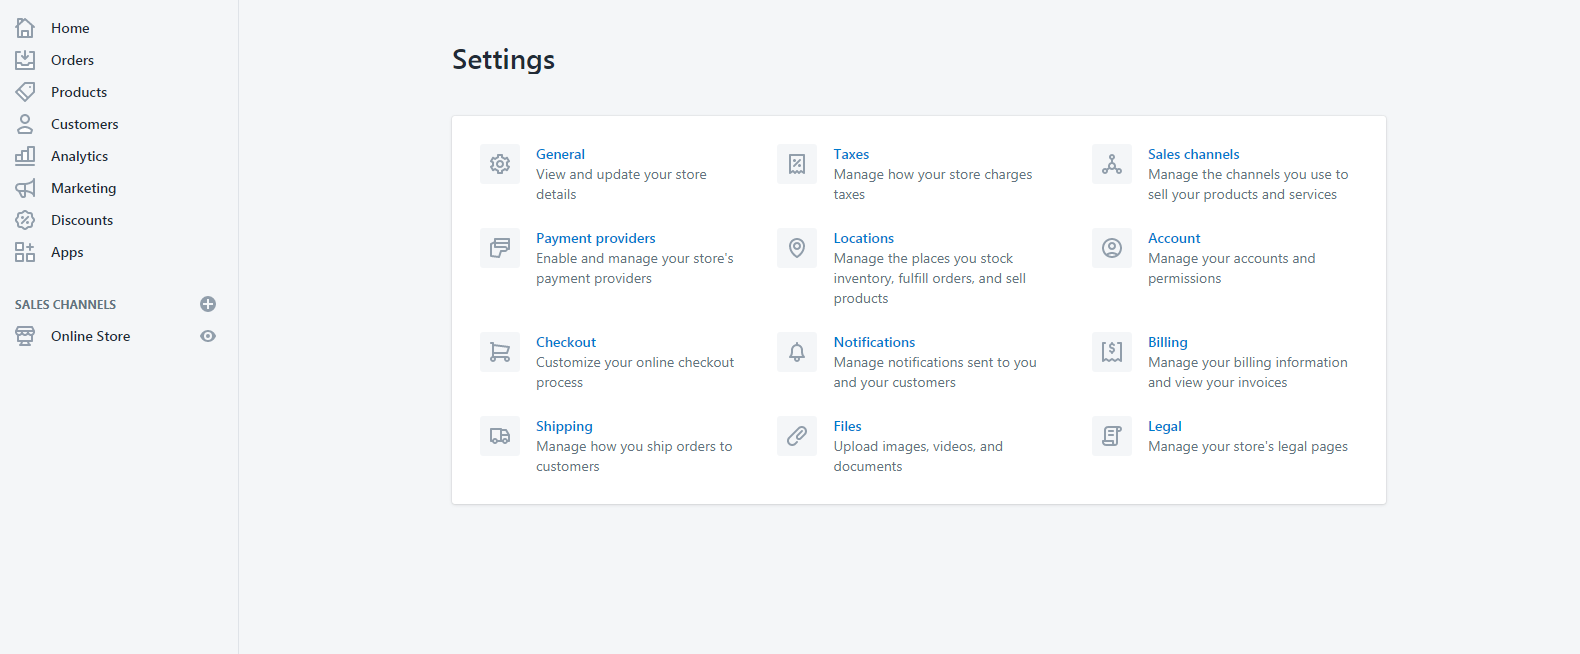
To navigate to your store settings, look at your dashboard sidebar and just underneath the Online Store menu, you will see the Settings menu. (It is located at the bottom left corner of the page)
As you can see in the image above, we have:
General section to view and update your store details
Payment providers section to manage your store’s payment providers
Checkout section for online checkout processing
Shipping to manage how you can ship the orders to customers
Taxes section for store’s charges or fees
Location section for managing where your stock inventory is placed
Notifications for you and your customers
Files for your uploads
Sales channels section for managing the channels you use to sell your products and services
Account section for managing your account and permission
Billing section for your Shopify plan billing information
Legal for store’s legal pages
General
The general setting is where your store details are located. Your customers will most likely use the information to contact you in case they have problems, questions or requests.
This is also where you can change the currency of your store. Make sure you change them into the currency of your country or where your store is located.
Payment Providers
Payment providers settings page is where you can manage how you wanted to get your payments. By default, PayPal Express Checkout is enabled and your earnings will be sent to the account connected with your Shopify store.
Make sure that the email indicated is your PayPal email address.
You may also choose a third-party provider like 2Checkout, Adyen, PayTabs, CyberSource, PaymentExpress, etc.
Checkouts
For this setting, it’s highly recommended to keep your customer accounts disabled which means that customers will only be able to check out items as a guest and not register to your store. It will remove the hassle for your customers from buying and it’s going to increase your conversion rate.
Shipping
Shipping setting is where you can modify your shipping origin, your rates at checkout, etc. I highly recommend you to leave everything by default unless you have a different shipping zone or shipping methods.
Taxes
By default, Shopify uses sales tax rates, which are updated regularly. If you use the default rates, make sure to confirm that they are updated and correct. Otherwise, override them whenever it’s necessary.
Locations
If you’re planning on managing your inventory and fulfill orders from different locations, then you can use this setting. This is very useful especially if you have multiple locations for your items. For instance, if you run out of stock at your first location but have inventory at your second location, then Shopify will split the order so that is it fulfilled from multiple locations.
Now, the remaining sections in the settings are mostly set up already so there’s no need for you to edit them besides you can just modify them once you actually started gaining earnings.
Let’s just focus on setting up your store to start getting sales. Now let’s talk about the products that you can sell.
Shopify Products
To start gaining profit, you obviously need something to sell and that is your products. There are many ways for you to get products. Number one is your actual products or services, and number two is products from drop shipping.
What is Dropshipping?
Dropshipping is a retail fulfillment method where a store doesn’t keep the products it sells in stock but instead, when a store sells a product, it purchases the item from a third party and has it shipped directly to the customer. In conclusion, the merchant will never see or handle the product.
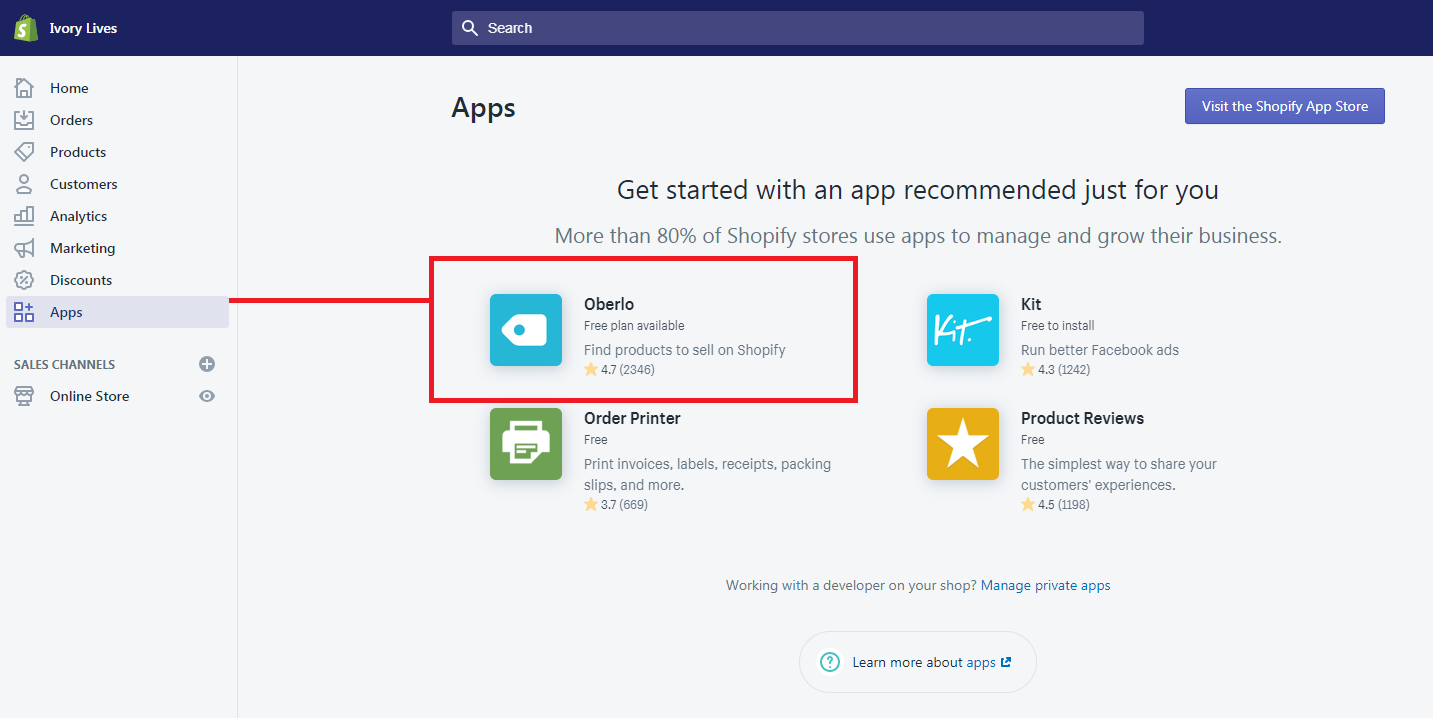
To start selling with dropshipping, you can use the Shopify app called Oberlo. Go to your Shopify Partner Dashboard, and go to the Apps menu and then select Oberlo.
If somehow you don’t see Oberlo, you can visit the Shopify App Store by clicking the button at the top right corner of the app page.
After Installing, you may now start using Oberlo and start adding products to your store. There are plenty of products that Oberlo will start recommending you. But I suggest you add products that are related to your niche. For example, your store focuses more or men’s clothing then look for items that are men related like shoes, shirt, underwear shorts, etc.
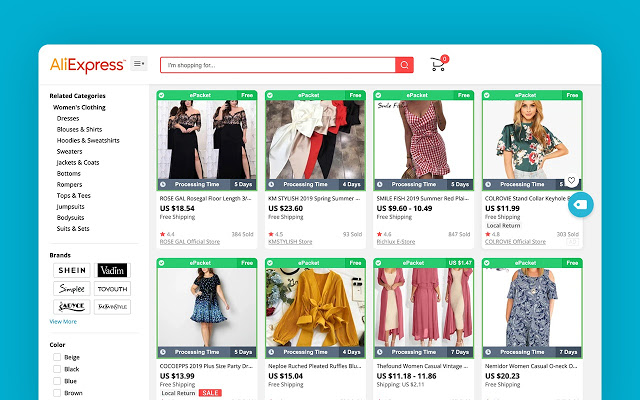
Adding products from AliExpress
Another thing to keep in mind is Oberlo also allows you to import items from AliExpress. So if you want to sell items that are not available in Oberlo but available in AliExpress, you can add that item to your store by installing the Oberlo extension to your browser and then go to AliExpress, search for items, and then click Add to import list.
If you’re getting items from AliExpress, it’s best to select items that are under ePacket shipping. ePacket shipping basically means that items will be shifted out in around twelve to twenty days which we believe is the fastest form of dropshipping compared to other types of shipping. It will also save you a lot of time, money, and effort.
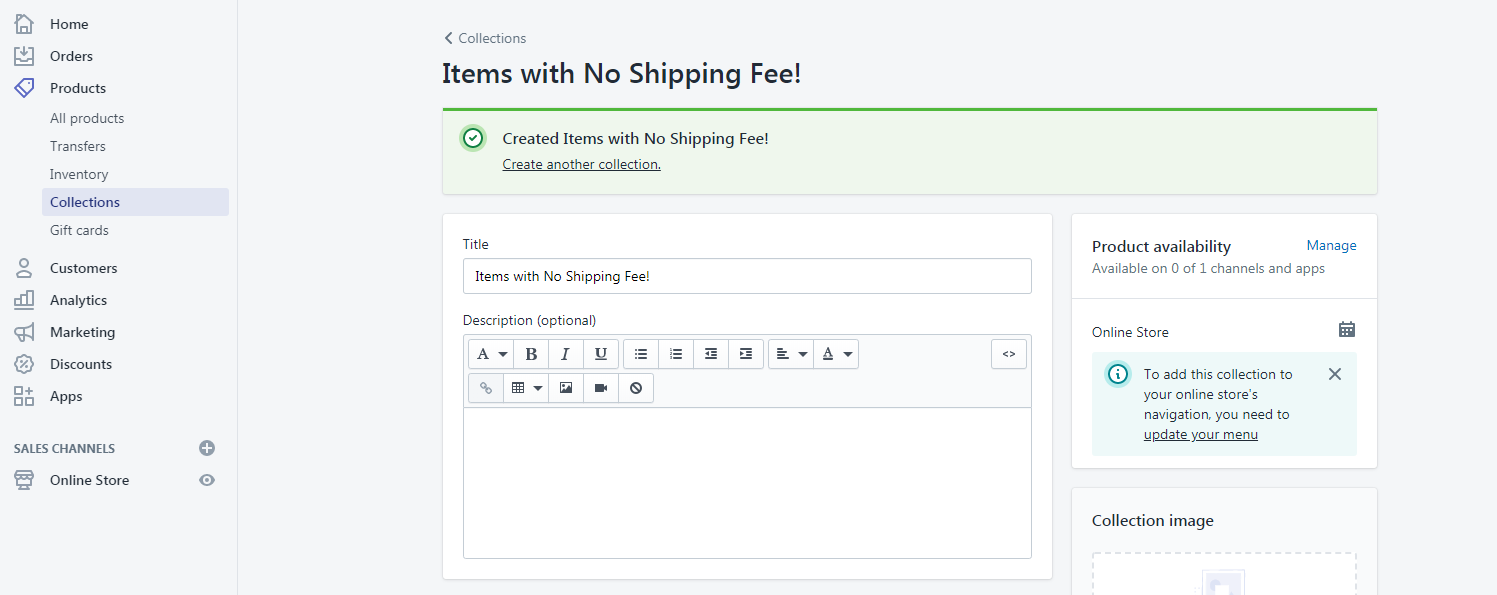
Shopify Collections
Once you’re done adding items to your store, you can start creating collections. Like what we have said before, collections are a group of products that are categorized based on a certain property. For example, you create a collection for products are free for shipping. You can do that by going to Products then collections then select Create collection.
To add items to your custom collection, you can do that manually or automatically based on a certain condition. We prefer to use manually so we have more control of what’s coming inside a collection. But, if you want to use the automatic collection, make sure you enter a condition that follows its purpose.
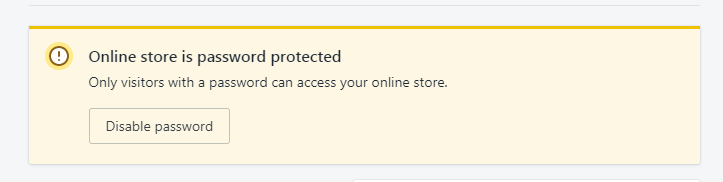
Removing Shopify store Password
If you are under the 14-day free trial, customers will have no access to your store unless you give them the password that Shopify has given to you. But we don’t want that, we want to give our customers the service that will not make them click and do more actions before they can purchase an item from us.
So how can we get rid of the password from Shopify store? Simple, upgrade your store to a certain plan. Now, it might be scary to some but don’t worry if you’re still under the 14-day trial, you won’t be paying for anything. Just make sure to cancel your subscription before the trial ends if you don’t like Shopify.
Final Touch
Congratulations! You have setup your Shopify store. Now, what is the next step? Well, you can start doing marketing strategy or advertise your store to show your products to people on the internet.
Now to end this article, I would like to give you some tips for your business.
Be patient, Building a successful business is not going to happen in just one day.
Get organic traffic with paid ads like AdWords or Bing Ads or use Facebook Ads to advertise your Shopify store.
Keep trying and learn from your mistakes. If this is your first time, expect it to be hard and try to be more understanding.
Video Attachment
I’ve tried recently if Shopify dropshipping still works in 2021. Here’s my research:
I got asked a while ago by one of my students, “What is the best programming language for Shopify app development?”.
If you’ve been following us for a long time, you’d know that we create Shopify apps using PHP. However, in my work, I do use React. Surprisingly to say but I really liked developing with React than the core PHP. Now, you may be asking why? Well, there are a lot of reasons why I prefer using React and in this blog post, I will be comparing the two languages from a coding point of view.
Shopify App Development with Node, React, REST API & GraphQL
Discover how to create a Shopify app that works using Node, React.js, Polaris, REST & GraphQL.
Making Shopify apps with PHP is great especially if you prefer to have control over everything in your development. Because you’re not using any frameworks and modules, you know exactly where you’ve written your own functions, classes, and features. Not only that but you know exactly how to fix them if in case you encounter an error. But to be fair is it not the same if you use other programming languages or libraries like React?
If you’ve been following us for a while, you may be familiar with the following code:
The code above is written by our friend Alex and this is what I personally use for generating Shopify access tokens in PHP. Very simple, right? Just provide your API and secret keys and use cURL and you’ll be able to get your access tokens.
Now, what is the problem with the code above? Well, first of all, if you’re not truly familiar with PHP then you probably won’t understand the code above at first glance.
You see, in the code above it took us 10 lines of code just to get the access token and with PHP, you will have to do the same process to use REST API. In other words, developing Shopify apps with PHP can take a lot of your time. Yes, you have control over everything, but is it really worth a try?
Now, what about in React? How do you get the access token?
Well, getting Shopify access tokens in React is actually very easy. Thanks to koa-shopify-auth, you can generate an access token by simply using one single function: shopifyAuth. Here’s an example for shopifyAuth function:
In this single function, you can easily generate access tokens. Just one function! Unlike PHP, you won’t have to learn about cURL, setup your URL, etc. Just provide your API and secret keys, set up your access scopes and you’re good to go.
Now, if I am going to ask you, which one is more readable and easier to understand? PHP or React?
If you answered PHP, then good for you because it means that you’re up for a challenge. If you answered React, then that means you’re taking the easy and fastest way to develop Shopify apps.
Now, does that mean the PHP is a bad programming language for Shopify app development? Of course not! But I wouldn’t say it’s the best either.
There are a lot of reasons why you should use Node and React for developing Shopify apps. One of the reasons is GraphQL and Polaris.
If you’re not fully aware yet, REST API is very slow compared to GraphQL. This is because REST do not allow you to pick the fields you want to query. Let’s take a look at the following code:
As you can see in the code above, we’ll have to do two REST API calls just to get the images of a single product. This itself is very costly and can slow your application down.
Unlike PHP, Node and react can allow you to use Shopify GraphQL using React apollo and graphql-tag. Also, you can use both REST and GraphQL in React. So, that’s a win for React.
As you can see in the code above, we only needed to do one query to get 10 images per product. It’s also very easy to understand because, with GraphQL, you can specify in the query which data you want to retrieve. In the code above, we simply used the products field and specified in the input that we only need the first 10 products. Then, in each node, we are going to use the images field and specify in the input that we only need the first 10 images and each node response will only give us the value of originalSrc field.
If you’re curious about the response, here’s the JSON response generated by my code above:
So, is React.js better than PHP for Shopify App Development?
If we’re going to compare the two, in my own opinion, yes. React is much better to use compared to PHP. However, it doesn’t mean that PHP is not good for Shopify app development because after all, it will depend on the project that you’re working on and where you’re comfortable creating the app.
Summary
There are a few similarities between React and PHP, but there are more important differences that you need to be aware of. Obviously, PHP is more for back-end development, and React is more of a front-end development language so in other words, these two are totally different from one another. My only advice for you is to use React if you’re going to need a lot of data from a Shopify store and if you’re going to create an app that only customizes the storefront using your own functions, then go for PHP because it will be much easier for you to manage it, especially if it’s live on the internet.
I have talked about this on our YouTube channel, and so if you’re interested, feel free to watch it here:
I believe that making Shopify apps is one of the easiest projects any developer can do. With the help of Shopify API, you can build apps that can interact with store owners.
If you are new to Shopify App Development, we have written many articles about it to help you get started.
Here is the list of tutorials that you can use to start building your very first Shopify app:
In this article, we are going to learn together how to use Shopify Order API to interact with Shopify stores and its recent products that have been purchased by customers.
We’ll be also guiding you through how to properly set up your store to get started with Order API because this API is different from the last API that we have used.
But don’t worry. This is very easy to do and won’t take you much time as long as you understand how to use Shopify API.
Now, to begin.
Go to your Shopify Partner Dashboard, go to your apps, and select the app that you want to use for this project. If you have no apps yet, please refer to the tutorials that I have listed above.
With your app selected, go to App setup highlighted in the image below:
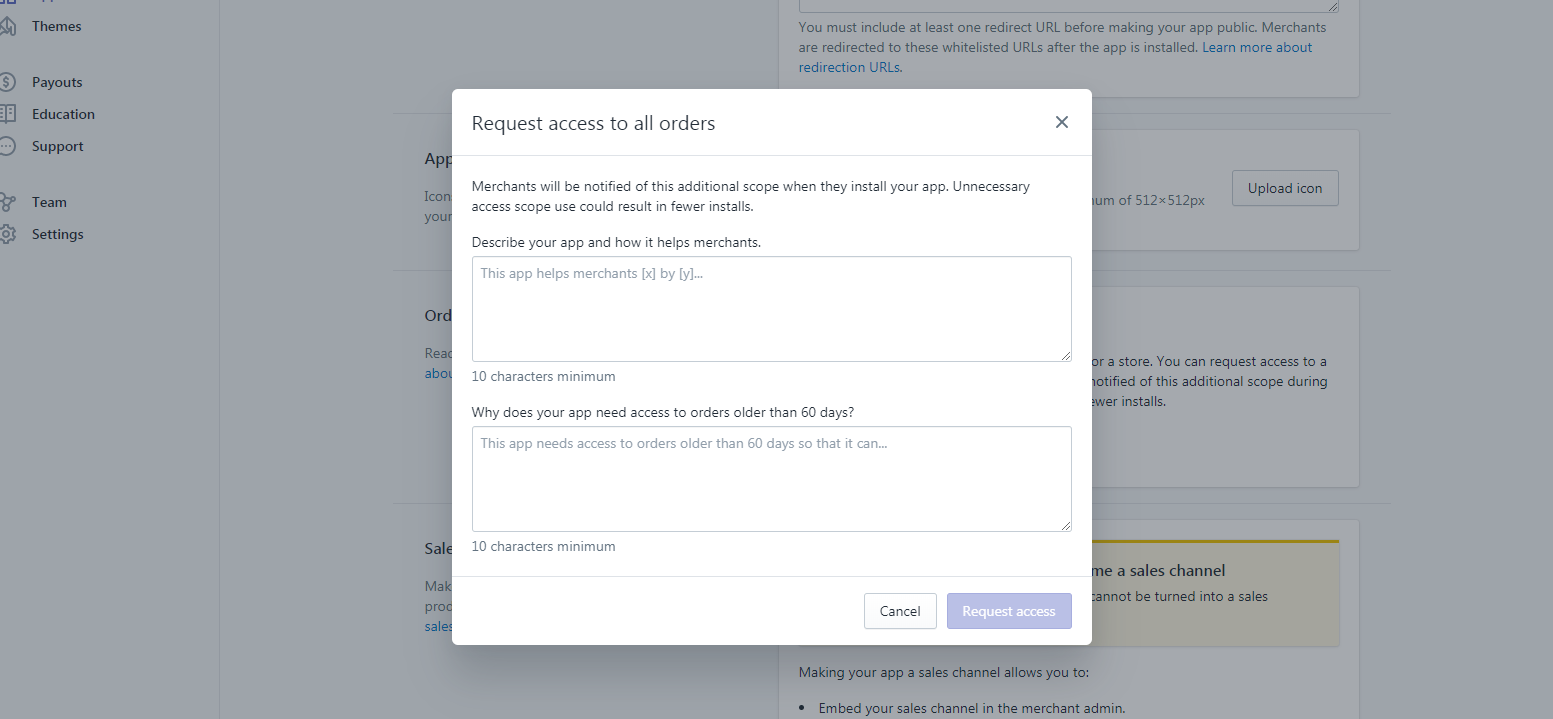
Scroll down the page until you see the Orders section. Now, to access the last 60 days of orders of a store. You are required to ask for a request to have access to the store’s full order history.
You will be sending a request to Shopify and they will review your request if it’s actually acceptable. My advice is to be accurate with your answers and tell them your objectives of why you need store orders.
Example Request
Describe your app and how it helps merchants. This app will help merchants understand where the order is coming from, is it from organic store purchase? or is the order came through this app?
Why does your app need access to orders older than 60 days? This app required access to orders older than 60 days to allow merchants to see if the purchases are made through this app or not
Once you have sent the request, Shopify will review your app and grant the request for accessing orders. Note that this will take two or three days to be reviewed.
Using Order API
Now you have access to Order API, let’s start with the basics and understand how the API works, and what can we do with the API?
Well, there are many things that you can do with Shopify Order API like listing the products that were purchased by the customer or show how much money they have spent on their shopping or retrieve what discount code they have. Sky is the limit!
Now, let’s start with coding.
We have a Shopify App Development Course! Be one of the first students!
Are you looking for an in-depth guide on how to create Shopify apps? Click the enroll button to get started!
Make sure you have set the token and shop variables.
In the code above, we used ini_set("display_errors", 1); to see if there’s going to be errors in our code same with error reporting. Then reference the function.php which came from Shopify API Client made by Alex.
Next, we get the requests from $_GET variable and take the HMAC code. Basic stuff… Then, we’ll be using the generated token, and the shop name which the subdomain of your shop URL.
Next, we create a new array then call the shopify_call() function. Make sure we’re using:
/admin/api/2020-01/orders.json
And then we decode the JSON code pulled from Order API. Easy
Now, the next thing that we’re going to do is to actually get the values that we need. There are many parameters that we can pull the values from. Which will take a lot of understanding on how to actually get them.
Let’s start with the basics.
What if we want to list the orders from the last 60 days?
You can see that there is A LOT of data that we can retrieve. We have order ID, email address of the customer, his/her location, number of purchased items, and so on. With the data above, you can basically display everything about the order.
Let’s use that for example to display the order ID.
foreach($orders as $order) {
foreach($order as $key => $value){
echo"<p>Order ID: " . $value['id'] . "</p>";
}
}
Code language:PHP(php)
Using the above code, you’ll be able to display the list of order IDs that are present in the past 60 days. Now, what if I only want to display the last 10 orders I have received? Simple, just do the count.
In the code above, you see that we accessed another array inside an array. In other words, this API will give you a ton of dimensional arrays and that’s confusing sometimes. But it’s never hard.
Great! Now we can access the data inside the three-dimensional array. Now, what if I wanted to display the image of the product that was purchased?
Again, that’s very easy. All you needed to do is to call shopify_call() function once again and get the image src by applying the product_id.
What about sorting? by creation date?
Sorting Orders by created_date with Order API
I think this is one of the easiest things to do since this is an array already. Well, all you needed to do is to call shopify_call() function once again but this time, use the following:
Understanding Order API is never that hard. It will just get more confusing as soon as you get more items to deal with. But I hope you get the idea of how you can extract the list of recent orders from a store.
If you have questions or if you encountered any errors, please let us know and we’ll get to you as soon as we can. We love interacting with you!
We thank you as well for taking the time to read us and being interest in Shopify Development. We’ll tackle more lessons in the future so keep in touch with us and sign up to our newsletter.
Shopify is growing exponentially! A lot of eCommerce businesses are being built using Shopify. Why not take this opportunity to learn how to create a Shopify app and make a profit out of it by making an app that works and helps Shopify merchants?
In this course, you will learn how to develop Shopify apps using Node.js and React. We will also go through the important parts of Shopify REST API like subscriptions, script tags, products, orders, and more!
Frequently Asked Questions
Is this course updated and using the latest version of koa-shopify-auth?
Most of the lessons of this course are using the previous version of koa-shopify-auth which is, of course, version 3. However, I’m doing everything I can to ensure that this course can help you migrate from version 3 to version 4. I will be adding new lessons about the new koa-shopify-auth, the new Shopify library, and how to create a custom session.
Is this course relying on the documentation of Shopify?
Yes, but we only do that at the beginning, once we have set up our server and the modules, we’ll stop using the documentation and learn how to use the Shopify API ourselves.
How long do I have access to this course?
Once you have enrolled in the course, you will have unlimited access to this course for as long as you like.
Changelog
March 21, 2021
Added a new lesson “Database and Creating Custom Session Storage” to section “Update”
Attached a project ZIP file to lesson “Database and Creating Custom Session Storage”
March 17, 2021
Added a new lesson “Setting up App Bridge, GraphQL, and using Old Project Files” to section “Update”
Attached a project ZIP file to lesson “Setting up App Bridge, GraphQL, and using Old Project Files”
March 14, 2021
Added a new lesson “Setting Up A New Project & Server & Polaris” to section “Update”
Updated course description
March 13, 2021
Added new section “Update”
March 07, 2021
Shopify recently updated their koa-shopify-auth to version 4 and since this course is made using version 3, you’ll have to downgrade the library in the meantime.
Updated the video of the lesson “Create and Installing the app to a store”
Added an instructional description to the lesson “Create and Installing the app to a store.”
February 11, 2021
Updated the video of the lesson “Installing Polaris”
Added an instructional description to the lesson “Installing Polaris.”