
Before you can start working with Shopify store data using Shopify API, there must be an authentication where the store approves your app for certain permission.
We have done this so many times now. So if you don’t know yet how to set up your first Shopify app then I highly recommend you to read first my article on how to create Shopify apps using PHP.
In this article, we’re going to store and save access tokens in two ways and that is through MySQL/PHP and Cookies/Sessions. I will also explain anything you need to know and which one you should really use.
I have received comments about this recently so I decided to write about it as soon as I can. Now let’s say that you already have built your Shopify app and you’re having issues about access tokens. How can we actually save access tokens that were generated by the stores?
Well, there are…
Two ways to save access tokens
There are two ways to store access tokens and the first option you have is to…
Save access tokens using MySQL Database
This is quite obvious now since MySQL database is your only reliable and secured storage for saving data. Now how can we do this? Well, the first thing you wanna do is to create a database through your web host. If you’re using XAMPP/WAMP server then just go to your localhost URL and browse your phpMyAdmin and create a database. If you have your own web host then just go and proceed to your Dashboard and create a database.
Disclaimer, I can’t pretty much give you instructions on how to navigate to your database since we all don’t have the same dashboard or control panel. All I can tell you is to look for MySQL tab or category, click that, and try to create a new database account.
Keep in mind as well that some host requires you to create a username and password for database while some host does not require you to do so and you can just proceed to phpMyAdmin and get your account details there.
Now let’s proceed to PhpMyAdmin and create a database.

I will name my database example_db just for the sake of this tutorial. You can name your database whatever you want.
After that, click on the database that you just have created, and proceed to SQL tab and type in the following SQL query.
CREATE TABLE example_table ( id INT(8) UNSIGNED AUTO_INCREMENT PRIMARY KEY, store_url VARCHAR(255) NOT NULL, access_token VARCHAR(255) NOT NULL, install_date DATETIME )Code language: PHP (php)Make sure that your database is selected.

And just click the ‘Go’ button located at the very bottom right corner of the query box.
You should have something like this:

Now that our database is ready, let’s go back to our Shopify app project and create a new script.
Let’s name it connect_to_mysql.php and copy the following code:
<?php
$servername = "YOUR SERVER NAME";
$username = "YOUR DATABASE USERNAME";
$password = "YOUR DATABASE PASSWORD";
$db = "example_db";

$conn = mysqli_connect($servername, $username, $password, $db);

if (!$conn) {
    die("Connection Error: " . mysqli_connect_error());
}Code language: HTML, XML (xml)
Make sure you replace the value of each variable above before you proceed. Otherwise, you’ll be getting an error once you reference this script in our next code.
To be sure that there will be no errors. Browse this file using your browser. For example, We have https://example.com/connect_to_mysql.php
If it shows no errors then that means you’re good to go.
Now save the script and let’s go back to our generate_token.php or token_generator.php (I have created two tutorials as far as I can remember, so the name of the file doesn’t really matter, as long as it has the same code. 😛)
So far, these are the files I have in our project.

And this is the code inside our token generator.

Underneath the require_once("inc/functions.php"); type in require_once("connect_to_mysql.php");
Next, locate the line where it says echo $access_token; and comment that out.
After that, add the following code just below the //echo $access_token; line.
$sql = "INSERT INTO example_table (store_url, access_token, install_date)
		VALUES ('".$params['shop']."', '".$access_token."', NOW())";

if (mysqli_query($conn, $sql)) {
	header('Location: https://'.$params['shop'].'/admin/apps');
	die();
} else {
	echo "Error inserting new record: " . mysqli_error($conn);
}Code language: PHP (php)
Make sure you have the same table name. After that, save the file and uninstall your app and re-install again.
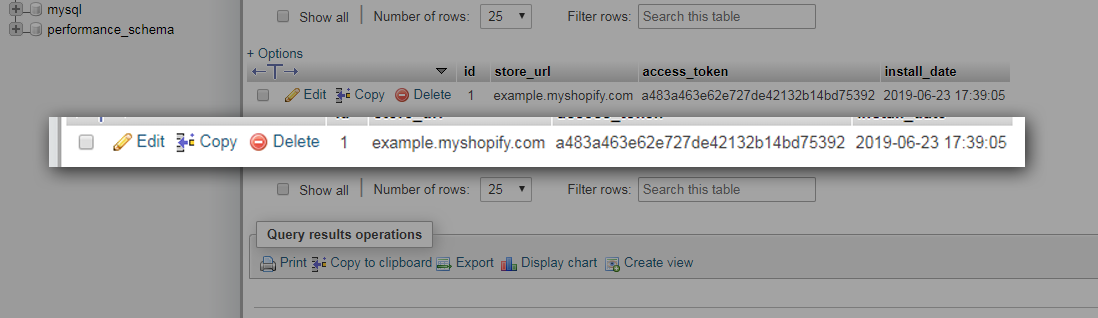
After installing the app, check your database and see if it saved the access token. Like this:
Keep in mind that these tokens are kind of like a password which is important for stores. So you might wanna encrypt these tokens just for the sake of additional security.
The other option that you may use is by saving access tokens using cookies or sessions.
I don’t personally recommend doing this since cookies and sessions are temporary storage. Especially if you usually clear your browser’s data.
Plus, it is also not safe to do this.
However, if you still want to know how to save access tokens using cookies then doing that is very simple. All you need is JavaScript code like this:
document.cookie = "token=" + <?php echo $access_token; ?>;Code language: PHP (php)See that code above? You’re pretty much displaying the token for the public to see. Yay! free tokens!
Conclusion
Shopify access token is very important for each store. It’s like a password which makes it very critical. So make sure you secure them as much as you can.
If you don’t know about encryption, I highly suggest you search about MD5 or HASH. This will help you secure your important data such as access tokens and passwords.
For now, I thank you for reaching this far. If you have more concerns regarding this series, feel free to share them down in the comments and I swear I respond faster than your internet connection.
Good luck Shopify Developers!
Hi! Thanks for this tutorial, how can i fetch the token from database so i can use it on shopify_call function? I don’t know where can i get the value of store_url to use it as a condition on sql query to get its token. Is there a way that i can get the Store URL? I tried $_SERVER[‘HTTP_REFERER’] but its not working. Thanks!
Hi Raff,
Got a solution?Is there any way we can get the stored access token?
Hi,
I followed your tutorial. While fetching the access_token, The $result variable returns an empty array. And the access_token is empty. Can you help me out in this ?
Hi Priyanka,
Thank you for following our tutorial!
If the
$resultvariable is empty, that could possibly mean that your token generator script is not setup properly. Is your API key and Secret Key correct?Is your app installable for your test store? Do you receive an error in your console?
We recommend you to always check your
install.phpscript andtoken_generator.phpscript as these two files are vital to your Shopify app.If you have questions, we’d love to help you out!
Regards,
Chris
Hi Chris,
I hvae double checked my API key and Secret Key. Also code is been generated and I get the value in $params[‘code’] correctly. Its the $result variable giving an undefined value when I checked it in my console. I do not receive any errors in my console. Both my install.php script and token_generator.php script perfect according to your instructions. I guess something is not working in the curl methods. Any idea on this?
Hi Priyanka!
Thanks for coming back to us!
If you think anything looks great then I guess there’s nothing wrong with your code. However, I would still recommend debugging the process from start to finish.
Are you able to install this app in your store? If so, then there’s nothing wrong with the cURL. How about your MySQL connection? Is it connected? If the $result variable is undefined that means the process is not proceeding. Try to make console.log() in every step of your code and see if it’s going through the process. If you see the log stopped on a certain line then that means that’s where the code is having the issue.
If you think cURL is the issue, try contacting your host provider or look at your PHP settings. Make sure it is up to date or the cURL extension is enabled.
If you have more questions, we’d love to help you out!
Regards,
Chris
I am getting this error “error:1407742E:SSL routines:SSL23_GET_SERVER_HELLO:tlsv1 alert protocol version” when I caught the curl error.
Hi Chris,
I found t he issue. I am using my localhost and curl didn’t work because of the ssl issue. I added “curl_setopt($ch, CURLOPT_SSL_VERIFYPEER, false);
curl_setopt($ch, CURLOPT_SSL_VERIFYHOST, false);” in my code and I got the access code saved in my DB.
Hi Priyanka!
That’s good to hear!
If you have more questions, please don’t hesitate to let us know.
We’d be glad to help.
Cheers!
Chris
Hello
How can installed another stored . You added selected query and limit 1. But in this case not installing the other stores this app ?
Hey,
I want to create an app and publish to shopify store.
I checked you videos
How can we create the form and submit the data to shopify database in php.
Hi!
You can save variables or external data in the .json that shopify stores?.
If so, could you guide me how I could do it.
im learning and following the app tutorial in php, i want to be able to save data in the .json, not use a base on my server.
Hi Bernard,
Thanks for writing so much helpful article, i wanna know one more thing. Once we have stored the token with store name and we have to access it later on (assuming our app is installed on different stores, hence we have multiple tokens stored in table), so how we can pick the relevant token from DB? When shopify send request on call_back_url.php, i don’t see any store URL or other info in it. pls help.
Regards,
Aqeel
Hi ,
Do you find a solution?
Hi Bernard,
I also having trouble in accessing the stored access token. Access token is only getting on the index page like what you have displayed on the tutorial. But How we can access the access token using store url in another functions.