
If you don’t know already, there are plenty of ways to create Shopify apps. Thanks to Shopify REST API and its GraphQL API access, you can now develop new apps with your favorite programming language.
If you are comfortable with plain PHP, we have written a full Shopify App Development Tutorial with PHP. You can use it as your guide to developing Shopify apps because, in this article, we’ll be focusing more on building Shopify apps using Laravel.
What is Laravel?
Laravel is a web application framework with an elegant syntax to make the development more enjoyable, unlike developing on a plain PHP syntax. Laravel attempts to take the pain out of development by easing common tasks used in the majority of the web projects, such as web authentication, routing, sessions, and caching.
What is a Shopify App?

Shopify app is an additional feature for Shopify stores for controlling and management. With the help of Shopify API and GraphQL, you can create applications like Oberlo to find products to sell.
For more applications, you may look at our list of best Shopify apps for increasing sales.
Shopify App Development Packages
There are many packages online that can help you build Shopify apps. See the list below:
Featured Video
Watch how I create Shopify apps using Laravel in 10 minutes here:
How to Create Shopify Apps with Laravel?
To create a Shopify app with Laravel, you firstly need to create first the app for API and secret keys.

If you don’t know how to create an app, you may refer to this guide: How to build Shopify apps with Shopify Partner Dashboard
After creating the app in your Shopify Partner Dashboard, the next thing we need to do is to setup the skeleton of Laravel. To do that, we need to install composer and create a new project.
To do that, create a new folder where you want your projects to stay in and then open a command prompt and select that folder.
After that, type the following command:
composer create-project laravel/laravel /path/to/your/projectThen change your current directory to the path of your project. For example, I have created a Laravel project using the command above and name my project shopify_app.
cd shopify_appThen type the following command:
composer require ohmybrew/laravel-shopifyCode language: JavaScript (javascript)You should see something like this:

Then it will update the package and dependencies.

Once done, use the following command.
php artisan vendor:publish --tag=shopify-configAfter that, you will now be able to access the config file in config/shopify-app.php.
Typically you will need to fill in the app_name, api_key, api_secret, and api_scopes to generate a working app. Items like webhooks and scripttags are completely optional depending on your app requirements. As well, anything to do with billing is also optional and is disabled by default.
It is also recommended to use an env file for the configuration.
Shopify App Settings
In your app’s settings on your Shopify Partner dashboard, you need to set the callback URL to be:
http://127.0.0.1:8000/Code language: JavaScript (javascript)And the whitelisted redirect_uri to be:
http://127.0.0.1:8000/authenticateCode language: JavaScript (javascript)The callback URL will point to the home route, while the redirect_uri will point to the authentication route.
Routing the App
This package expects a route named home to exist. By default, the package has this route defined which shows a simple welcome page. To enable it, you will need to open routes/web.php and comment out the default Laravel route for /.
Optionally, to make your own, edit routes/web.php and modify the default route to use the auth.shop middleware with the home named, example:
Route::get('/', function () {
    return view('welcome');
})->middleware(['auth.shop'])->name('home');
Code language: JavaScript (javascript)
Next, modify resources/views/welcome.blade.php to extend this packages’ layout for Shopify AppBridge abilities, for example:
@extends('shopify-app::layouts.default')

@section('content')
    <p>You are: {{ ShopifyApp::shop()->shopify_domain }}</p>
@endsection

@section('scripts')
    @parent

    <script type="text/javascript">
        var AppBridge = window['app-bridge'];
        var actions = AppBridge.actions;
        var TitleBar = actions.TitleBar;
        var Button = actions.Button;
        var Redirect = actions.Redirect;
        var titleBarOptions = {
            title: 'Welcome',
        };
        var myTitleBar = TitleBar.create(app, titleBarOptions);
    </script>
@endsection

Code language: HTML, XML (xml)
Jobs
Recommendations
By default Laravel uses the sync driver to process jobs. These jobs run immediately and synchronously (blocking).
This package uses jobs to install webhooks, scripttags, and an option after-install hook if any are defined in the configuration. If you do not have any after-install hooks, scripttags, or webhooks to install on the shop, you may skip this section.
If you do however, you can leave the sync driver as default. But, it may impact load times for the customer accessing the app. Its recommended to setup Redis or database as your default driver in config/queue.php so jobs can run in the background and not affect the frontend performance. See Laravel’s docs on setting up queue drivers.
For more information on creating webhooks, see Creating Webhooks of this wiki or After Authentication Job.
Uninstalled Job
There is a default job provided which soft deletes the shop, and its charges (if any) for you. You’re able to install this job directly or extend it.
To install, first run:
php artisan vendor:publish --tag=shopify-jobs a job will be placed in App/Jobs/AppUninstalledJob.
Next, edit config/shopify-app.php to enable the job:
'webhooks' => [
        [
            'topic' => env('SHOPIFY_WEBHOOK_1_TOPIC', 'app/uninstalled'),
            'address' => env('SHOPIFY_WEBHOOK_1_ADDRESS', 'https://(your-domain).com/webhook/app-uninstalled')
        ],
    ],
Code language: JavaScript (javascript)
Use your environment file to replace the values, such as the domain, but set the topic to app/uninstalled and the path as /webhook/app-uninstalled will allow the webhook manager to do the heavy lifting for you.
Migrations
php artisan vendor:publish --tag=shopify-migrations && php artisan migrateIf you have encountered an error after using the commands above. Chances are, you haven’t configured your php.ini file and Laravel and trying to access the database module.
In your Laravel project, open the .env file and get rid of the lines starting with DB_ but keep the DB_CONNECTION and change the value to sqlite.
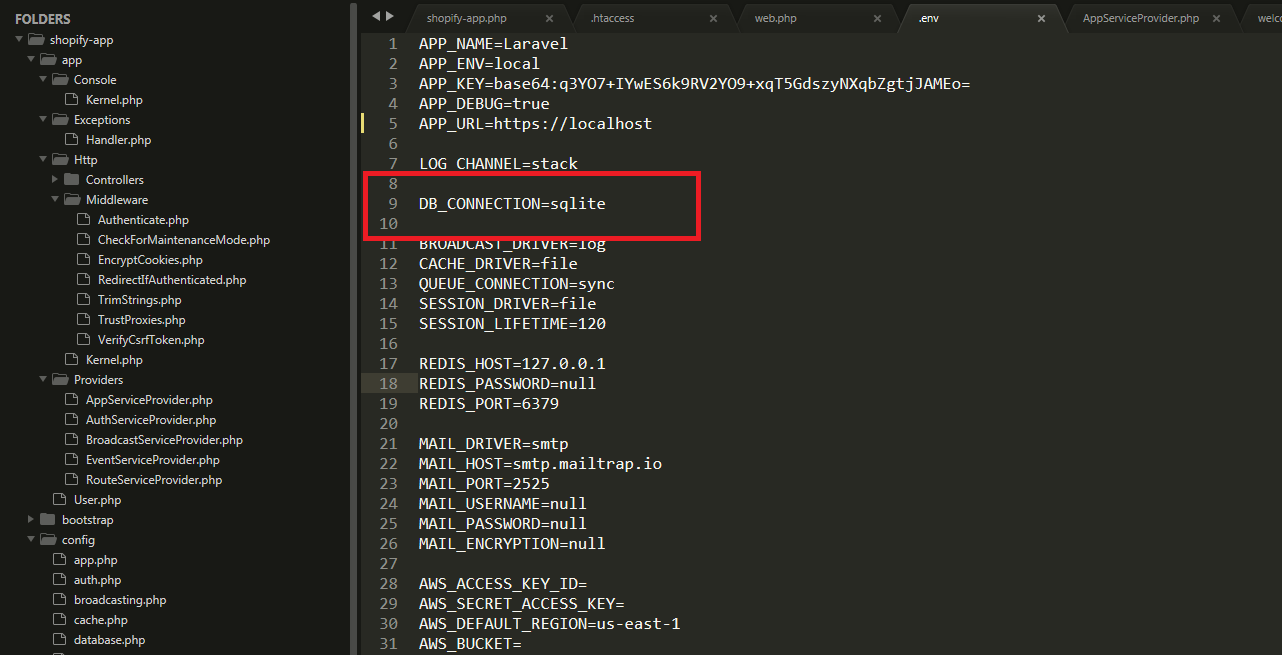
That’s the database that we’re going to use.
Next, find your php.ini file and look for the lines starting with ;extension and remove the semi-colon for these two modules.
extension=pdo_mysql
extension=pdo_sqlite
Once you’re done with everything, try to run the command again
php artisan vendor:publish --tag=shopify-migrations && php artisan migrateAt this point, it should create the database for the Shopify app.
Serve Locally
After migration, run the following command to create the local server.
php artisan serveThere you can browse your application using 127.0.0.1:8000
Login with your store and install the app. However, you might encounter the following error.
Laravel: Invalid Request (Unsupported SSL Request)
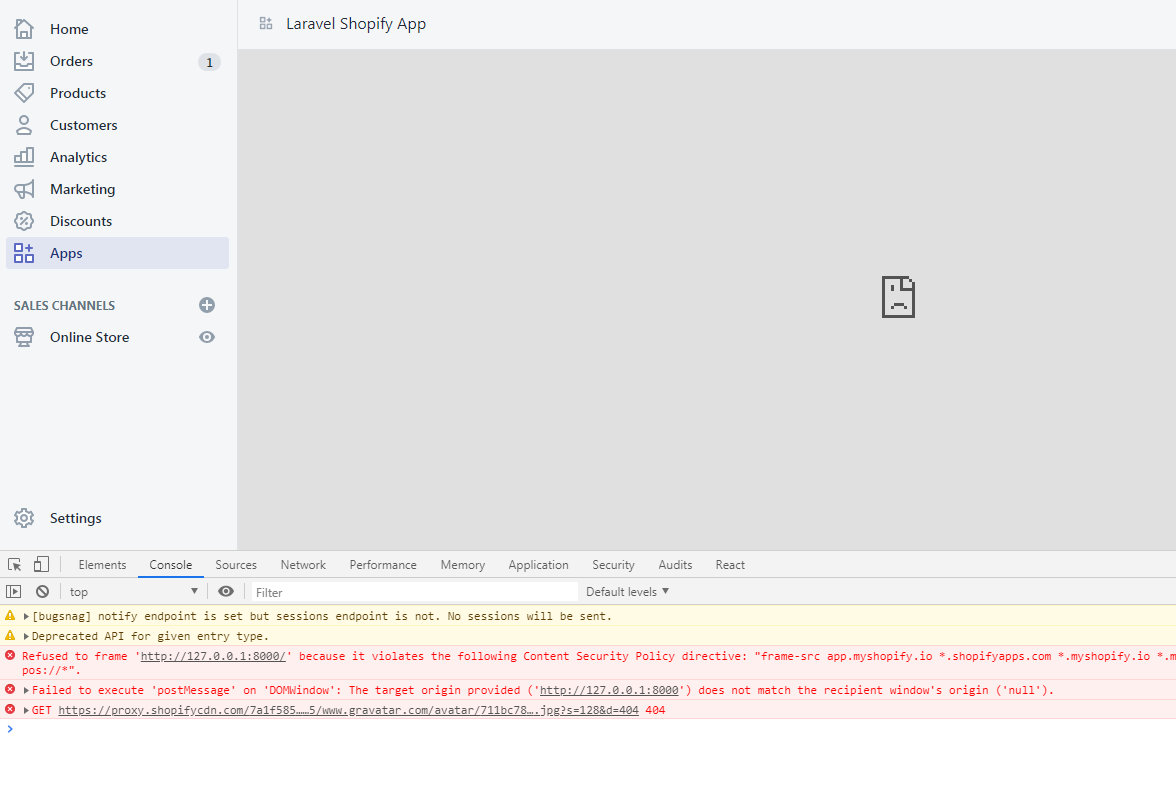
By default, Laravel is only being served through HTTP and as you might already know, Shopify requires your application to be served with SSL and Laravel can’t help you with this at all.
There has been a lot of solutions out there, that you should modify this or add this code to your code. None of them will work.
I suggest you run your own server or use ngrok to expose local servers behind NATs and firewalls to the public internet over secure tunnels.
After you get the URL from ngrok, replace the URLs in your Shopify Partner App Dashboard and there you can access your app.
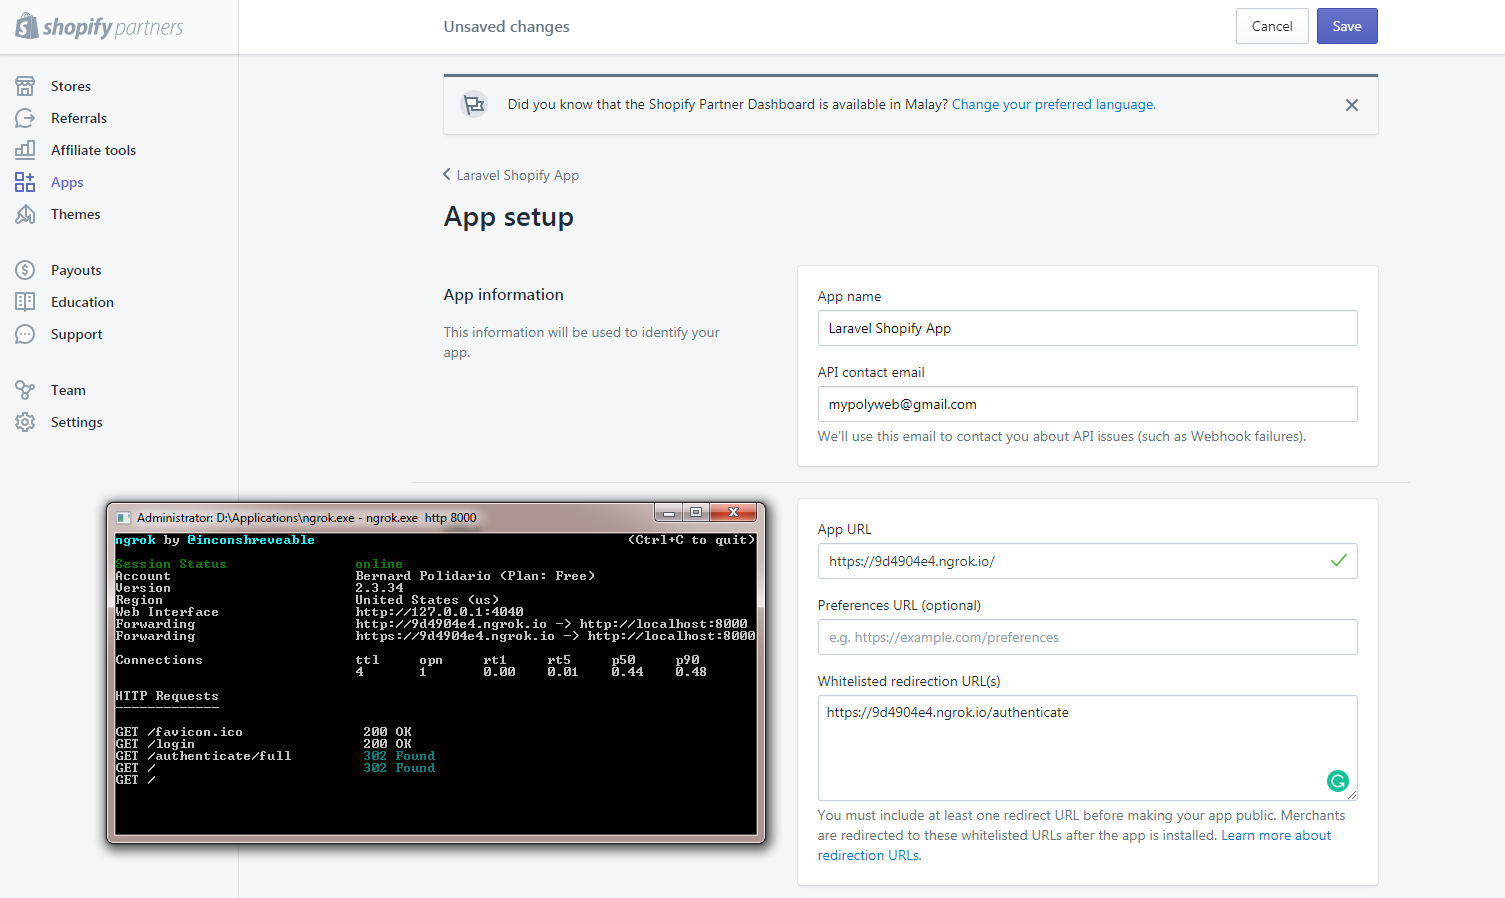
After that, you’ll be able to access your Shopify app using the URL provided by ngrok.
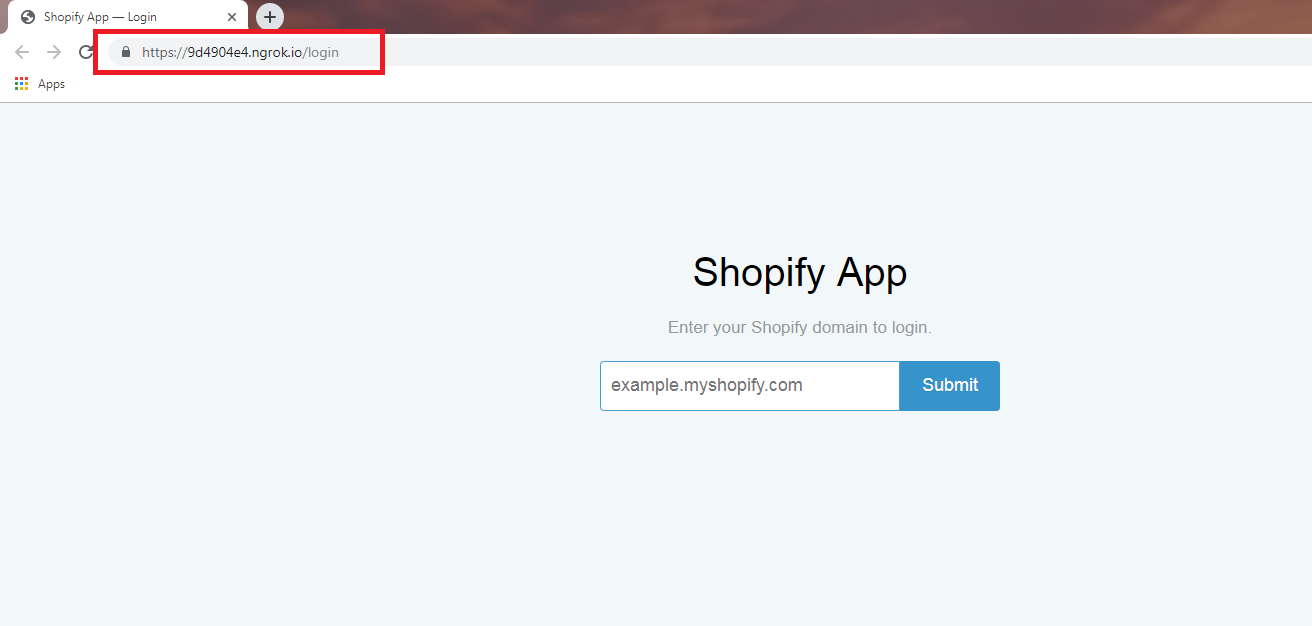
And here it is, you may now be redirected to the Shopify app created with Laravel. Lovely!

The ‘Loop’ Problem
If you are using Webhooks to listen for changes, such as a new customer, and then using the API to update this customer, you can create an inadvertent loop. As an example:
And thus an infinite loop is created.
To combat this, it is recommended to implement some mechanism to avoid a loop. For example, don’t perform a customer update on the same customer within 60 seconds. The Shopify Dev forums have a number of solutions to this problem but you must implement logic to avoid a loop or you risk hitting API limits, in addition to annoying your App users.
App Bridge & Legacy
By default, Appbridge is enabled, the embeddable mode for Shopify Apps. If you wish to disable this, set SHOPIFY_APPBRIDGE_ENABLED=0 for your environment variable. This will enabled legacy mode and skip any AppBridge modes.
Please note, X-Frame-Options header must be removed for AppBridge to function. This package attempts to remove this header through the responses in Laravel, but this does not work for all cases. For Nginx, and Laravel Forge, you must specifically comment-out or remove the line below from the Nginx configuration:
add_header X-Frame-Options "SAMEORIGIN";Code language: JavaScript (javascript)The Nginx configuration is found in Laravel Forge at the very bottom of the page for the site in question: Files->Edit Nginx Configuration
Conclusion
Special thanks to the developers who developed the packages for building Shopify apps easier.
Creating Shopify apps with Laravel and Composer can be a little bit complex to some but it wouldn’t be that much hard if you know a little bit of Laravel and Shopify API. If in case you don’t know any of these, you may refer to their documentation.
Does this work with Laravel 7.19?
Hi James, yes it should work.
This package doesn’t even work. When I just create a nav bar, every time I was trying to redirect to other pages it will just ask for the domain name to login.
Does this work with laravel 8?