So you are developing a Shopify app where merchants can easily customize their product’s title, description, and even the prices. However, you forgot one thing and that is the collections.
How do you actually update the product’s collections?
In this Shopify tutorial, we’ll learn how to update the product’s collections using Collect REST API and PHP.
Video Tutorial
If you prefer to learn through a video tutorial, you may watch the following video.
Getting started
To get started, we’ll assume that you have followed our Shopify app tutorial series and you are using the same repository/client that we are using here.
Now, for this tutorial, we’ll only need the following three files.
In our product.php, we should have the following code:
<div class="card-columns">
<?php
$products = shopify_call($token, $shop_url, "/admin/api/2020-07/products.json", array(), 'GET');
$products = json_decode($products['response'], JSON_PRETTY_PRINT);
foreach ($products as $product) {
foreach ($product as $key => $value) {
$images = shopify_call($token, $shop_url, "/admin/api/2020-07/products/" . $value['id'] . "/images.json", array(), 'GET');
$images = json_decode($images['response'], JSON_PRETTY_PRINT);
?>
<div class="card" product-id="<?php echo $value['id']; ?>">
<img class="card-img-top" src="<?php echo $images['images'][0]['src']; ?>" alt="Card image cap">
<div class="card-body">
<h5 class="card-title"><?php echo $value['title']; ?></h5>
</div>
</div>
<?php
}
}
?>
</div>
<!-- Modal -->
<div class="modal fade" id="productsModal" tabindex="-1" role="dialog" aria-labelledby="productsModalLabel" aria-hidden="true">
<div class="modal-dialog" role="document">
<div class="modal-content">
<div class="modal-header">
<h5 class="modal-title" id="exampleModalLabel">Modal title</h5>
<button type="button" class="close" data-dismiss="modal" aria-label="Close">
<span aria-hidden="true">×</span>
</button>
</div>
<div class="modal-body">
<form action="ajax.php" id="productForm">
<div class="form-group">
<label for="productName">Product Title</label>
<input type="text" class="form-control" id="productName" name="productName">
</div>
<div class="form-group">
<label for="productDescription">Product Description</label>
<textarea class="form-control" id="productDescription" name="productDescription" rows="7"></textarea>
</div>
<div class="form-group">
<select class="custom-select" id="productCollection" name="productCollection" multiple>
<?php
$custom_collections = shopify_call($token, $shop_url, "/admin/api/2020-07/custom_collections.json", array(), 'GET');
$custom_collections = json_decode($custom_collections['response'], JSON_PRETTY_PRINT);
foreach ($custom_collections as $custom_collection) {
foreach ($custom_collection as $key => $value) {
?>
<option value="<?php echo $value['id']; ?>"><?php echo $value['title']; ?></option>
<?php
}
}
$smart_collections = shopify_call($token, $shop_url, "/admin/api/2020-07/smart_collections.json", array(), 'GET');
$smart_collections = json_decode($smart_collections['response'], JSON_PRETTY_PRINT);
foreach ($smart_collections as $smart_collection) {
foreach ($smart_collection as $key => $value) {
?>
<option value="<?php echo $value['id']; ?>"><?php echo $value['title']; ?></option>
<?php
}
}
?>
</select>
</div>
</form>
</div>
<div class="modal-footer">
<button type="button" class="btn btn-secondary" data-dismiss="modal">Close</button>
<button type="button" class="btn btn-primary" id="SaveProduct" product-id=''>Save changes</button>
</div>
</div>
</div>
</div>
Code language: HTML, XML (xml)In our index.php, we should have the following code:
<!DOCTYPE html>
<html lang="en">
  <head>
    <meta charset="utf-8">
    <meta name="viewport" content="width=device-width, initial-scale=1, shrink-to-fit=no">
    <link rel="stylesheet" href="https://stackpath.bootstrapcdn.com/bootstrap/4.1.3/css/bootstrap.min.css">
    <title>WeeklyHow Shopify App</title>
  </head>
  <body>

	<div class="container">
		<?php
		include_once("inc/functions.php");
		include_once("inc/mysql_connect.php");
		include_once("header.php");
		include_once("products.php");
		?>
	</div>
    <script src="https://code.jquery.com/jquery-3.3.1.min.js"></script>
    <script src="https://cdnjs.cloudflare.com/ajax/libs/popper.js/1.14.3/umd/popper.min.js"></script>
    <script src="https://stackpath.bootstrapcdn.com/bootstrap/4.1.3/js/bootstrap.min.js"></script>

    <script>
      var shop = '<?php echo $shop_url; ?>';

      $('div[product-id]').on('click', function (e) {
        $.ajax({
          method: 'POST',
          data: {
            url: shop,
            id: $(this).attr('product-id'),
            type: 'GET'
          },
          url:'ajax.php',
          dataType: 'json',
          success:function(json){
            console.log(json);

            $('#productName').val(json['title']);
            $('#productDescription').val(json['description']);

            $('#productCollection option').each(function(i) {
              var optionCollection = $(this).val();

              json['collections'].forEach(function(productCollection) {
                if(productCollection['id'] == optionCollection) {
                  $('#productCollection option[value=' + optionCollection + ']').attr('selected', 'selected');
                }

              });
            });


            $('#SaveProduct').attr('product-id', json['id']);
            $('#productsModal').modal('show');
          }
        });
      });


      $('#productsModal').on('hide.bs.modal', function() {
        $('#SaveProduct').attr('product-id', '');
        $('#productCollection').val([]);
      });

      $('#SaveProduct').on('click', function() {
        var productID = $(this).attr('product-id');

        $.ajax({
          method: 'POST',
          data: {
            url: shop,
            id: productID,
            product: $('#productForm').serialize(),
            type: 'PUT'
          },
          url:'ajax.php',
          dataType: 'html',
          success:function(json){
            console.log(json);
          }
        });
      });
    </script>
  </body>
</html>
Code language: HTML, XML (xml)
And for our ajax.php, we should have the following code:
<?php
require_once("inc/functions.php");
require_once("inc/mysql_connect.php");
$id = $_POST['id'];
$shop_url = $_POST['url'];
$sql = "SELECT * FROM shops WHERE shop_url='" . $shop_url . "' LIMIT 1";
$check = mysqli_query($conn, $sql);
if(mysqli_num_rows($check) > 0) {
$shop_row = mysqli_fetch_assoc($check);
$token = $shop_row['access_token'];
if($_POST['type'] == 'GET') {
$products = shopify_call($token, $shop_url, "/admin/api/2020-07/products/" . $id . ".json", array(), 'GET');
$products = json_decode($products['response'], JSON_PRETTY_PRINT);
$id = $products['product']['id'];
$title = $products['product']['title'];
$description = $products['product']['body_html'];
$collections = array();
$custom_collections = shopify_call($token, $shop_url, "/admin/api/2020-07/custom_collections.json", array("product_id" => $id), 'GET');
$custom_collections = json_decode($custom_collections['response'], JSON_PRETTY_PRINT);
foreach ($custom_collections as $custom_collection) {
foreach ($custom_collection as $key => $value) {
array_push($collections, array("id" => $value['id'], "name" => $value['title']));
}
}
$smart_collections = shopify_call($token, $shop_url, "/admin/api/2020-07/smart_collections.json", array("product_id" => $id), 'GET');
$smart_collections = json_decode($smart_collections['response'], JSON_PRETTY_PRINT);
foreach ($smart_collections as $smart_collection) {
foreach ($smart_collection as $key => $value) {
array_push($collections, array("id" => $value['id'], "name" => $value['title']));
}
}
echo json_encode(
array(
"id" => $id,
"title" => $title,
"description" => $description,
"collections" => $collections
)
);
} else if( $_POST['type'] == 'PUT' ) {
$productData = array();
$productData = proper_parse_str($_POST['product']);
$array = array("product" => array("title" => $productData['productName'], "body_html" => $productData['productDescription']));
$products = shopify_call($token, $shop_url, "/admin/api/2020-07/products/" . $id . ".json", $array, 'PUT');
}
}
?>
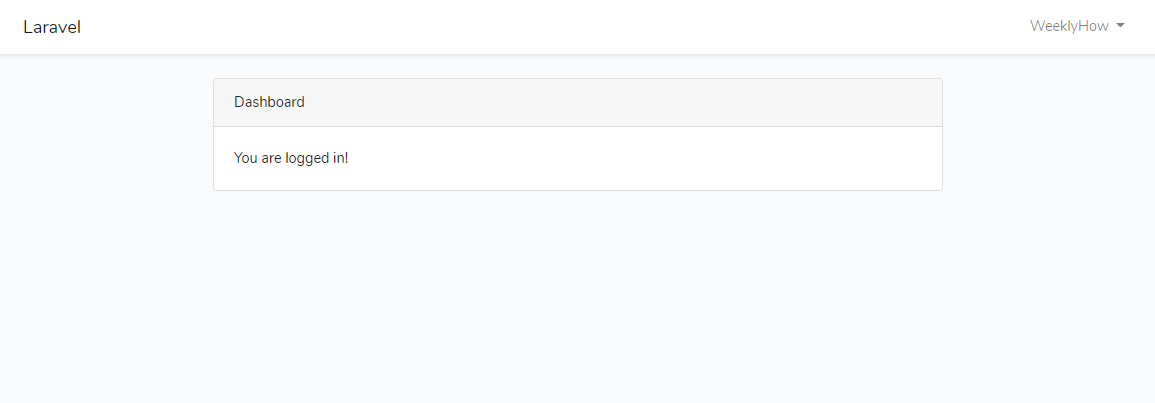
Code language: PHP (php)The scripts above should allow us to edit and save a new title and description for any of the products that we select below.

Now, what we want to do is when we select a product. A bootstrap modal should appear and allow us to select new collections for our product.

Updating the product’s collection
There are two ways to update the product’s collection. One is to use the Collection API, delete the collection attached to the product, and create the deleted collection and assign all of the previous products assigned to the collection except that product that we selected. Two is to use Collect API.
Obviously, the first option is the worse way of updating the product’s collection. Why? Because it’s ugly and it’s making too many unnecessary API calls.
However, if you use collect API instead, all we needed to do is to get the collect attached to the product that we selected, delete the collect, and create a new collect with the new collection. Simple as that!
Let’s start by getting all of the collect from collect API. Open the ajax.php and update its code to the following:
<?php
require_once("inc/functions.php");
require_once("inc/mysql_connect.php");

$id = $_POST['id'];
$shop_url = $_POST['url'];

$sql = "SELECT * FROM shops WHERE shop_url='" . $shop_url . "' LIMIT 1";
$check = mysqli_query($conn, $sql);

if(mysqli_num_rows($check) > 0) {
	$shop_row = mysqli_fetch_assoc($check);

	$token = $shop_row['access_token'];

	if($_POST['type'] == 'GET') {
		$products = shopify_call($token, $shop_url, "/admin/api/2020-07/products/" . $id . ".json", array(), 'GET');
		$products = json_decode($products['response'], JSON_PRETTY_PRINT);

		$id = $products['product']['id'];
		$title = $products['product']['title'];
		$description = $products['product']['body_html'];
		$collections = array();

		$custom_collections = shopify_call($token, $shop_url, "/admin/api/2020-07/custom_collections.json", array("product_id" => $id), 'GET');
		$custom_collections = json_decode($custom_collections['response'], JSON_PRETTY_PRINT);

		foreach ($custom_collections as $custom_collection) {
			foreach ($custom_collection as $key => $value) {
				array_push($collections, array("id" => $value['id'], "name" => $value['title']));
			}
		}

		$smart_collections = shopify_call($token, $shop_url, "/admin/api/2020-07/smart_collections.json", array("product_id" => $id), 'GET');
		$smart_collections = json_decode($smart_collections['response'], JSON_PRETTY_PRINT);

		foreach ($smart_collections as $smart_collection) {
			foreach ($smart_collection as $key => $value) {
				array_push($collections, array("id" => $value['id'], "name" => $value['title']));
			}
		}

		echo json_encode(
			array(
				"id" => $id,
				"title" => $title,
				"description" => $description,
				"collections" => $collections
			)
		);

	} else if( $_POST['type'] == 'PUT' ) {
		$productData = array();
		parse_str($_POST['product'], $productData);

		$array = array("product" => array("title" => $productData['productName'], "body_html" => $productData['productDescription']));

		$products = shopify_call($token, $shop_url, "/admin/api/2020-07/products/" . $id . ".json", $array, 'PUT');

		$collects = shopify_call($token, $shop_url, "/admin/api/2020-07/collects.json", array('product_id' => $id), 'GET');
		$collects = json_decode($collects['response'], JSON_PRETTY_PRINT);

		foreach ($collects as $collect) {
			foreach ($collect as $key => $value) {
				$collects = shopify_call($token, $shop_url, "/admin/api/2020-07/collects/" . $value['id'] .".json", array(), 'DELETE');
			}
		}

	}

}
?>
Code language: PHP (php)
In the code above, we first get the collects assigned to our selected product and then loop through each collect using foreach and then delete each collect. These are just basics and you should be able to follow along 🙂
Next, we’ll use POST endpoint to create the new collect.
<?php
require_once("inc/functions.php");
require_once("inc/mysql_connect.php");

$id = $_POST['id'];
$shop_url = $_POST['url'];

$sql = "SELECT * FROM shops WHERE shop_url='" . $shop_url . "' LIMIT 1";
$check = mysqli_query($conn, $sql);

if(mysqli_num_rows($check) > 0) {
	$shop_row = mysqli_fetch_assoc($check);

	$token = $shop_row['access_token'];

	if($_POST['type'] == 'GET') {
		$products = shopify_call($token, $shop_url, "/admin/api/2020-07/products/" . $id . ".json", array(), 'GET');
		$products = json_decode($products['response'], JSON_PRETTY_PRINT);

		$id = $products['product']['id'];
		$title = $products['product']['title'];
		$description = $products['product']['body_html'];
		$collections = array();

		$custom_collections = shopify_call($token, $shop_url, "/admin/api/2020-07/custom_collections.json", array("product_id" => $id), 'GET');
		$custom_collections = json_decode($custom_collections['response'], JSON_PRETTY_PRINT);

		foreach ($custom_collections as $custom_collection) {
			foreach ($custom_collection as $key => $value) {
				array_push($collections, array("id" => $value['id'], "name" => $value['title']));
			}
		}

		$smart_collections = shopify_call($token, $shop_url, "/admin/api/2020-07/smart_collections.json", array("product_id" => $id), 'GET');
		$smart_collections = json_decode($smart_collections['response'], JSON_PRETTY_PRINT);

		foreach ($smart_collections as $smart_collection) {
			foreach ($smart_collection as $key => $value) {
				array_push($collections, array("id" => $value['id'], "name" => $value['title']));
			}
		}

		echo json_encode(
			array(
				"id" => $id,
				"title" => $title,
				"description" => $description,
				"collections" => $collections
			)
		);

	} else if( $_POST['type'] == 'PUT' ) {
		$productData = array();
		parse_str($_POST['product'], $productData);

		$array = array("product" => array("title" => $productData['productName'], "body_html" => $productData['productDescription']));

		$products = shopify_call($token, $shop_url, "/admin/api/2020-07/products/" . $id . ".json", $array, 'PUT');

		$collects = shopify_call($token, $shop_url, "/admin/api/2020-07/collects.json", array('product_id' => $id), 'GET');
		$collects = json_decode($collects['response'], JSON_PRETTY_PRINT);

		foreach ($collects as $collect) {
			foreach ($collect as $key => $value) {
				$collects = shopify_call($token, $shop_url, "/admin/api/2020-07/collects/" . $value['id'] .".json", array(), 'DELETE');
			}
		}


		if( count($productData['productCollection'] ) > 0) {
			for ($i = 0; $i < count($productData['productCollection']); $i++) {
				if(count($productData['productCollection']) >= 0 && count($productData['productCollection']) <= 1) {
					$value = $productData['productCollection'];
				} else {
					$value = $productData['productCollection'][$i];
				}


				$collects = shopify_call($token, $shop_url, "/admin/api/2020-07/collects.json", array('collect' => array('product_id' => $id, 'collection_id' => $value)), 'POST');
			}
		}
	}

}
?>
Code language: PHP (php)
In the above code, we need to check if the collections selected by the merchant is more than one. If it is, then we’ll loop through each collections and create the collect using the value of product ID and collection ID.
If you’re wondering why there is a condition inside the loop, it’s because the productData variable can create two-dimensional arrays especially if the length of the array is more than 1. So we need to make sure we get both values regardless of the array length.
With everything saved, we should be able to update the product’s collections. BUT! Unfortunately, the built-in parse_str() function is not going to work if there are two or more query strings with the same name.
For example, let’s say we have the following query string:
https://weeklyhow.com/?id=1&id=2&id=3
Code language: JavaScript (javascript)
If we use the built-in parse string function, the function will only return the last value which is 3.
So if we use the same function, it’ll most likely not create the first collects.
To fix that, we’ll have to use the following function provided by Evan K from php.net:
function proper_parse_str($str) {
  # result array
  $arr = array();

  # split on outer delimiter
  $pairs = explode('&', $str);

  # loop through each pair
  foreach ($pairs as $i) {
    # split into name and value
    list($name,$value) = explode('=', $i, 2);

    # if name already exists
    if( isset($arr[$name]) ) {
      # stick multiple values into an array
      if( is_array($arr[$name]) ) {
        $arr[$name][] = $value;
      }
      else {
        $arr[$name] = array($arr[$name], $value);
      }
    }
    # otherwise, simply stick it in a scalar
    else {
      $arr[$name] = $value;
    }
  }

  # return result array
  return $arr;
}
Code language: PHP (php)
You can copy the above function and paste it either on the very top of ajax.php or inside the functions.php.
Once you’re done copying the code, we should then be able to use it instead of the parse_str() function.
<?php
require_once("inc/functions.php");
require_once("inc/mysql_connect.php");

$id = $_POST['id'];
$shop_url = $_POST['url'];

$sql = "SELECT * FROM shops WHERE shop_url='" . $shop_url . "' LIMIT 1";
$check = mysqli_query($conn, $sql);

if(mysqli_num_rows($check) > 0) {
	$shop_row = mysqli_fetch_assoc($check);

	$token = $shop_row['access_token'];

	if($_POST['type'] == 'GET') {
		$products = shopify_call($token, $shop_url, "/admin/api/2020-07/products/" . $id . ".json", array(), 'GET');
		$products = json_decode($products['response'], JSON_PRETTY_PRINT);

		$id = $products['product']['id'];
		$title = $products['product']['title'];
		$description = $products['product']['body_html'];
		$collections = array();

		$custom_collections = shopify_call($token, $shop_url, "/admin/api/2020-07/custom_collections.json", array("product_id" => $id), 'GET');
		$custom_collections = json_decode($custom_collections['response'], JSON_PRETTY_PRINT);

		foreach ($custom_collections as $custom_collection) {
			foreach ($custom_collection as $key => $value) {
				array_push($collections, array("id" => $value['id'], "name" => $value['title']));
			}
		}

		$smart_collections = shopify_call($token, $shop_url, "/admin/api/2020-07/smart_collections.json", array("product_id" => $id), 'GET');
		$smart_collections = json_decode($smart_collections['response'], JSON_PRETTY_PRINT);

		foreach ($smart_collections as $smart_collection) {
			foreach ($smart_collection as $key => $value) {
				array_push($collections, array("id" => $value['id'], "name" => $value['title']));
			}
		}

		echo json_encode(
			array(
				"id" => $id,
				"title" => $title,
				"description" => $description,
				"collections" => $collections
			)
		);

	} else if( $_POST['type'] == 'PUT' ) {
		$productData = array();
		$productData = proper_parse_str($_POST['product']);

		$array = array("product" => array("title" => urldecode($productData['productName']), "body_html" => urldecode($productData['productDescription'])));

		$products = shopify_call($token, $shop_url, "/admin/api/2020-07/products/" . $id . ".json", $array, 'PUT');

		$collects = shopify_call($token, $shop_url, "/admin/api/2020-07/collects.json", array('product_id' => $id), 'GET');
		$collects = json_decode($collects['response'], JSON_PRETTY_PRINT);

		foreach ($collects as $collect) {
			foreach ($collect as $key => $value) {
				$collects = shopify_call($token, $shop_url, "/admin/api/2020-07/collects/" . $value['id'] .".json", array(), 'DELETE');
			}
		}


		if( count($productData['productCollection'] ) > 0) {
			for ($i = 0; $i < count($productData['productCollection']); $i++) {
				if(count($productData['productCollection']) >= 0 && count($productData['productCollection']) <= 1) {
					$value = $productData['productCollection'];
				} else {
					$value = $productData['productCollection'][$i];
				}


				$collects = shopify_call($token, $shop_url, "/admin/api/2020-07/collects.json", array('collect' => array('product_id' => $id, 'collection_id' => $value)), 'POST');
			}
		}
	}

}
?>
Code language: PHP (php)
Now, query strings are encoded to URL text formatting that’s why before we save the new title and description, we’ll have to decode the title and description back to a normal text format using urldecode() function.
Now if we save all of our scripts and run the app, we should then be able to update the collections without any problem. Awesome!

Conclusion
Updating a product’s collection can be a hassle especially if the products are attached to not just a custom collection, but also to a smart collection. However, with collect API, we should be able to update the product’s collection without doing too much unnecessary API calls.
We hope that you learned how to update your products using collect API. If you have encountered any issues or errors, let us know in the comments below and we’ll try to help out! 🙂