If you are a big fan of mobile games then you probably have heard of the game Flappy Bird. Maybe you even have installed it and played it with your mobile phone even just for once.
Flappy Bird is a mobile game for both android and iOS and was developed by a Vietnamese indie game developer Dong Nguyen. It was released initially on May 24, 2013, and was suddenly pulled back from PlayStore somewhere around February of 2014.
The concept of the game is fairly simple. The player takes control of Faby (The bird) as he scrolls across the horizontal path while a gravity is pulling him down. The player must prevent Faby from hitting the Warp Pipes, and as Faby goes through each pipe, the player will get a point.
According to Dong Nguyen, this game was created in 3 days.
But! We’re going to do better than that because, in this tutorial, we’re going to create a flappy bird game in just 10 minutes using Unity Game Engine.
So without wasting any more time, let’s begin!
Creating Flappy Bird using Unity
Before we begin, it’s crucial that you have all of the tools that is required to start building your own game. Since we are creating a flappy bird clone game using Unity, you will need to have this game engine installed to your computer. If Unity isn’t already installed on your computer, you can download it from the official Unity website. This is a vital step, as Unity’s powerful platform will serve as the canvas and toolkit for your game development journey.
Create Unity Project
Once Unity is installed, create a new Unity project and make sure that you set its template to 2D.

Downloading Assets
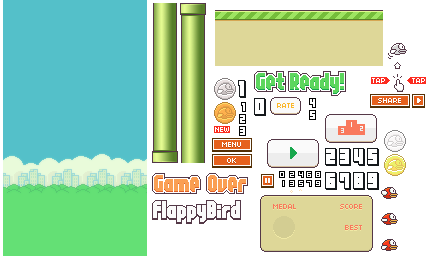
Before we can start creating the game, obviously we need the assets such as the bird, the pipes, the interfaces, and etc.
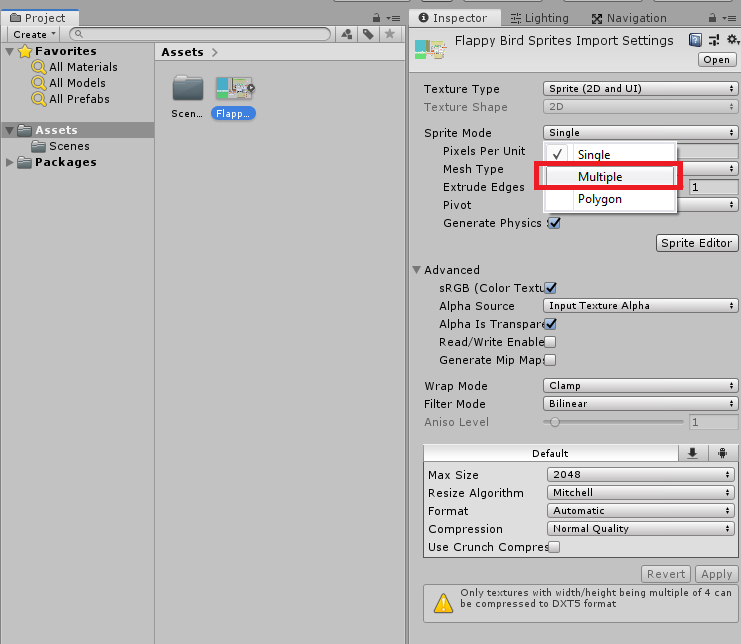
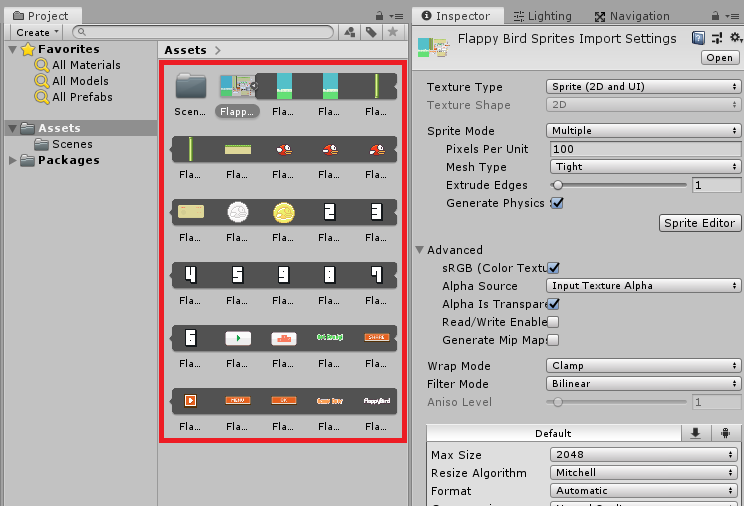
Once you have downloaded the file, go back to Unity and import the image.
Once imported, select the sprite and make sure you set its sprite mode to Multiple and Filter mode to Point and Compression to None. This will make your sprite sharp and high quality.
Don’t forget to click Apply to save changes.
Now, if you have noticed already, our assets are compiled into a PNG file which is then converted into a sprite, once imported in Unity.
We need to slice this sprite using Sprite Editor so we can use the objects such as the bird, the pipes, and etc.
Go ahead and select the sprite once again, and right under the Generate Physics checkbox, click the Sprite Editor button.
This will open the following window.
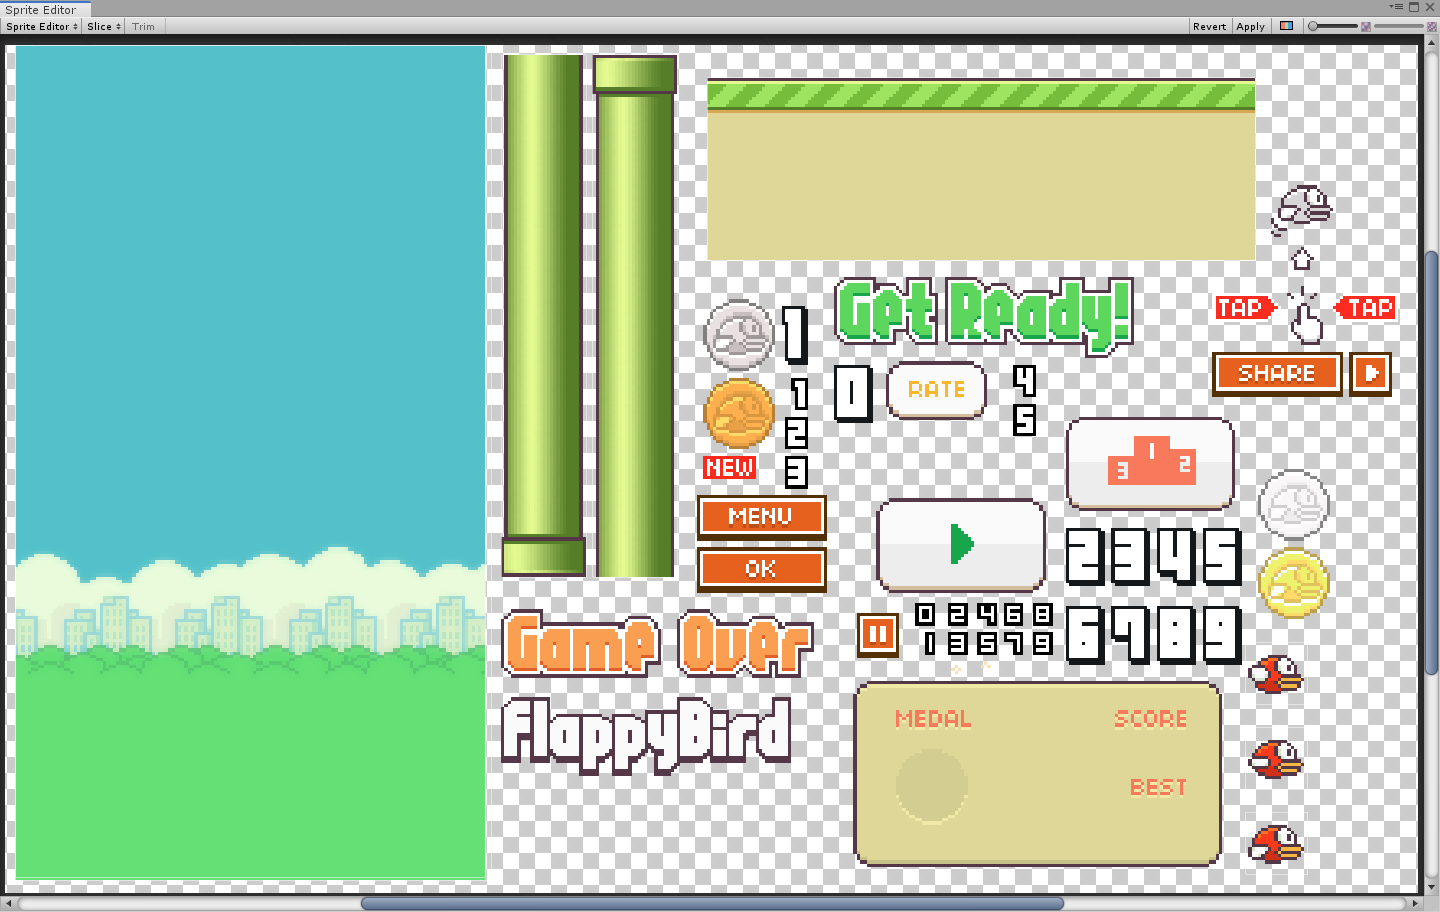
Now to create new sprites, select the objects by dragging inside the Sprite Editor. (Just imagine you’re using Photoshop and you’re select an image)
Once you’re done slicing the sprite, click apply.

Once successful, you should see all the sprites sliced inside your Flappy Bird sprite asset.
Setting up the Game
Now that we’re done with our assets, let’s start this tutorial by adjusting our game aspect ratio to 9:16.

Then we’ll drop our game background in the hierarchy.

Next, go to your Scene window (CTRL + 1) and click on the Main Camera inside the hierarchy and drag the white dot down until it matches the size of our background.
Next, go to Inspector window and set its Order in Layer value to -1.

That should make your game preview ready for the player.
Creating the Player
Now that we’re done with the background, the next thing we’re going to work on is the bird or our Player.
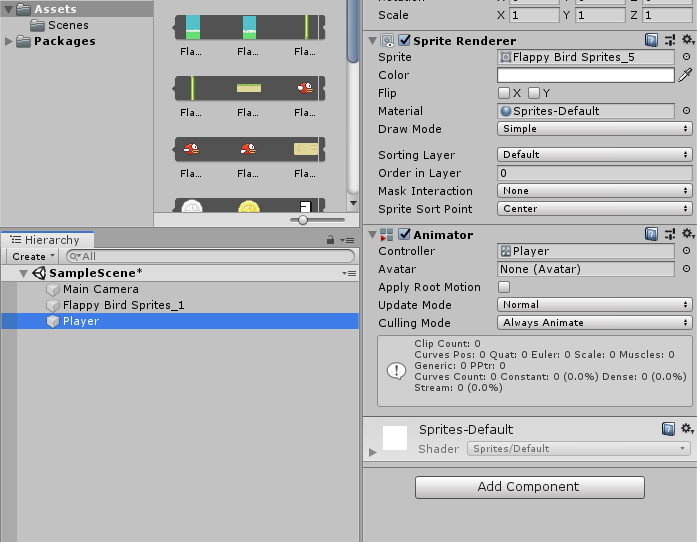
Let’s go back to our Project files and open our Flappy bird sprite once again and drag the bird sprite with its wing raised up into our hierarchy.
Rename the game object to Player

Next, we’re going to create a new animation- so go to your project window and right-click- select Create then choose Animation.

You can name the animation whatever you want. We’ll call it Faby.
Then drag the animation to the Player game object. That will generate a new Animator component for our Player.
Next, open the Animation window by pressing CTRL + 6.
With your Player selected, go to your project window, open Flappy Bird sprite, and drag all the three bird sprites in the animation window.

To make your animation look better, adjust your animation by dragging the last keyframe to 0:10 and the second keyframe to 0:05 and leave the first keyframe to its original place.

The Platform
The next game object that we need is the platform.
Go to your Project window once again and drag and drop the platform in the hierarchy.

Now, obviously we need to drag this platform down at the bottom of the screen so go to your scene window once again and just drag the platform down.
Let’s also rename this game object to Platform.
Same with the background, let’s rename it to Background.
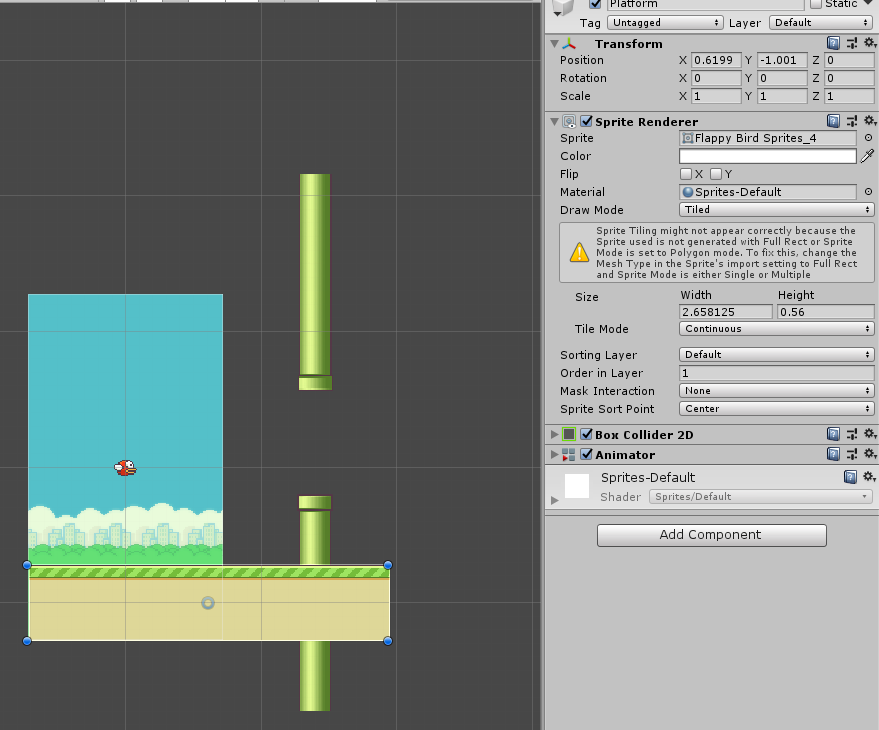
Now, select your Platform game object and change its Draw Mode to Tiled. We’ll also change its Order in Layer to 1.
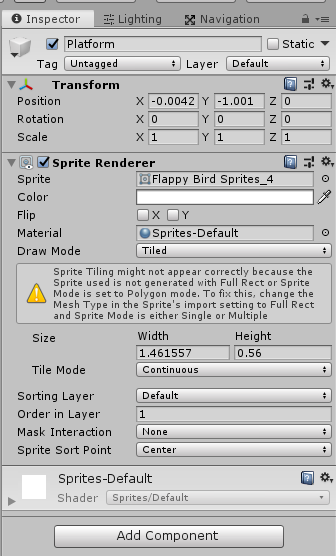
This will make our platform seamless and be displayed at the top of everything.
Next, we’ll add a box collider to this game object by clicking the Add Component button and searching Box Collider 2D.
Make sure you set its Auto Tiling to true.
Player Physics
For this game to work properly, we need to apply physics to our player.
So with your Player game object selected, go to your inspector window and click Add Component and search for Rigidbody 2D.

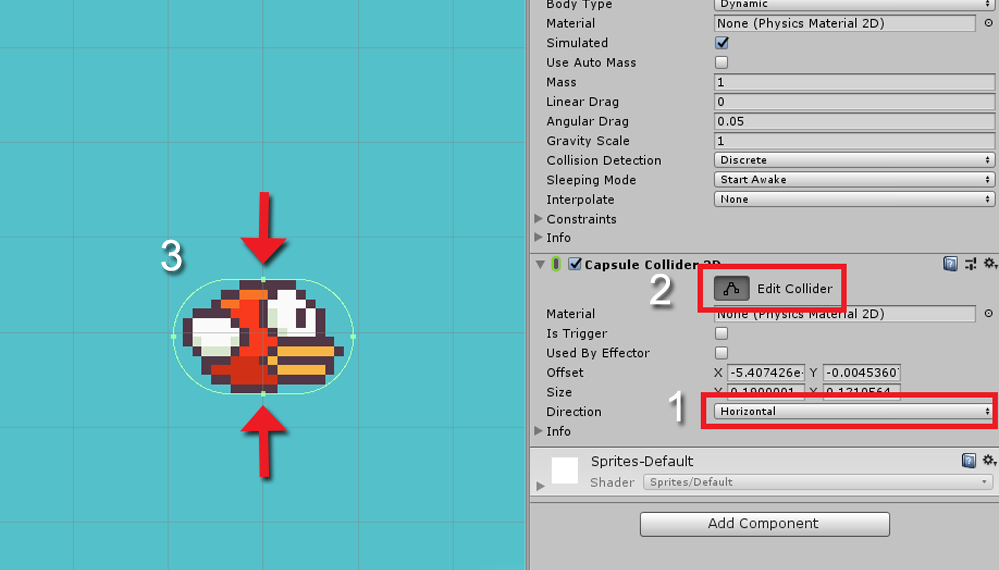
And after that, we’ll add another component which is the capsule collider so click Add Component button once again and search for Capsule Collider 2D.
Then we’ll set Capsule Collider 2D‘s direction to Horizontal.
Next, click the edit collider button and adjust the size of the capsule collider that will fit your player.
Player Script
We’re going to create a new script to make our player jump as soon as we tap our screen.
So go to your Project window, right-click, select Create, then choose C# Script.
Let’s name our script Player.cs
Once the script is created, drag the script to the player game object and then open that script with Visual Studio.
using System.Collections;
using System.Collections.Generic;
using UnityEngine;

public class Player : MonoBehaviour
{
    public float velocity = 2.4f;
    private Rigidbody2D rigidbody;

    // Start is called before the first frame update
    void Start()
    {
        rigidbody = GetComponent<Rigidbody2D>();
    }

    // Update is called once per frame
    void Update()
    {
        if(Input.GetMouseButtonDown(0))
        {
            rigidbody.velocity = Vector2.up * velocity;
        }
    }
}
Code language: C# (cs)
The Obstacles
Now that our player is done, our platform is done, and our background is done. It’s time for us to create the obstacles (commonly known as the warp pipes).
Let’s open our sprites once again and drag the two warp pipes into our scene.
With our warp pipes selected, add a component by pressing the Add Component button and searching for Box Collider 2D.
Then we’ll align these pipes to one another vertically, just like the game itself. Then we’ll create an Empty Game Object and name it Obstacle pipes, and then, we’ll drag our two warp pipes into that empty game object.
In other words, we’ll make our empty game object the parent of these two warp pipes. Did it sound too complicated? 😉
Also, make sure you place your empty game object between the two warp pipes. So it will look something like below.

Next, we’ll create a new C# script but this time it’s obstacle.cs
using System.Collections;
using System.Collections.Generic;
using UnityEngine;

public class obstacle : MonoBehaviour
{
    public float speed;

    // Update is called once per frame
    void Update()
    {
        transform.position += ((Vector3.left * speed) * Time.deltaTime);
    }
}
Code language: C# (cs)
Make sure to drag this script to the Obstacle Pipes game object.
Now that our obstacle is ready, we can now then create an obstacle spawner so our obstacle will keep on coming endlessly.
To do that, we’ll create another empty game object and we’ll name it Obstacle Spawner.
Then make sure you reset its Transform position and drag it’s X position all the way to the right of the screen.
We’ll create another C# script and we’ll name it spawner.cs.
Make sure you assign this script to Obstacle Spawner game object.
using System.Collections;
using System.Collections.Generic;
using UnityEngine;

public class spawner : MonoBehaviour
{
    public float queueTime = 1.5;
    private float time = 0;
    public GameObject obstacle;

    public float height;

    // Update is called once per frame
    void Update()
    {
        if(time > queueTime)
        {
            GameObject go = Instantiate(obstacle);
            go.transform.position = transform.position + new Vector3(0, Random.Range(-height, height), 0);

            time = 0;

            Destroy(go, 10);
        }

        time += Time.deltaTime;
    }
}
Code language: C# (cs)
Make sure to save all of your scripts as well as your scene.
Go back to unity and this time, we’ll save our Obstacle Pipes as a Game Object Prefab. To do that, drag the Obstacle Pipes in the Assets.
Next, select the Obstacle Spawner game object, and drag the Obstacle Pipes prefab to the Obstacle variable.

You should have the following results.
Scrolling Platform
We’re almost done! However, if you look closely, you will see that our platform is not scrolling horizontally along with our warp pipes. That looks weird.
To fix that, create a new animation and call it platform. Then drag the animation to the platform game object.
Then we’ll increase the horizontal scale of our platform.
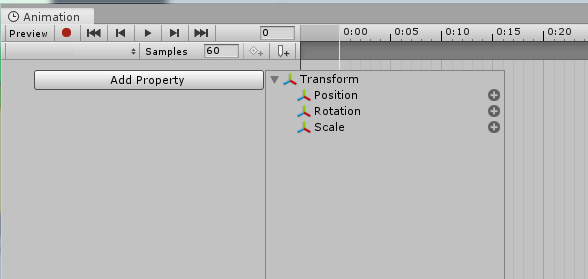
Then open the Animation window by pressing CTRL + 6.
With your platform game object selected, click Add Property button in the Animation window and select Transform then Position.
To create a keyframe, click the button beside the number input. Then somewhere around 3:00 seconds, we’ll create another keyframe, but this time we’ll adjust the value of x.

So for example, in the first keyframe, I have 0.59 for the x position and in the second keyframe, I have -0.59. This will make our platform scroll from 0.59 x position to -0.59 x position every 3 seconds.
The User Interface
The game is almost done, but there’s still one thing that we’re not setting up yet, and that is our player death as well as the user interface when the player dies.
To start, let’s create a new Canvas by going to our hierarchy, right-click and select UI, and then Canvas.

Next, right-click on the Canvas game object that you have just created then select UI, then Image.

Rename this Image game object to Restart Button.
Next, open your Flappy Bird Sprite asset once again and look for the play button and drag it to the Source image of the Restart Button game object.

Once you have applied the image, proceed by clicking the Set Native Size button.

If you want, you may scale up the image to your desired size. In our case, we’ll scale it by 1.85 (X, Y, and Z-axis)
Game Manager
The next thing we’re going to do is to create a script or a game manager where it freezes the game but as soon as you click the start button, the game unfreezes.
Then when the player dies, the game freezes and does a countdown for restarting the game.
Alright, let’s create a new game object and call it GameManager and a new C# script and call it GameManager.cs.
Once the script is created, we’ll assign it to our Game Manager game object.
using System.Collections;
using System.Collections.Generic;
using UnityEngine;
using UnityEngine.UI;
using UnityEditor.SceneManagement;

public class GameManager : MonoBehaviour
{
    public GameObject startButton;
    public Player player;

    public Text gameOverCountdown;
    public float countTimer = 5;

    // Start is called before the first frame update
    void Start()
    {
        gameOverCountdown.gameObject.SetActive(false);
        Time.timeScale = 0;
    }

    private void Update()
    {
        if( player.isDead )
        {
            gameOverCountdown.gameObject.SetActive(true);
            countTimer -= Time.unscaledDeltaTime;
        }

        gameOverCountdown.text = "Restarting in " + (countTimer).ToString("0");

        if(countTimer < 0)
        {
            RestartGame();
        }
    }

    public void StartGame()
    {
        startButton.SetActive(false);
        Time.timeScale = 1;
    }

    public void GameOver()
    {
        Time.timeScale = 0;
    }


    public void RestartGame()
    {
        EditorSceneManager.LoadScene(0);
    }
}

Code language: C# (cs)
Using the script above, you have to make sure that you have your scene in the Build Settings. Otherwise, you’ll receive an error as soon as you start your game.

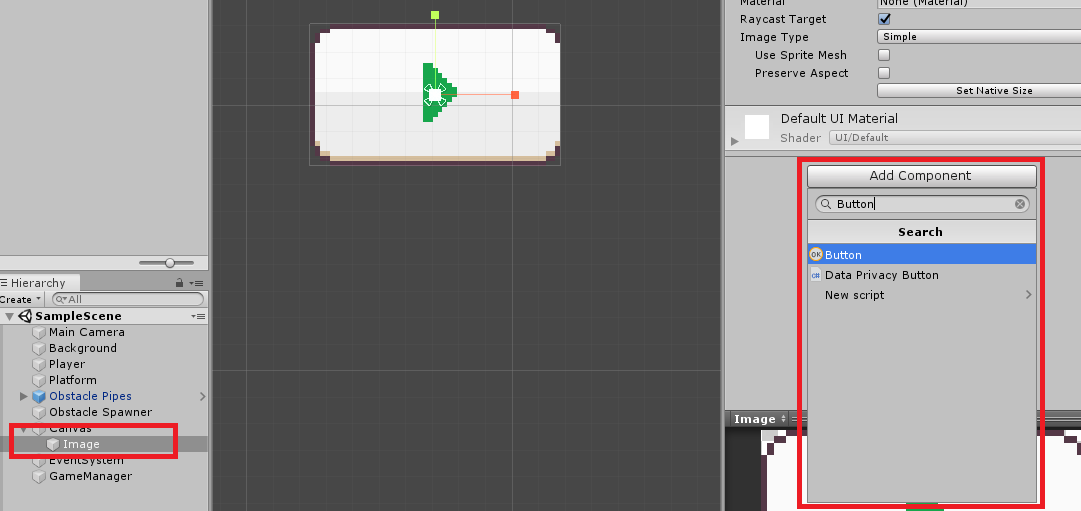
Next, we’ll add a button component to our Play button image.
Click the Image game object, Add Component, then search for Button.
Next, inside the button component, navigate to On Click() and add a new list by clicking on the little plus button located at the bottom-right corner.

Next, drag the GameManager game object to the box right under the Runtime Only dropdown.
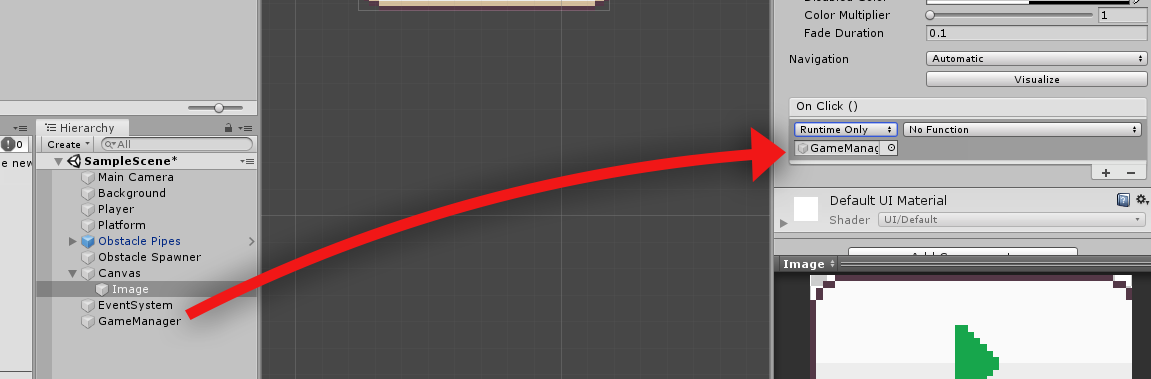
Next, click on the No Function dropdown and change it to GameManager then StartGame ().

Next, select the GameManager game object and drag your Image game object to the Start Button.
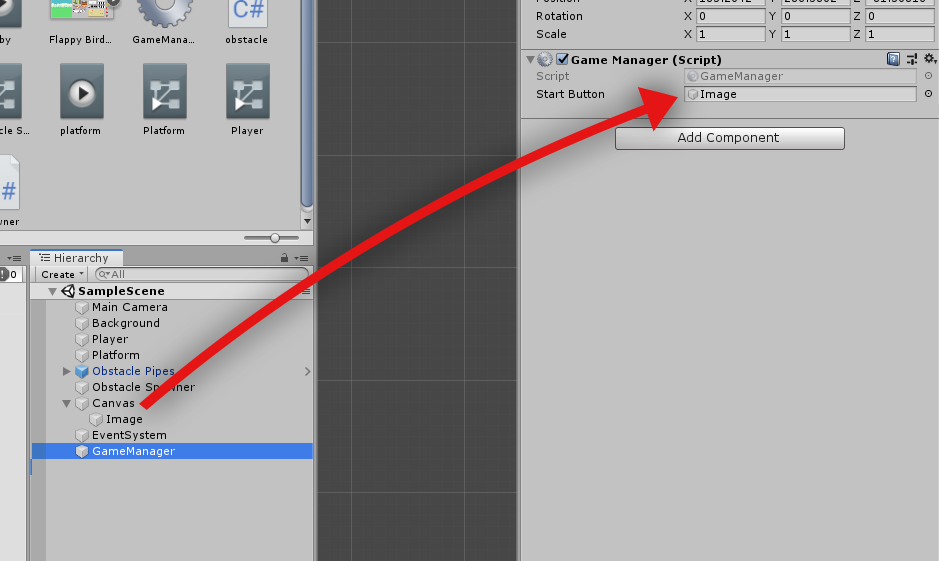
Don’t forget to save your scene.
Player Death
Now that we have a start button, the last thing we need to do is to make our player die as soon as it hits either the floor or the warp pipes.
To do that, we have to go back to our Player.cs script and add the following code.
public GameManager gameManager;
public bool isDead = false;

private void OnCollisionEnter2D(Collision2D collision)
{
    isDead = true;
    gameManager.GameOver();
}Code language: C# (cs)
Save the script, and go back to Unity.
Lastly, we’ll create a Text game object and assign it to our GameManager script.
Right-click in the hierarchy, select UI, then select Text.

Next, we’ll change it’s alignment to center, we’ll tick the Best Fit checked, and we’ll change its Font Size to 25 and Font Style to bold. Then, we’ll drag this Text all the way to the top by 125.65 on Y-axis.
Then, for the sake of the design, we’ll add a new component, search for Shadow.
Next, select our GameManager game object for the last time and drag the Player game object as well as the Text UI object to the Game Manager script.
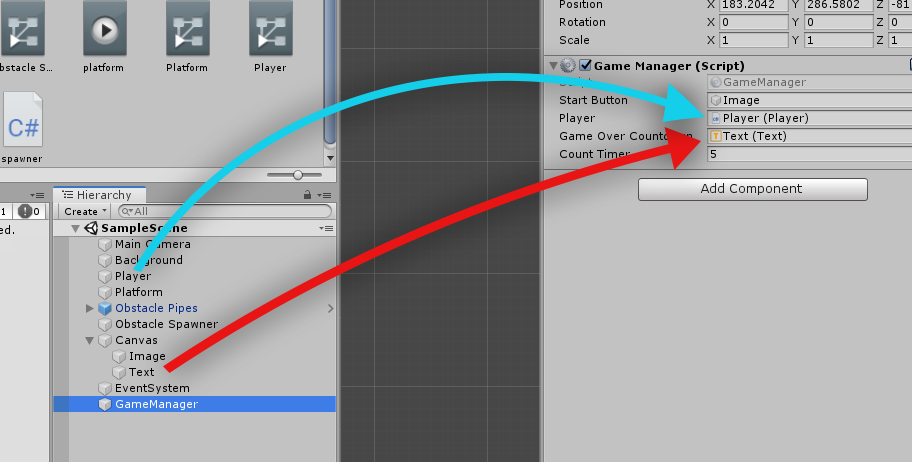
Save all of your scripts, and play your Flappy Bird game!
Conclusion
For the record, we have created this game in just 7 minutes but since you have to read everything to understand what’s going on, then you might take longer than 10 minutes to finish this project. However, once you get everything, you can definitely develop this game in just a short amount of time.
There’s one more missing to this tutorial, and that is the score. We’re going to continue this project in the next tutorial so if you are interested, let us know in the comments below.
Any reactions? Let us know!
hello, i got as far as to spawning pipes, but whenever i play the new pipes are invisible and aren’t spaced out right wich messes up the game, is there a fix to that?
Hi Mason!
Thank you so much for reading our articles!
In regards to your question, yes there is a fix to that! Have you tried checking if your warp pipes are set up properly? Make sure that the parent game object of the warp pipes is between the warp pipes. Also, make sure that your scripts in the inspector have values, especially the velocity. We also recommend checking the spawner’s transform position. Make sure it’s outside the screen area and its transform Y-position must be 0.
We would love to know more about this issue that you’re encountering so we could help you better.
Cheers!
Awesome tutorial. Just a few steps missing but nothing you can’t fix with the documentation.
Thank you.
Thanks for this! May I know where is the Scoring System Tutorial?