So you have been creating web applications using different programming languages and so far, you are not satisfied with how your application is rendering your web data.
Most applications nowadays are made with only one page and if you’re not familiar with how they’re called, they’re called single-page-applications or SPA, and these applications are mostly made with React and they are often faster compared to web applications like WordPress.
Single-page applications are often using what we call nowadays “routing” or “router” and no, we’re not talking about an internet router but a react-router.
Now the question is…
What is React-Router?
React Router is one of the most powerful and most used routing libraries for React. It is used to navigate through different webpages without making your web browser refresh which makes your application more faster and dynamic.
How to use?
Using react-router is very easy but you need to firstly install it using the following command.
npm install react-router-domNow with all that being explained, let’s start by creating a very simple project where we use react-router to navigate through different webpages.
Getting Started

Let’s start by creating a new project. Open your VS code editor and run the following command using the Terminal window.
npx create-react-app routing-appIf you don’t have visual studio code editor, then we suggest installing it to your machine as it will make your development more faster and comfortable.
After creating the new react app, we will then have to install the react-router using the following command:
npm install react-router-domOnce the installation is done, finally run the start command to see your work through your browser.
npm start
Awesome! Now it’s time for us to create the real deal.
Creating Components
The first thing we’re going to do is to modify our App.js file. So open that and update its code to the following.
import React from 'react';
import Nav from './Nav';
import './App.css';

function App() {
  return (
    <div className="App">
      <Nav />
    </div>
  );
}

export default App;
Code language: JavaScript (javascript)
Saving the code should give you the following error in your browser.

This error happened because we haven’t created the Nav component that we’re trying to import. Let’s do that.
Create a new file and name it Nav.js and apply the following code:
import React from 'react';
import './App.css';

function Nav() {
  return (
    <nav>
        <ul>
            <li>Home</li>
            <li>Blog</li>
            <li>About</li>
        </ul>
    </nav>
  );
}

export default Nav;Code language: JavaScript (javascript)
Now if you save the script, you should be able to see in your browser that a list is created.

Awesome! Now let’s created these pages.
Create a new file and name it Home.js. Then, copy the following code:
import React from 'react';
import './App.css';

function Home() {
  return (
    <div>
      <h1>Homepage</h1>
    </div>
  );
}

export default Home;Code language: JavaScript (javascript)
Then, create another new file and name it Blog.js. Then, copy the following code:
import React from 'react';
import './App.css';

function Blog() {
  return (
    <div>
      <h1>Blog</h1>
    </div>
  );
}

export default Blog;
Code language: JavaScript (javascript)
Then of course all website have their very own about page so we’ll create a file for that as well. Name it About.js and copy the following code:
import React from 'react';
import './App.css';

function About() {
  return (
    <div>
      <h1>About us</h1>
    </div>
  );
}

export default About;Code language: JavaScript (javascript)
Awesome! Now we have every page ready.
Now, if we update the code of our App.js to the following, we should be able to see the content of each files that we created.
import React from 'react';
import Nav from './Nav';
import Home from './Home';
import Blog from './Blog';
import About from './About';
import './App.css';

function App() {
  return (
    <div className="App">
      <Nav />
      <Home />
      <Blog />
      <About />
    </div>
  );
}

export default App;
Code language: JavaScript (javascript)
Like this
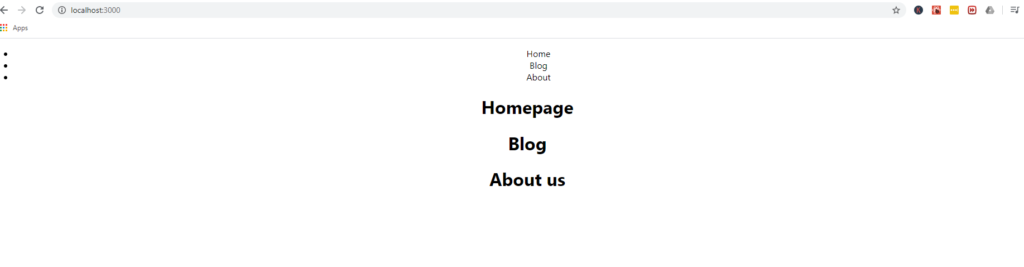
However, that’s not what we want to achieve.
We only want to display the blog page if the URL is pointing to the blog page and the same goes to the about page and home page.
This is where react-route can help us.
To use routing, what we need to do is to import BrowserRouter, Route, and Switch from react-router-dom. Then use these components to create route paths throughout our web application.
Let’s update the code of our App.js to the following
import React from 'react';
import Nav from './Nav';
import Home from './Home';
import Blog from './Blog';
import About from './About';
import './App.css';
import { BrowserRouter, Route, Switch } from 'react-router-dom';

function App() {
  return (
    <BrowserRouter>
      <div className="App">
        <Nav />
        <Route path="/" component={Home}/>
        <Route path="/about" component={About}/>
        <Route path="/blog" component={Blog}/>
      </div>
    </BrowserRouter>
  );
}

export default App;
Code language: JavaScript (javascript)
To explain the code above, we first imported the components from react-router-dom (BrowserRouter, Route, and Switch).
Then, we used the BrowserRouter and everything that is inside of this component will have the ability to use routing.
We used Route then gave it a path and indicated which component should be displayed once the URL contains the specific path. For example, if we add in the URL /about, the web application should display the about page. The same goes for other routes.
Now you might be wondering, why did we not applied a route to the Nav component? Well, the answer is quite obvious. We will be using the Nav component to navigate from homepage to about page and blog page.
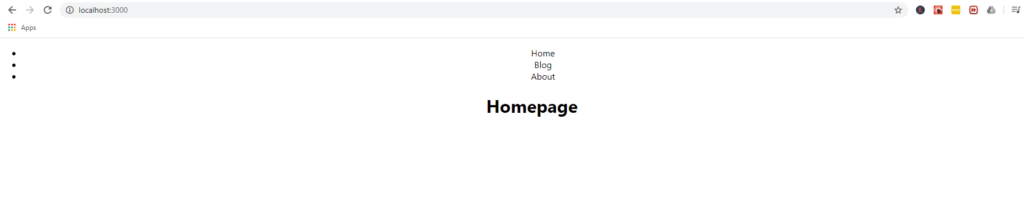
Now if you save the script, you should notice that the about and blog pages are gone. Thanks to route component, the about page will only be displayed once our URL pointed to that specific path.
So if you visit / in your browser. Only the home page will be displayed.
Awesome! Now let’s work for our Nav component because it looks really ugly.
Look for the file App.css and update its code to the following.
.App {
  text-align: center;
}

nav {
  align-items: center;
  background: #123123;
  padding: 20px;
  color: white;
}

nav ul {
  display: flex;
  justify-content: space-around;
  list-style: none;
}

nav ul li {
  font-weight: bold;
}
Code language: CSS (css)
For this stylesheet, we just need to style our navbar so it looks more decent. Later on we might edit this again for the links. We’ll see..
But for now, if you save the stylesheet, you should be able to see that our navbar looks much better.

That looks much better.
The homepage issue
One of the common issues with React-Route is when you visit the blog page, for example, it will also display the homepage.
The reason why this is happening is it basically just checks if the URL contains the specified paths in our application. For the homepage, we have only specified it to display if the URL has /and since there is a / to /blog it will both display the home page and the blog page.
So, how can we fix this?
Fixing this is actually really easy. This is where we’re going to use the Switch component.
If you’re not sure what switch does then just think of it as an if statement. If the path is /blog, then it will just display the blog page.
However, the case for the homepage is different. If we applied the switch component to our application, whenever we open the about page or the blog page, it will only display the homepage and nothing else. That’s why we will be applying the exact attribute for our homepage router.
What the exact attribute will do is it will check if the URL really only has a slash to it. If the URL contains /blog then it will skip the homepage and proceed to the blog page.
So with that being said, let’s update our App.js code to the following:
import React from 'react';
import Nav from './Nav';
import Home from './Home';
import Blog from './Blog';
import About from './About';
import './App.css';
import { BrowserRouter, Route, Switch } from 'react-router-dom';

function App() {
  return (
    <BrowserRouter>
      <div className="App">
        <Nav />
        <Switch>
          <Route path="/" exact component={Home}/>
          <Route path="/about" component={About}/>
          <Route path="/blog" component={Blog}/>
        </Switch>
      </div>
    </BrowserRouter>
  );
}

export default App;
Code language: JavaScript (javascript)
If you save your script, you should be able to browse the Blog page without displaying the home page.

Now that we’re done with the components, let’s continue and work for our navigational links. Currently, we have a navbar with items that are not clickable.
Usually, developers who are new to react, they often just add anchor tags to the nav items to make the link work but that’s not the most effective way of navigating through the website.
We’ll be using another component that is very useful and that is the Link component. Don’t worry, we don’t have to install another module because this component is already included in the react-router-dom which is very convenient.
So with that being said, let’s open our Nav.js file and update its code to the following:
import React from 'react';
import './App.css';
import {Link} from 'react-router-dom';

function Nav() {
  return (
    <nav>
        <ul>
            <Link to='/'><li>Home</li></Link>
            <Link to='/blog'><li>Blog</li></Link>
            <Link to='/about'><li>About</li></Link>
        </ul>
    </nav>
  );
}

export default Nav;
Code language: JavaScript (javascript)
So for the update above, all we did is we added the link component from the react-router-dom and used it like how you use anchor tags. However, instead of href we use to attribute to point which link we want the navbar item to lead us.
Saving the script should give you the ability to click the navbar items.

However, as you can see from the above image, the links became purple and we can barely see it now.
We can easily fix that by adding styles to it but instead of doing it through the stylesheet, let’s do it directly to our Nav.js.
Open the Nav.js file and update its code to the following:
import React from 'react';
import './App.css';
import {Link} from 'react-router-dom';

function Nav() {
  const navColor = {
    color: 'white'
  };

  return (
    <nav>
        <ul>
            <Link style={navColor} to='/'><li>Home</li></Link>
            <Link style={navColor} to='/blog'><li>Blog</li></Link>
            <Link style={navColor} to='/about'><li>About</li></Link>
        </ul>
    </nav>
  );
}

export default Nav;
Code language: JavaScript (javascript)
For the update above, we just simply created a const variable and reference it to the Link component just like how you apply style with classNames, etc.
So with all that being saved, you should be able to finally see the navbar links. Try it and see that your webpage is not loading at all.

Conclusion
And that’s all about it! You can finally create as many routers as you want using React-Router. We hope that this tutorial helped you understand how react-router works and how you can apply it to your web applications. If you are looking for a guide on how to create a responsive navbar using react, feel free to go to our blog page and there you will find a guide on how to make one.
If you have encountered any issues while you’re following this tutorial, feel free to let us know in the comments below and we’d love to help you out as soon as we can.