Search Results for: Shopify

Publishing Your Apps To Shopify App Store & Get Approved

You have finally developed your very first Shopify app and you feel like it’s time to submit your application to Shopify for reviewing and publishing. However, there is a problem… You don’t know the right steps before submitting your application.

In this tutorial, we’re gonna be looking at how you can publish your Shopify app easily and guaranteed to be approved by Shopify reviewer.

Getting Started

It’s quite obvious that before you can publish your Shopify app, you firstly need to make sure that your app is 101% ready to be published. The app’s functionality must be working with little to no bugs.

Not only that, but you should also verify that your application is following the app requirements of Shopify If you haven’t read any of those, it’s best to check if your app is compatible in the app store so you won’t be disappointed in the future.

Once you’re sure that your app is compatible with the Shopify app store. The next thing you need to do is to submit it to Shopify and we’re here to teach you how to do it step by step.

But first! Again! Double-check if your app is installing properly in your development store. Otherwise, the Shopify app reviewer will ask you to fix your installation process.

Installation Process of your App

Sadly, this is one of the common mistakes of Shopify developers. If you are not fully aware of this, whenever a merchant installs your app, Shopify will use your scripts to install your application to this merchant’s store.

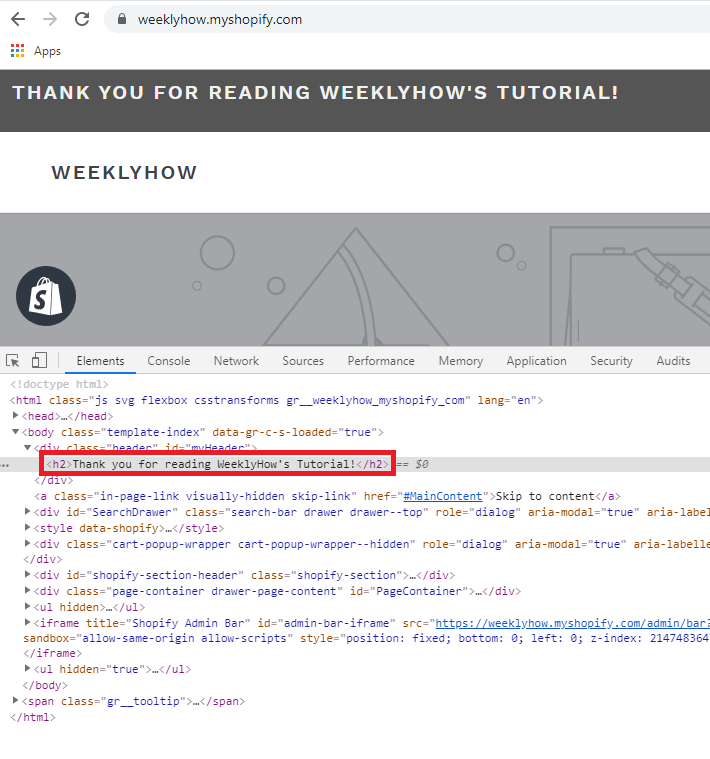
If you have followed our Shopify app development tutorial, you would have a script something like install.php, and this script is included in the whitelisted redirection URL(s) in the app setup like below.

Shopify App Settings URLs

Unfortunately, this script will never be loaded whenever a merchant installs your app. Instead, it will open the App URL and look for the index.php.

So the trick here is to add a condition in your index file that checks if this merchant’s store exists in your database. If it doesn’t then redirect this merchant to your install.php file.

$store_check = mysqli_query( $conn, "SELECT * FROM shops_table WHERE shop_url='SHOP_URL_OF_THE_MERCHANT' LIMIT 1");
if( mysqli_num_rows( $store_check ) < 1) {
	header("Location: install.php?shop=" . 'SHOP_URL_OF_THE_MERCHANT'); 
	exit();
}Code language: PHP (php)

As you can see in the example above, we used a simple MySQLi query to check our database. Then, we check if this data exists. If it doesn’t then we use the header() function to redirect the merchant to our install.php file with the shop URL of the merchant’s store.

Submitting Your App

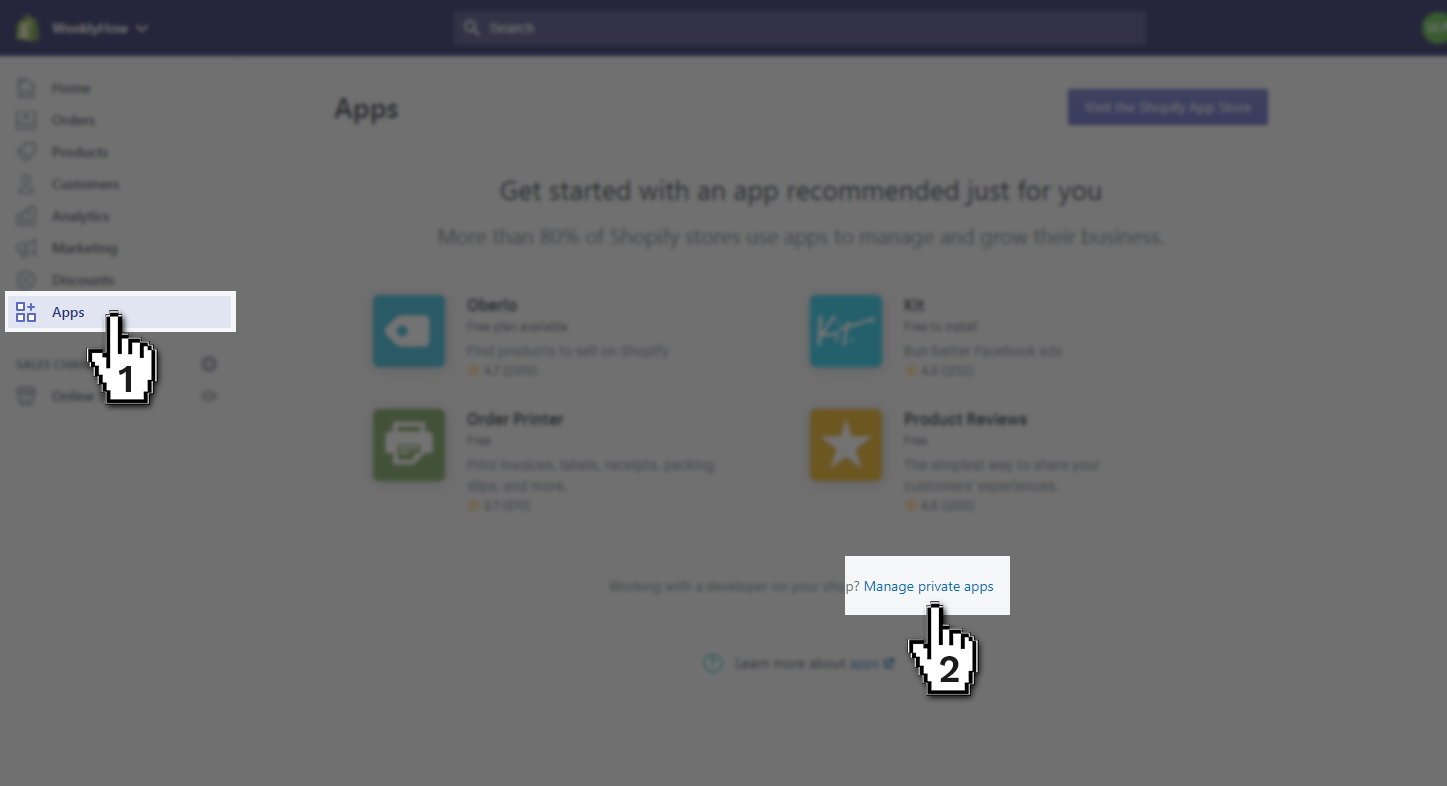
Once you feel like you have fixed all your app issues then that’s the moment we can start our app listing. To do this, navigate to your app dashboard and click on the App listings button.

Shopify app listings for app submission review

Then, once you have arrived in the app listings page, you can either use the English listing or create another listing in different language. We suggest before creating a non-english listing, you submit your app in english list first as it will expose your apps into a larger community.

Shopify app listing overview page

As you can see above, the default listing is in English and you are required to complete the listing before you can submit the app.

By selecting the English listing, you should be redirected to the listing form.

App Listing Form

Once you arrived in the app listing form, you will see a very long form that requires you to fill in. We’ll be guiding you step by step on how to properly fill the input boxes below.

shopify app english listing information

Let’s start with the listing information.

Listing information

This part is the most easiest to fill-in. All you need is the name for you Shopify app and the tagline that you want to say about your application.

App name

With app name, you can only input a total of 30 characters so it’s best to pick the perfect name for your app. We recommend picking a name with keywords that are usually used when merchants used the search box. SEO is also applied for your app name so use it wisely.

A perfect example for app name is the Free Shipping Bar by Hextom.

shopify app free shipping bar

If you look closely, the app name contains only three words yet super effective that it always gets to #1 spot of search results.

Here’s how it works:

The word free is used to indicate that this app can be used for free. Then, the word shipping is also used to indicate that this app is for shipping offers, discounts, and more. Then, of course, the word bar indicates that this app is used to display a bar on the top of the store’s page. Super easy to understand the name.

Although, we recommend you experiment with this since you can always customize this even if the app is published.

App icon

Next up is the application icon. This part is surely easy to understand. All you need is to upload a 1200×1200 image with no text at all. Making your own icons should not be that much of an issue. However, if you are lacking knowledge on how to create an image. You can contact us and we’ll work for you to create a perfect image that can surely attract new installs.

Search terms (optional)

Although this is optional, we HIGHLY recommend putting at least five search keywords to boost your exposure in the search results. Like what we mentioned before, SEO is a big part of this process so use this wisely.

App Details

Next up is the application details. This is where you describe what your application is all about. This is where you can tell why your app is better than the other apps. *wink*

Promotional video (optional)

The first one is the promotional video. This one is purely optional. You can add a YouTube link here to describe what your app is all about and what it can provide.

From our experience, adding a promotional video is not that very useful. In fact, it’s just a waste of effort and time as it don’t provide that much increase in installs.

We’d rather put more additional efforts to our images than adding a promotional video.

Key benefits

This will be the section where you describe the best features of your application. This is very useful and very effective for attracting more installs. Although adding photos are optional, we highly recommend adding eye-catching photos that represent each benefit to fully take advantage of this section.

Check the following example:

shopify app key benefits example image

For the image, it’s suggested to use 1600px by 1200px image dimension. You may download the following template for your reference.

Featured app banner (optional)

If you want your application to be featured on the front page of Shopify app store. You must create a well-made banner. This is optional. However, to increase the chance of getting well-known through the entire community, it’s best to create a banner. Who knows? Maybe you’ll get featured and get not only hundreds of new installs but also thousands of new installs.

For banners, it’s suggested to use 1600px by 900px image dimension. You may follow the guidelines on how to create a perfect banner.

Screenshots

This section is one of the most important parts of your app listing. Based on our own research, almost 89% of merchants look at app’s screenshots almost immediately after picking an application. With that being said, it’s important to pick the right screenshots of your application.

Now, you may be asking…

“What are the best screenshots for my Shopify app?”

The answer is very simple.

The first photo that you should be sharing to merchants is the result or the output when they finally installed your app. It should tell them that your app is user-friendly and easy to use. Take these screenshots as the thumbnails of your application. Make them interesting and eye-catchy. Don’t just screenshot your app and paste in the Paint and save it as PNG. Work on it. Add small details that can help merchants understand how your app works.

Always remember, your goal is to help the merchant and make things easier for them. NEVER confuse them.

There are three parts of screenshots. The first one is for desktop, the second one is for mobile, and the last one is for Point of Sale. Both mobile and Point of sale are optional but we highly recommend adding mobile screenshots since most merchants rely on mobile. So make sure your app works perfectly on mobile.

For images, the dimensions are the following:

  • Desktop: 1600px by 900px
  • Mobile: 900px by 1600px
  • Point of sale: 2048px by 1536px

The templates are also included in the file that you have downloaded earlier. Feel free to use them.

Detailed description

The detailed description section is where you provide almost everything about your application. For most application, they start their description by adding an introduction telling what the application is all about and what it can do. Then, after the introduction, provide and explain thoroughly each of your app’s key features.

The title description field allows you to use a markdown format. In other words, you can create a header/title, an ordered list, and a non-ordered list. Use this to make your description look neat and easy to read.

Never never never just create a block of long text full of paragraphs. Merchants have no time reading a letter!

Demo URL (optional)

Although this is optional, adding a demo URL can prove that your app is perfectly working especially if your app is customizing the merchant’s storefront. Otherwise, paste a URL leading to a demo page or maybe a YouTube video URL that demonstrates how the app works? That should be fine too.

Integration (optional)

If your application works with other application or devices, you can list them here.

Pricing

shopify app pricing free to install image example

This section is all about the pricing of your application.

There are three types of pricing: Free, Recurring Charge, and One-Time Charge.

If your app doesn’t charge the merchants, then you can just leave the radio-button set to Free. Otherwise, set it to either Recurring Charge or One-Time Charge. Just make sure your app is using Charge API. Although there are also a way to provide both a free plan and a paid plan to your merchants. You can do that simply with Charge API.

If you want to charge your merchants and you haven’t implemented the Charge API to your application, we highly recommend following our guidelines on how to create a recurring charge API.

Contact Information

The contact information section is one of the most important part of your app listing. This is where you provide contact numbers, email addresses, and URL addresses to help the merchants contact you in case there is an issue within your application.

Review notification email

You may enter any of your email addresses here. This email address will be receiving notifications whenever there is a review on your application.

App submission contact email

You may enter any of your business/personal email addresses here. The email address you provide will be receiving updates about the app you submitted for review. Make sure to always check this email address especially after you submit your app for review.

Sales and support

shopify app support section listing app

All of the information you provide in the sales and support will be displayed in the app listing page and will be used by merchants to contact you. So make sure you use business related email addresses and phone numbers. Be prepared because you will get contacted a lot by merchants especially if you have plenty of installs.

Tracking (optional)

If you want to track your application then feel free to add Google analytics ID and more. It don’t really matter since Shopify has its own analytics page.

Install requirements (optional)

This part is very useful especially if you want to lessen the amount of uninstalls of your app. If your app requires certain settings then you can adjust it here in this section.

App review instructions

shopify app review instructions for listing

And finally, last but not the least. The app review instructions is the part where you explain to the Shopify app reviewer how to use your application and what it should be doing. It’s important to explain everything in detail and it should be step by step.

For example, start from installations, to settings, and end to output.

Review Duration

Once you have finally submitted your app to Shopify, an employee from Shopify will start reviewing your app and this process usually takes around 2-3 days depending on how complex your application is.

You shouldn’t be scared of this process. We agree that this part takes time but if your application is working perfectly then no doubt your app will get published as soon as possible.

However, if you get a response saying that you need to fix something then that’s also good! That means you avoided getting a negative review from merchants.

Conclusion

Developing Shopify apps can be a tedious task but submitting your app to Shopify is much harder especially if your app is not meant to be submitted yet. So we suggest before submitting your app, check it thoroughly and make sure there’s no flaw at all.

If your app get rejected, don’t worry, you have a full month to respond to the reviewer for rechecking the application.

10 Most Successful Shopify Stores in 2020 [eCommerce Inspirations]

Building yourself an online business can sometimes be intimidating. There are so many things to consider and so many things to deal with, like how to make sure that you won’t get bankrupt. However, those are just the common things you tend to think of when you start a business.

So let’s just put that aside and think in a positive way. Let’s think that the online business we’re about to create will also hit the chart.

Do you have plans on building your own dropshipping store using Shopify? If so, then we have written an article for that where we will be guiding you step by step on how to build your very first Shopify dropshipping store using Oberlo. You can click the link below to start building:

We all need inspirations, like our family or loved ones, our friends, or even our competitors. In this article, we’ll be giving you the Shopify stores that you can use as your inspiration.

Find Popular Shopify Stores with myip.ms

If you’re personally looking for the best Shopify stores that are popular, you may visit Shopify’s official web blog. They provide their own top list of popular Shopify stores. However, if you actually want to see by its popularity worldwide then you may follow these steps to see the most popular Shopify stores.

  • Go to myip.ms
  • Paste this IP address: 23.227.38.32 and click “Whois Lookup”.
  • Click “Other Sites on IP
  • Now you have thousands of Shopify stores to use for your own research purposes.
  • If you want to check the most popular stores, click “View All Records”, “World Site Popular Rating

Unconditional

Unconditional's Shopify Store being simple, yet eye-catching

The web design of this Shopify store is so simple, yet eye-catching. From its header to footer, everything is simple and because of that, it’s much easier to navigate their website.

Unconditional is selling items like menswear, womenswear, homewear, and lookbooks. They describe themselves as “a winning combination of the laidback and the edgy”.

Many costumers loved their shop as well as their items due to it being well made, unique and edgy. You may use this Shopify store as your inspiration especially the store design.

SIR

SIR ecommerce sweat shirts shopify store inspiration

This is the type of Shopify store that’ll make you look for more photos. Its design is more like a fashion blog due to its big and serene photographic style in the background. When you visit SIR’s website, you will notice that there is a hoverable button over images which redirects you to the product page. This strategy will increase their sales more and if you’re planning on making a clothing store, then this could also help you get more sales.

Partake Foods

Best shopify store for food niche

There’s definitely not much Shopify stores that is under the food niche. If you’re looking for a inspiration related to selling foods, then Partake Foods is one of the good Shopify stores to look up to. Partake offers mostly cookies in different shapes and flavors.

If you like cooking, then this is the best time for you to sell your masterpiece online!

Milk

Best Shopify store for baby clothes

This Shopify store offers clothes for babies and kids. Its store design is adorable and that’ll make the costumer look for more items.

Using this Shopify store as your inspiration, especially if you are in the same niche. It will absolutely attract costumers like parents and grandparents.

NCLA Beauty

Best Shopify stores for nails and beauty

NCLA was founded in 2008 in Downtown Los Angeles with an offering of the best quality of nail products and other cosmetic products, such as jelly balms and lipsticks. They won so many awards and had so many celebrity customers like Kylie Jenner, Madonna, Nicki Minaj, Ke$ha, Paris Hilton, and many more. They’re one of the most successful Shopify stores in the beauty category and I would say that if you’re looking for some good inspirations, NCLA Beauty is a good choice for that.

Argent

Best Shopify stores for clothing jackets and blazers

The mission of this Shopify store is to make women look and feel great when they’re at work. Their blazers and jackets are very eye-catching and that makes their store design more attractive.

The CANDI Factory

Best Shopify store for underwear clothing

I would say this Shopify store is worth mentioning here. Their store design is very minimal and it blends well with their products. The only thing I would recommend here is by not making your logo that big because Shopify stores are supposed to sell products, not logos. All in all, the rest looks awesome.

Chubbies

Best Shopify store for shorts and swimwear

This Shopify store is absolutely fantastic. It got a very trendy design that made its way to the list of top 10 exceptional Shopify stores to inspire you.

All we can say is, their creative store design never failed to amuse me. So if you are into a grid-style layout, Chubbies could be your perfect inspiration.

Jeffree Star Cosmetics

Best Shopify store for beauty cosmetics by Jeffree Star

If you don’t know who Jeffree Star is, He is an American make-up artist, fashion designer, model, and a content creator on YouTube. If you’re interested in seeing him, you may follow him online.

I have really no words on how to describe this Shopify store beside it being absolutely fantastic and eye-catching. The colors in this Shopify store really fits its brand, so if you’re in the same category, using colors will absolutely make your Shopify store stand-out.

I still don’t have a store. How do I make a Shopify store?

So you finally have inspiration but you still don’t have a store? Well making your own Shopify store is pretty easy and can be done in less than 15 minutes. You may follow these steps to guide you through.

  • Sign up for Shopify account. (Choose free trial if you’re just starting out. This way, if you feel like it’s not worth an upgrade you can just stop using it. Shopify offers a 14-day trial for FREE)
  • Enter your email address, this should show you a form like below.
Get 14 day trial of Shopify for FREE
  • After clicking Create your store, tell Shopify about the store your about to create. Tell if you’re already selling and How much revenue you’re currently making.
  • After clicking next once again, fill in the form about yourself and your default business address.
  • That’s it! You have created your Shopify account, though you will receive an email regarding your signup and you need to complete your registration by clicking the button provided in the email.

How many Shopify stores are successful?

There is definitely no exact number of ‘successful’ Shopify stores. How do you define a successful Shopify store? When a store earns a thousand dollar profit? Half a million? or more?

If that’s the case then there’s probably only 20% of Shopify stores that earns that much of a profit.

Not so much right?

Well there are many reasons why a Shopify store could fail:

  • Merchants don’t have any idea how and what to sell
  • Started with almost no capital
  • Not doing enough work or research
  • Joined hoping for a quick success

Conclusion

Looking for inspiration is not a bad thing. In fact, it keeps you active to work on your own Shopify store. But let’s not forget the fact that being unique from the rest of these stores by making yourself your own design or style will absolutely help you be remembered by costumers. So go ahead, make your own branding that will make your costumers not forget you.

Though if you’re looking for themes that could save you a lot of time, you may follow Shopify’s store. They sell hundreds of Shopify themes that could make your store look like one of the stores that are featured in this article.

20+ Best Shopify Apps To Grow Your Sales in 2020 [Free To Use]

There’s no doubt that Shopify is one of the best e-commerce platforms to make online stores and retail point-of-sale systems. It is so complete that it lets you grow and manage a business wherever you go.

Shopify lets you sell on any platforms as well like social media, marketplaces, blogs, or even in person. All you need to do is to build your own store and publish it to the public for viewing.

But is that really the only thing you need to do to make a Shopify store? Of course not, you still have to do marketing strategy and do lots of research to successfully attract customers and earn sales.

There are also too many Shopify apps that you can use to improve your Shopify store. Apps that can potentially increase your sales and customers. That’s why in this article, we’ll be giving you the best Shopify apps that you can use to improve your store, increase your sales, and attract more potential customers.

We’ll be breaking this down into categories so you know exactly which app to use to improve your Shopify store.

  • Marketing, SEO, and Promotions
  • Customer Support
  • Store Designs

Shopify Apps For Marketing, SEO, and Promotions

Promoting a Shopify store is something that everyone is doing. Not only it increases your sales but it also expose your store to any platform that is available only. Here are the Shopify apps that you can use to increase your sales.

Free Shipping Bar by Hextom

Shopify App, Free Shipping Bar by Hextom Inc, Offer free shippin

I will put Free Shipping Bar by Hextom in number one because it’s also one of my favorites. A lot of customers today are expecting products to be shipped for free. Especially if they reached a certain amount of money in their cart. Free Shipping Bar lets you adjust this amount. Let’s say the goal $80, when they reached that amount, they will get free shipping.

According to recent data, 88% of consumers would be more likely to shop at a site that provides free shipping.

Free Shipping Bar Features

  • Customizable Free Shipping Bar display
  • Displays progressive messages as the customer increase the items in their shopping carts
  • Shows Congratulation message when the customer gets free shipping offers
  • Statistics for each bar to know which one generates sales the most
  • Lots of FREE bar templates to choose from

Free Shipping Bar Advanced Targeting Features

  • GeoTargeting, You may set different goals depending on locations. For example, you may set the goal for only $50 for the United States, and in Australia, the goal can be $70, and so on.
  • Limit where you display the bar, you may display it on the home page only, item page, or in the cashout page. You may also give a custom URL. As long as it’s not external links.

But do you know what’s best with this app? This app is FREE and will never show its company logo in the bar because they know it will look unprofessional.

Instagram shop by Snapppt

Add multiple products to each image

Instagram is one of the biggest social media ever and fashion bloggers are mostly found in this platform. So why not use Instagram shop by Snapppt to increase your sales while the customers browse your photos?

How Instagram Shop works?

  • Connect to Instagram to automatically fetch images from your feed
  • Link images with your products using Snapppt’s plug-n-play Shopify store integration. Now, anyone can shop for your products.
  • Embed shoppable galleries and carousels directly in your store and product pages or, if you prefer to copy & paste your personalized URL to link to your Snapppt page in your bio link.
  • Your customers and your orders will appear in your shop dashboard, exactly as you’d expect. Purchases made as a result of a customer seeing your Instagram images are tracked all the way to the checkout so that you can see your best-performing images and the purchases they inspired. Customers no longer need to hunt down the things they saw in your Instagram feed in your store as each Instagram image is now linked with a ‘Buy’ button.

Consistent Cart by Cart Kit

Use social proof Shop Pop widgets to increase conversions fast.

Consistent Cart is the app you should really give a try. It maximizes your marketing without being charged by ad agencies, SEOs or designers. It can also boost your sales up to 300% without spending any cash on ads.

Consistent Cart Features

  • Facebook Messenger Marketing
  • Add to Cart Popups
  • Push Notification Marketing
  • Cart Syncing across devices
  • Activity Monitor
  • Happy Birthday Emails
  • Customer Thank You Emails
  • Abandon Cart Campaigns
  • Real-Time Sale Pops
  • Advanced Title Bar

PushOwl Web Push Notifications

Create custom push notification buttons for your store

There are times that a customer leaves a store with their items inside their cart, and this could lead to a loss of a huge amount of revenue. But, with PushOwl Web Push Notifications. It will help you remind your customers about their abandoned cart through push notifications. No more losing revenue!

Push Owl Features

  • Very easy to use
  • Abandoned cart reminders, helps to recover the items that were left behind by the potential customers.
  • Price drop push notifies the customers that the price of an item drops.
  • Back in stock push notifies the customers about an item having stocks once again.
  • Shipping push notifications notify the customers about their items being delivered
  • Welcome push notifications
  • Flash sales notifications

With Basic PushOwl, you may only have 500 impressions. But you may upgrade to 10,000 impressions with business type for only $19/month.

SMSBump SMS Marketing

Powerful Analytics. Track everything important

SMS Bump is Shopify’s most loved text marketing and automation app. With more than 300+ Shopify Plus clients, 1000+ Shopify Advanced and more than 5000 SMEs use SMS Bump to fully automate all notification and marketing processes in their stores.

Create SMS and Text with image marketing campaigns in seconds and track results. Fully TCPA and GDPR compliant. Integrates with major Shopify apps such as Klaviyo, MailChimp, ReCharge, Smile.io, PushOwl, ReCart and many more.

Download SMS Bump for FREE, set up in less than 5 mins and join 5000+ Shopify stores averaging a 35x increase in ROI.

Text marketing and automations

  • MMS support – Boost conversion by sending Image (PNG) or GIF SMS to your clients (US only)
  • SMS Segmentation – Combine Shopify filters for more narrow targeting
  • Run A/B Testing. Run different variants of a SMS message and measure performance
  • ROI Powered Text automations including Abandoned Cart Reminders and Customer Reactivation
  • Integrates with Shopify Flows
  • SMS Automations (On new order, based on the payment method, on shipped order and many more
  • Full support and tracking of Shopify discount codes + individual discount codes
  • SMS campaign scheduling
  • Opt out lists – keep track of unsubscribed clients
  • + Many more

Features

  • Send messages just the right time – Launch campaigns or send automations based on your customer’s local timezone, wherever they are
  • Quiet hours – Input quiet hours based on your store timezone which guarantees that your clients would not be woken up in the middle of the night by a text message
  • Country restriction – Send messages only to a certain countries
  • Max cost per text message – Optimize your costs and do not send SMS messages above a certain threshold
  • Emojis – Spice up your campaigns

Analytics

  • Detailed In app Analytics – Track orders, link clicks, SMS by country, conversion rate, amount spent, specific automation stats, campaign stats, Image SMS, GIF SMS special tags and many more
  • Google UTM tracking

How to build your Text Marketing subscription list?

  • Make a small change in your checkout language (complimentary for all users + video tutorial included)
  • Use built-in subscription form generator (or use our integration with JustUno or Privy)
  • By texting a special SMS textword/keyword to our US shortcode (US users only)
  • Best Practices, where we detail how to get the most of text marketing and automations as well as sharing TCPA, CTIA, GDPR compliance

Privy ‑ Exit Pop Ups & Email

Easy to Use Drag & Drop Editor

What I do love about Privy is that it effectively convert website visitors into subscribers and customers. Unlike other marketing apps, Privy gives you unlimited pop-ups, flyouts, spin to win (one of my favorites) and more.

Privy Features

  • Customizable, mobile-friendly display types including popups, spin to win wheel, banners, flyouts, scroll boxes, announcement bars, & embedded forms for email collections
  • Single-use, and bulk coupon code integration. Surface coupon codes in popups, or in email autoresponders
  • Target campaigns based on exit, cart abandonment, cart value, scroll, timer, location, device type, page, number of visits, number of orders, referral site, language & more
  • Run automated A/B split tests to understand how small changes impact conversion rates
  • Add ‘free shipping’ bars to any page
  • Send autoresponders & reminder emails to turn signups into sales
  • Run upsell models with add to cart buttons
  • Use Privy’s Automate plan to send newsletters, remind customers with their abandoned cart & send follow up emails
  • Seamlessly sync new contacts to more than 50 email marketing services like MailChimp, Klaviyo, Bronto, Conversion & more

Shopify Apps For Customer Support

Using Shopify apps to provide customer support is one of the important things that you should provide to your customers. It will build loyalty and it will increase customer satisfaction. So don’t hesitate to install one of the recommended Shopify apps for customer support.

Easy Contact Form

Zotabox Contact Form

Upgrade your customer support with our responsive and embeddable Easy Contact Form. Your customers can quickly and easily contact you privately on your website. Add fields and mark them optional or required. Premium versions include custom background images.

Easy Contact Form Features

  • Add a beautiful background image and impress your customers
  • Customize Templates for Customer Reviews and Feedback
  • Add custom fields and departments, attach image and auto-respond incl in our premium version
  • Multiple Forms also available with our premium option
  • Embed or Stand-Alone options
  • Secure with Ajax and HTML5 technology
  • Loads asynchronously. Won’t slow down your website
  • No coding needed. Easy Installation.
  • Mobile friendly

Easy contact form provides 30 days money back if you think that it’s not worth the money. But they also provide Free Plan if you don’t want to spend money.

HelpCenter by Vertex LV

Every Shopify store should provide an FAQ page. since most of the customers will have questions about shipments, mode of payment, etc. Shopify stores should also have a nice and easy-to-navigate FAQ page.

HelpCenter will help you with that.

With HelpCenter app you can:

  • Create an easy-to-navigate and searchable FAQs page.
  • Publish Searchable Articles, Sections, and Categories.
  • Let your customers submit questions they can’t find the answers to.
  • Make your FAQs page look solid and professional.

Why You should use HelpCenter app:

  • You’ll save lots of your Support Team time.
  • You will be able to provide instant help to your customers without supporting an expensive live chat.
  • You will have a solid, attractive, and branded FAQs page.

Upcoming Features:

  • Multiple Customizable Layouts
  • Prepared Most Frequently Asked Questions Drafts
  • Pre-made Themes and Easy to Use Custom Styling Options

AfterShip ‑ Track & Notify

AfterShip is trusted by Shopify sellers to engage customers with a branded tracking experience. Start with their free plan to provide a better post-purchase experience!

Keep your customers updated on the whereabouts of their orders until delivery through an intuitive, customized tracking page and automated notifications.

  • Engage Customers with Branded Tracking Page – Build your own tracking page to include product marketing banner and Instagram image feeds to impress, engage and upsell your customers. You can also upload your logo and customize the color scheme to conform to your brand identity.
  • Improve SEO Ranking & Site Traffic – Replace the carrier’s tracking link with our auto-generated link to drive traffic to your site instead of the carrier’s site. Improve SEO and increase organic search.
  • Eliminate Customer Frustration – Assure your customers that their order is on the way and give them an estimate of the delivery time. Remember, if an order goes undelivered and a complaint goes unanswered, frustrated customers often resort to writing a review to let you and others know.
  • Monitor All Shipments in One Go – Track and check delivery status in the same place so that you can take remedial actions immediately before upsetting a customer.
  • Reduce Customer Inquiries & Complaints – Reduce customer inquiries on order status by enabling customers to look up order status by order number+email or tracking number anytime. At the end of the day, happy, engaged customers are the most effective tool for marketing your e-commerce business.
  • Notify Customers Before They Ask – Tell your customers where the order is and when it arrives at their door in a timely manner via automated email or text notifications.

Tidio Live Chat

Support for Live chat, Messenger and Email

If you’re looking for a free tool that would increase your customer’s satisfaction, and at the same time boost your sales, then Tidio Live Chat is what you’re looking for.

Tidio uniquely merges live chat, Bots, and Marketing Automation to meet the expectations of the most demanding Shopify store owners.

Tidio Live Chat Features

  • Fast Contact – By adding Tidio Chat to your store you empower your customers with the quickest and most effective form of contact. Research shows that live chat can boost sales by as much as 40%. Next time your customer faces an issue, they won’t go to the competitors or waste time — they’ll contact you.
  • Auto-Bot Response – Nobody can be available 24/7. Except for Bots, that is! Bots automatically reply to 43% of the most popular inquiries.
  • e-mail and Messenger integration – How many times have you missed a customer’s message that was sent through a channel you haven’t been checking frequently? In Tidio, you’ve got all your channels in one place — you’re always able to reply to messages. If you’re often away from your computer, Tidio will give you a free mobile app.
  • A modern widget design that suits any website – When designing the widget, it was our goal to make it gorgeous and suitable for any website. Dozens of thousands of sites that use Tidio have shown us that we’ve done a good job. You can adjust your own widget to the colour scheme of your store.

Other recommended Shopify apps:

Shopify Apps For Store Design

Store design is one of the components that you should consider improving as well. Customers first impression is important. Like the old saying: “It is the first impression that lasts forever, so make it count’. “

You can use the following Shopify apps to not only improve your store design but also optimize them for fast loading.

Free Trust Badge

payment badges for shopify

In e-commerce, you have less than three seconds to build trust with a potential buyer and one of the easiest ways to increase conversion rates for your store is to add a set of payment processor icons.

Displaying payment badges is one of the most proven ways to build trust during the customer sales journey.

Free Trust Badge Features

  • Brand new premium version – Unlock 250+ premium badges including full-color and credit card payment badges. You’ll also be able to add your badges to your homepage and cart page to build trust through the sales process. Upgrading to premium is an affordable one-time payment that gives you lifetime access to the premium version of the app.
  • Simple setup in just two minutes – Very easy to use with no technical skill needed. Just install, choose your badges and that’s it.
  • Fully customizable – Match your payment badges perfectly to your store’s design. You can customize the message, colors, alignment, size and much more.
  • TOP QUALITY SUPPORT – They are 100US-based and looking forward to helping you. Their passion is helping Shopify store owners grow their businesses and understand the importance of fast, reliable customer service.

Stamped.io Reviews

Display widgets to Showcase reviews everywhere

Stamped.io Reviews has proven to increase social proof that leads to an increase in sales. It also boosts your organic traffic by optimizing SEO, showcasing star ratings on products and collections page in Google search, increasing site ranking.

Marketing & Upselling

  • Facebook Reviews Tab
  • Smart Product Recommendations
  • Incentivize Coupon for Writing Reviews or Sharing Reviews
  • Facebook & Instagram Reviews Retargeting Ads
  • Social Push reviews to drive traffic from Facebook and Twitter

Boost your organic traffic

  • SEO-optimized Widgets for Reviews and Q&A
  • Showcase star ratings on Product & Collections pages in Google Search, increasing site ranking
  • Showcase reviews in Google Shopping to boost CTR
  • Instant loaded reviews (inline-HTML) increase page speed

Fits your brand

  • Emails and reviews widgets are 100% Customizable to fit your brand
  • Custom Forms, add attributes to Customer’s reviews profile (e.g. fit, age, waist, etc)
  • Email Sequence personalize reviews email subject, reviews message, layout, and intervals

Advanced Options

  • Liquid Support
  • Product Groups Reviews
  • Anonymous reviews
  • Blacklisting
  • Reviews moderation and commenting
  • Multi-lingual
  • Reviews Syndications across multiple stores
  • Custom Redirect URL on reviews submission
  • Reviews Insights & Sentiment Analysis (A.I. powered)
  • Reviews filter and Custom Form
  • Point-of-Sales support
  • GDPR Compliant

Infinite Options

Let shoppers personalize products with dropdown menus, text and number inputs, checkboxes, radios, and more. Infinite Options is 100% free! No watermarks, gimmicks, or surprises.

Infinite Options Features:

  • Easily add an unlimited number of product customizations to your products so you’re not restricted by the normal 3 option limit
  • Control over placeholder and default values
  • Set fields as optional or required
  • Product bundling functionality allows you to add additional charges for services or add-ons offered with your products
  • Dropdown menus and checkboxes can be set up to allow multiple selections
  • Show a live count of remaining characters when you set a maximum character length
  • Numeric fields can have minimum and maximum values
  • It’s easy to get up and running in just 1 minute with only a single line of code to paste in your theme.
  • Bundle add-on products to your option selections to increase prices. Need a $5 gift wrapping surcharge? How about $15 for rush processing? Infinite Options makes this easy!

Other recommended Shopify apps:

What The Coronavirus (COVID-19) Means For Shopify Dropshippers

We are quite sure that you have heard about the Coronavirus and how in danger we are at this point.

Unfortunately for everyone, the reality is that it is spreading very quickly and will keep on spreading until a vaccine is created.

If you are not aware, we are getting more than 11,000 cases per day and it’s growing fast.

Due to all of this, stock markets went down globally and it is affecting almost every business.

This is a very sad truth including for us as we are under the eCommerce business.

But…

What does this really mean for you and for your business?

Before we get into that, let’s make this one thing very clear.

Do NOT exploit the pandemic

It’s very sad to say that we are seeing quite a lot of businesses that are exploiting this pandemic as well as the fear of mankind.

coronavirus covid 19 basic needs face mask toilet paper hand sanitizer

What we mean by this is that supplies around the globe are running low including face masks, hand sanitizer, isopropyl alcohol, toilet paper, and other necessities.

We are seeing a lot of dropshippers buying them and then reselling them on their Shopify stores.

What’s worse is that they are marketing it with Facebook ads and price them not only twice, but 50x higher.

This is not what dropshippers should be doing… and so does you.

If you are planning on making a store for the same reason, well, it’s sad to say but this is not only wrong but also very short-term. Yes sure, you can make a quick buck out of this situation but it won’t last forever.

You are better off spending your time on something else that can actually last for a very long time like other niches.

So what does the Coronavirus really mean for Shopify dropshippers?

Well, obviously…

Businesses are going down for a while

If you try, or if you are able to walk around your city, you probably would see that most businesses are closed except pharmacies and groceries. Of course, these businesses are important to be always open especially for this kind of situation.

With all that being said, other businesses are going to lose profit for a little while until the situation gets better.

What about for website owners?

Well…

Website traffic may go down for the most industry

You are probably thinking why is this the case when people are in their home self-quarantining themselves. There should be a spike in traffic since they will have more time to browse the internet.

The truth is, only the following industry will get the benefit of this pandemic.

  • Healthcare
  • Media
  • Food
  • Finance

…and the rest is surely going to go down.

coronavirus covid19 traffic growth

As you can see in the graph above, most industries went down especially the travel niche.

This is gonna be the case for most industry and the only thing we can do at this point is to keep our businesses online.

What can you do at this point?

If you are a Shopify dropshipper and you sell products that don’t really have relativity to the situation then it’s safe to say that you can still continue your business.

Sure, the stats may go down but surely there are still customers roaming around the internet.

We suggest checking your marketing analytics and see if your ads (if any) are still working or not.

If not, then it’s best to keep your expenses low for a while until the situation gets better.

Taking advantage of the economic downturn

During this pandemic, most businesses will go down and you will find that they will either get bankrupt, bought out, or bailed out by the government. Some businesses may be able to cut costs to pay their bills, but for most businesses, it will be hard to say.

If you are lucky enough, you may be able to purchase a business as this is the best time to buy out other companies. If you are planning on doing so, we suggest looking out for media companies or health companies.

Conclusion

With all of this happening around the world, we are hoping that the Coronavirus or COVID-19 passes away soon.

For the moment, please try to not socialize with others or to go into any crowded places.

And of course, keep your hands clean and avoid touching not only your face but also the things that could possibly have bacteria.

And for the businessmen and women, try to double down and avoid being afraid of what’s happening to your business.

Everything will be back to normal soon.

PS: We have written a complete guideline on how to set up a profitable Shopify store that can give you new ideas and who knows? maybe you’d profit out of it while the crisis is happening.

How To Implement Recurring Application Charge API To Shopify Apps

Did you know that you can earn money when you develop Shopify apps? Yes, you can!

When you create Shopify apps, you’re obviously allowed to either charge your users only for one-time or monthly. You can even not charge them at all.

You can do this by implementing Billing API which is divided into four different API resources:

  • RecurringApplicationCharge
  • ApplicationCharge
  • UsageCharge
  • ApplicationCredit

In this article, we’ll be focusing more on implementing monthly charges to users who use your Shopify apps which of course we’re talking about RecurringApplicationCharge.

But…

before we go deeper into that topic. Let’s understand first…

What is Billing API?

Billing API is an API used by Shopify apps for collecting a one-time charge, a fixed monthly fee, or a monthly fee based on the usage of the users.

Like what we have mentioned before, Billing API is divided into four API resources:

  • RecurringApplicationCharge which is used for charging users every 30-days;
  • ApplicationCharge used especially by apps that provide free-trial then charge a one-time payment after the trial ended;
  • UsageCharge used for charging users depending on their usage, and
  • ApplicationCredit is used for future purchases inside the app hence the name ApplicationCredit.

There are several reasons why you should use Billing API for charging your users.

  • The payment appears directly on the merchant’s Shopify invoice. They don’t have to enter their credit card details to pay for the apps.
  • Higher conversion rates because payments come directly from Shopify.
  • Tax is 100% correct and charged automatically
  • Lastly, Shopify handles all the chargebacks.

How it works?

When you implement Billing API to you Shopify apps, the API usually process in the following flow:

01


Triggers the Billing charge

This can be done by the merchant either by installing the app or by clicking on a button.

02


The app creates the charge

The app will create the Billing which can be either one-time charge or recurring charge.

03


Shopify verifies the charge

Shopify will verify the charge created by the app and once verified, Shopify will redirect the merchant to the confirmation_url

04


Merchant confirms the charge

If the merchant confirms the charge, he/she will be redirected to the return_url  specified in the API. Otherwise, notify that the charge was declined.

We have a Shopify App Development Course! Be one of the first students!

Are you looking for an in-depth guide on how to create Shopify apps? Click the enroll button to get started!

Implement Recurring Billing API

Creating a charge using the RecurringApplicationCharge resource is very easy and it takes just a couple of lines of codes to be able to create a charge.

If you have been following our Shopify app development tutorial series, you have the advantage of learning this course much easier because we’ll be using the very same method as before.

Read moreHow to build Shopify apps in 10 minutes

Creating Recurring Application Charge

In this course, we’ll assume again that you have followed our Shopify app development course and you’re using the very same files like ours.

To start, open your index.php file and add the following HTML code.

<hr>
<strong>Aha!</strong>
<p>You're still using our free trial. Click the upgrade button below to have access to more awesome features!</p>
<a href="upgrade.php?<?php echo $_SERVER['QUERY_STRING']; ?>" target="_blank">Upgrade</a>
Code language: HTML, XML (xml)

To help you catch up. This is our full index.php file. Feel free to copy it. Just make sure to replace the value of $token and $shop variable.

<?php
require_once("inc/functions.php");

$requests = $_GET;
$hmac = $_GET['hmac'];
$serializeArray = serialize($requests);
$requests = array_diff_key($requests, array( 'hmac' => '' ));
ksort($requests);

$token = "xxxxxxxxxxxxxxxxxxxxxxxxxxxxxxxxx";
$shop = "weeklyhow";	//change this to your store subdomain.
			//for example:
			//test-store.myshopify.com
			//your $shop variable is:
			//test-store

?>

<!DOCTYPE html>
<html>
<head>
	<title>Shopify Example App</title>
</head>
<body>
	<h1>Shopify App Example by WeeklyHow</h1>
	<hr>
	<strong>Aha!</strong>
	<p>You're still using our free trial. Click the upgrade button below to have access to more awesome features!</p>
	<a href="upgrade.php?<?php echo $_SERVER['QUERY_STRING']; ?>" target="_blank">Upgrade</a>
</body>
</html>
Code language: PHP (php)

Next, we’re going to create a new file.

Name it upgrade.php

We’ll do the very same thing here:

  • Require the functions.php
  • Get the $_GET variable
  • Get the hmac
  • Declare $token and $shop variables.

Your upgrade.php file should also look like this:

<?php
require_once("inc/functions.php");

$requests = $_GET;
$hmac = $_GET['hmac'];
$serializeArray = serialize($requests);
$requests = array_diff_key($requests, array( 'hmac' => '' ));
ksort($requests);

$token = "xxxxxxxxxxxxxxxxxxxxx";
$shop = "weeklyhow";

?>
Code language: PHP (php)

Next, we’re finally going to create the Billing API object. To do that, we’ll use the following code.

$array = array(
	'recurring_application_charge' => array(
		'name' => 'Example Plan',
		'test' => true,  //remove this line before sending to app store
		'price' => 15.0,
		'return_url' => 'https://weeklyhow.myshopify.com/admin/apps/exampleapp-14/?' . $_SERVER['QUERY_STRING']
	)
);

$charge = shopify_call($token, $shop, "/admin/api/2019-10/recurring_application_charges.json", $array, 'POST');
$charge = json_decode($charge['response'], JSON_PRETTY_PRINT);
Code language: PHP (php)

Make sure to copy the code above and write it below the $shop variable.

Next, once the code above is processed successfully, our $charge variable will give us a confirmation URL that we can use to redirect our users to the payment confirmation page.

To do that, we can use the following code:

header('Location: ' . $charge['recurring_application_charge']['confirmation_url'] );
exit();
Code language: PHP (php)

And that’s it! We can now save the scripts and see the results.

Shopify App example by weeklyhow

There’s our result! Now, if we click the upgrade link, we should be redirected to the payment confirmation page like below:

Billing API recurring application charge tutorial

If in case you received an error like below, that means you’re using a development store or your billing API is not on test mode.

Billing API application charge upgrade your account error

To successfully create a charge. Make sure you test the app with your upgraded Shopify store.

Activating the charge

If the merchant accepts the confirmation and paid your app for the monthly subscription, you need to activate the charge so the merchant can enjoy all the benefits awaiting for the merchant.

To do that, we’re going to modify our index.php once again and add the following code. Just below the $shop variable.

if( isset($_GET['charge_id']) && $_GET['charge_id'] != '' ) {
	$charge_id = $_GET['charge_id'];

	$array = array(
		'recurring_application_charge' => array(
			"id" => $charge_id,
		    "name" => "Example Plan",
		    "api_client_id" => rand(1000000, 9999999),
		    "price" => "1.00",
		    "status" => "accepted",
		    "return_url" => "https://weeklyhow.myshopfy.com/admin/apps/exampleapp-14",
		    "billing_on" => null,
		    "test" => true,
		    "activated_on" => null,
		    "trial_ends_on" => null,
		    "cancelled_on" => null,
		    "trial_days" => 0,
		    "decorated_return_url" => "https://weeklyhow.myshopfy.com/admin/apps/exampleapp-14/?charge_id=" . $charge_id
		)
	);

	$activate = shopify_call($token, $shop, "/admin/api/2019-10/recurring_application_charges/".$charge_id."/activate.json", $array, 'POST');
	$activate = json_decode($activate['response'], JSON_PRETTY_PRINT);

	print_r($activate);
	
}
Code language: PHP (php)

The code above will simply check if the Billing API has successfully provided a charge_id. If so, then we create an array of data to pass onto the next API call which will activate the charge.

Make sure you replace the value of the return_url with your development store URL or if you are using a database, just retrieve the merchant’s store URL.

By saving and running your Shopify app, you should see the following.

Billing API recurring application charge tutorial
Recurring Application Charge API for Shopify Billing API tutorial PHP

Not only that, but you will also receive an email that says your charge is approved which is awesome!

Test charge email for Shopify recurring charge API tutorial PHP

Conclusion

Congratulation! Now you can earn money with your Shopify app. But wait a minute, what’s the next step? After activating their subscription, how can I give the merchants the benefits of paying for the app?

The answer is very simple. Just verify if the merchant’s subscription is currently active. If it is, then the app should provide more features. Otherwise, give only the features that are only available for non-paying merchants.

Database is your friend here.

Using database, you can store their subscription’s status and there you can check if the merchant’s subscription is active or not.

We have written an article that can help you integrate your Shopify app with MySQL database.

How to Display HTML in Shopify Store with Shopify App (Script Tag)

We have a Shopify App Development Course! Be one of the first students!

Are you looking for an in-depth guide on how to create Shopify apps? Click the enroll button to get started!

If you’re a Shopify Developer, you might not know that one of the most powerful features of Shopify is the script tag API. It’s an API that allows Shopify apps to import javascript files to give more custom features for Shopify stores.

For example, you’re planning on creating a Shopify app that displays a coupon code. Some themes don’t provide that feature but you can do that by adding a script tag with a source URL coming from your server and that script has a callback function that communicates with your Shopify app to get the coupon codes from the store’s database.

Sounds too complicated? Don’t worry, we’ll explain this further so keep on reading.

Getting started

Whatever you’re trying to build, the script tag API will give you a way to add your javascript to your customers’ Shopify stores without making them import your script files manually.

In this tutorial, we’ll learn everything you need to know to be able to build a Shopify app that displays an HTML code in the storefront. We’ll also cover all the things that you can do to control your customer’s front store using pure JavaScript and HTML/CSS.

Also, we’re going to assume that you already have your Shopify app created using PHP and Shopify Repository by Nyalex so if you don’t have a Shopify app yet, we recommend you to learn how to create a Shopify app from scratch.

What is Script Tag?

Just like any other Shopify API, script tag is an API object that you can create, update, and delete on the Shopify store. It might seem a little confusing especially if you’re familiar with the other type of script tag which is enclosed with angle brackets (also known as <script>).

So to clear things up, script tag in Shopify is an API object and script tag in HTML is a code for sourcing a javascript file.

If you have questions, don’t hesitate to ask it out in the comments below and we’ll answer that as soon as we can.

Alright, so let’s proceed.

The first thing we need to do obviously is to create a script tag using Shopify API. However, there are two things that you need to do first before you can successfully create a script tag.

  • Ask a permanent access token with write_script_tags scope / permission
  • Create a javascript file for sending to Script Tag API

Video Tutorial

If you prefer to watch video tutorials, you may click this video

How to use Script Tags

The following are the step by step guide on how to use script tags in Shopify.

Installing Script Tag

Now, let’s assume we have the following install.php script.

<?php
// Set variables for our request
$shop = $_GET['shop'];

$api_key = "ASSIGN YOUR API KEY HERE";
$scopes = "read_orders,write_products";
$redirect_uri = "http://YOUR-DOMAIN-NAME.COM/generate_token.php";

// Build install/approval URL to redirect to
$install_url = "https://" . $shop . "/admin/oauth/authorize?client_id=" . $api_key . "&scope=" . $scopes . "&redirect_uri=" . urlencode($redirect_uri);

// Redirect
header("Location: " . $install_url);
die();
Code language: PHP (php)

The PHP script above is a basic example of installing Shopify app to your customers.


As you can see, we have the $_GET variable for Shopify store URL and the API key which you can retrieve from your Shopify Partner dashboard under the app credentials.

Where To Get the Shopify App Credentials - Shopify Partner Dashboard

Now, we have the $scopes variable.

This variable contains a string which is required for asking very specific permissions to Shopify stores. For example, you want to create a Shopify app that will retrieve all the products. Then you may use the read_products scope.

To be able to add scripts to your customer’s store, you need to use the scope write_script_tags.

In your install.php file, update the scope variable to:

$scopes = "read_orders,write_products,write_script_tags";
Code language: PHP (php)

Keep in mind that there must be NO spaces in the string.

List of Shopify API Access Scopes

To successfully access the Shopify API, you are required to ask your customers for permission to allow you to access their resources. You may use the following authenticated access scopes for that.

read_content
write_content
Used for accessing blog posts, comments, pages, and redirect
read_themes
write_themes
Used for accessing themes and assets
read_products
write_products
Used for accessing products and collections
read_product_listingsUsed for accessing product listings and collection listings
read_customers
write_customers
Used for accessing customers’ data
read_orders
write_orders
Used for accessing orders, fulfillments, and other transactions
read_all_orders Used for accessing all orders instead of the default window of 60 days worth of orders. (If you are going to use this scope, make sure you used this with read_orders, or write_orders scopes. You also need to write a request to Shopify before adding this scope to your app.)
read_draft_orders
write_draft_orders
Used to access draft orders
read_inventory
write_inventory
Used to access inventory
read_locationsUsed to access locations
read_script_tags
write_script_tags
Used to access script tags
read_fulfillments
write_fulfillments
Used to access fullfillment services
read_shipping
write_shipping
Used to access to carrier services, country, and province
read_analytics Used to access Analytics API
read_users
write_users
Used to access users (Available for Shopify Plus only)
read_checkouts
write_checkouts
Used to access checkouts API
read_reports
write_reports
Used to access Reports API
read_price_rules
write_price_rules
Used to access Price Rules
read_discounts
write_discounts
Used to access GraphQL Admin API – Discounts features
read_marketing_events
write_marketing_events
Used to access Marketing Event
read_resource_feedbacks
write_resource_feedbacks
Used to access Resource Feedback
read_shopify_payments_payouts Used to access the Shopify Payments Payout, Balance, and Transaction resources
read_shopify_payments_disputes Used to access the Shopify Payments Dispute resources.

Installing Shopify App

Assuming you followed our Shopify app development tutorial. You can install your Shopify app into your store using the following URL:

https://your-shopify-app-website/install.php?shop=your-shopify-store.myshopify.com
Code language: JavaScript (javascript)

Keep in mind that your-shopify-app-website is your host where your Shopify app source files are uploaded in. And your-shopify-store.myshopify.com is your shopify store URL.

After loading that URL, you should see the following:

Installing Shopify App with Script Tag Access Scope

Notice that there is Manage your Online Store.

Once your customers installed your app, your app will have access to your customers’ storefront and that’s where the magic happens.

Creating JavaScript for Script Tag API

Now that your Shopify app is installed to your store. You can start using Shopify API to import your script to your customer’s storefront.

But how?

Before we proceed to add the javascript to our store. Let’s create the file first.

Open your preferred text editor and create a javascript file called shopify.js.

jQuery(document).ready(function() {
	console.log('Thanks for reading WeeklyHow\'s Tutorials!');
});
Code language: JavaScript (javascript)

Assuming you have uploaded this script into your host scripts folder. You can access this file through:

https://your-shopify-app-website/scripts/shopify.js
Code language: JavaScript (javascript)

Creating Script Tag API Object

Now that we have installed our app to our store and created a sample javascript. Let’s import this script using script tag API.

To do this, we’re going to use the shopify_call() method which is included in the function.php file.

Here’s how your index.php file should look like.

<?php
require_once("inc/functions.php");

$params = $_GET; 
$hmac = $_GET['hmac'];
$serializeArray = serialize($params);
$params = array_diff_key($params, array('hmac' => ''));
ksort($params);

$parsedUrl = parse_url('https://'.$params['shop']);
$host = explode('.', $parsedUrl['host']);
$subdomain = $host[0];

$shop = $subdomain;
$token = "PUT YOUR STORE GENERATED ACCESS TOKEN HERE";


$array = array(
	'script_tag' => array(
		'event' => 'onload', 
		'src' => 'https://your-shopify-app-website/scripts/shopify.js'
	)
);

$scriptTag = shopify_call($token, $shop, "/admin/api/2019-07/script_tags.json", $array, 'POST');
$scriptTag = json_decode($scriptTag['response'], JSON_PRETTY_PRINT);


?>
Code language: PHP (php)

Before you test your app, make sure you have replaced the value of the variable $token. Keep in mind that each store have its own unique access token so make sure you get the access token which is generated by your generate_token.php. You can also store the access token to the database so it’ll be much easier for you to retrieve it whenever your customers use your app.

Notice as well the value of the $array, this variable is a multi-dimensional array so be careful of creating this variable.

The first key of our array is the script_tag and its value is another array which has two keys. event and src.

By default, event should always have a value of onload. To be clear, there are no other values available for the event key. However, it is important to always initialize this whenever you create a script tag.

The next key is src. This key is used to source the file that you want to import to your customer’s storefront. In the code above, we have sourced the link https://your-shopify-app-website/scripts/shopify.js.

Make sure you replace this with the URL you have in your domain.

$array, this variable is a multi-dimensional array so be careful of creating this variable.

The first key of our array is the script_tag and its value is another array which has two keys. event and src.

By default, event should always have a value of onload. To be clear, there are no other values available for the event key. However, it is important to always initialize this whenever you create a script tag.

The next key is src. This key is used to source the file that you want to import to your customer’s storefront. In the code above, we have sourced the link https://your-shopify-app-website/scripts/shopify.js.

Make sure you replace this with the URL you have in your domain.

Testing the App

Once you’re done with everything, you can open the Shopify app. If you haven’t seen any errors and such, you may proceed to your Shopify store and open the console.

If you’re using Google Chrome, you may open the console by pressing CTRL + Shift + I.

If you’re using Firefox, just right-click the window and press Q.

Edit Shopify Store with Script Tag API - Shopify App Development

There you have it! You have successfully displayed a message in your Shopify store.

“But that’s boring! No one will actually look at their browser’s console just to see that message. We want to show it as soon as the guests arrive at our customers’ store” – Everyone 2019

Chill! Well, since we already displayed a sample message, it’ll be much easier to append HTML/CSS codes. Thanks to JavaScript!

Alright, for example, we want to display a bar on the top of the page saying that we’re on a sale. You can do that by using the following example code in your javascript:

jQuery(document).ready(function() {
	$('body').prepend('<div class="header" id="myHeader"><h2>Thank you for reading WeeklyHow\'s Tutorial!</h2></div>');
	$('head').prepend('<style>.header { padding: 10px 16px; background: #555; color: #f1f1f1; } .content { padding: 16px; } .sticky { position: fixed; top: 0; width: 100%} .sticky + .content { padding-top: 102px; }</style>');

	var header = document.getElementById("myHeader");
	var sticky = header.offsetTop;

	window.onscroll = function() { 
		if (window.pageYOffset > sticky) {
			header.classList.add("sticky");
		} else {
			header.classList.remove("sticky");
		}
	};

});
Code language: JavaScript (javascript)

Feel free to change the text to “We’re on 100% Sale!” (Wow)

Displaying HTML in Shopify Storefront using Shopify API and PHP Tutorial - Shopify App Development

Conclusion

There you go! You have successfully displayed a message in your customer’s storefront. I suggest you experiment with this API because like we said before, you can do almost everything with script tag API.

But there’s always a downside with this.

Everything will only load once the whole document is loaded. That’s why if you noticed, whenever you reload your store, the message will only display a couple of seconds later.

If you enjoyed this article, feel free to share your thoughts! Do you have questions? Let us know in the comments below!

Shopify Draggable Tutorial: How to Drag and Drop in Shopify

It’s quite popular these days to interact with everything through mobile devices. Tapping, swiping, dragging things up and down, or even zooming in and out. All of these are possible with mobile devices.

Now, the problem arises, can all of these actions be done as well by desktop computers? Technically yes but most of the time no. Besides, it all depends on the capability of your display if it can do such actions like touch-screen.

But what if your desktop doesn’t have touch-screen features? Can you still drag or swipe? Maybe with the cursor instead?

100% yes! Thanks to Shopify Draggable, you can drag and drop web objects easily without too much programming.

So without further ado, let’s get started

What is Shopify Draggable

Shopify Draggable is a drag & drop library that allows developers to build interactive objects for users to drag from one place into another. For example, users can drag a product into the trash for deletion.

Shopify Draggable is also extensible which means if you have enough technical skills you can extend this library into something more useful. For instance, drag and popup or “drag and drop to see your prize!“.

Features

Unfortunately, Shopify Draggable is no longer being maintained by its original developers. However, this library could still give you the following features:

  • Drag & drop by mouse / touch
  • Extendable dragging behaviour
  • Extendable drag detection

Installing Shopify Draggable

What we liked about Shopify draggable is that it could easily be installed in many ways. For example, if you are using Laravel for Shopify Development then you can just run the following code.

npm install @shopify/draggable --save
Code language: CSS (css)

If you’re using yarn then

yarn add @shopify/draggable
Code language: CSS (css)

On the other hand, if you want to use their CDN directly. You can use one of the following script tags

<!-- Entire bundle -->
<script src="https://cdn.jsdelivr.net/npm/@shopify/draggable@1.0.0-beta.8/lib/draggable.bundle.js"></script>

<!-- legacy bundle for older browsers (IE11) -->
<script src="https://cdn.jsdelivr.net/npm/@shopify/draggable@1.0.0-beta.8/lib/draggable.bundle.legacy.js"></script>

<!-- Draggable only -->
<script src="https://cdn.jsdelivr.net/npm/@shopify/draggable@1.0.0-beta.8/lib/draggable.js"></script>

<!-- Sortable only -->
<script src="https://cdn.jsdelivr.net/npm/@shopify/draggable@1.0.0-beta.8/lib/sortable.js"></script>

<!-- Droppable only -->
<script src="https://cdn.jsdelivr.net/npm/@shopify/draggable@1.0.0-beta.8/lib/droppable.js"></script>

<!-- Swappable only -->
<script src="https://cdn.jsdelivr.net/npm/@shopify/draggable@1.0.0-beta.8/lib/swappable.js"></script>

<!-- Plugins only -->
<script src="https://cdn.jsdelivr.net/npm/@shopify/draggable@1.0.0-beta.8/lib/plugins.js"></script>
Code language: HTML, XML (xml)

Browser Compatibility

If you are worried about this library not being compatible with all of the versions of the popular browsers then worry not! Because Shopify Draggable is compatible with:

  • Google Chrome
  • Mozilla Firefox
  • Internet Explorer
  • Microsoft Edge
  • Opera
  • Safari

Examples

Whenever you use Shopify Draggable, it is important to remember that draggable objects must be inside a container or element.

Also, we’re going to use this library without any frameworks which mean pure HTML is what we only needed. This way, it’ll be much easier for you to understand how this library works.

Don’t worry, we’ll be guiding you step by step on how to use Shopify Draggable.

First, let’s create an empty HTML file.

<!doctype html>
<html lang="en">
	<head>
		<meta charset="utf-8">
		<meta name="viewport" content="width=device-width, initial-scale=1, shrink-to-fit=no">
		<style>

		</style>
	</head>
	<body>

	</body>
	<script type="text/javascript">

	</script>
</html>
Code language: HTML, XML (xml)

Next, let’s import the library using CDN.

Add the following line inside the head tag.

<script src="https://cdn.jsdelivr.net/npm/@shopify/draggable@1.0.0-beta.2/lib/draggable.min.js"></script>
Code language: HTML, XML (xml)

Now that we have the library installed, let’s create the objects that we can drag.

Inside the body tag, copy the following code.

<div class="block">
	<div class="droppable draggable-dropzone--occupied">
		<div class="draggable"></div>
	</div>
</div>

<div class="block">
	<div class="droppable"></div>
</div>
Code language: HTML, XML (xml)

In the code example above, we have declared three div classes and that is the block class, droppable class, and the draggable class.

Block Class

Take note that we called this “block” class because the above code, more specifically the div tag has a class of block. You can always change this class to whatever name you want as long as you specify that class in the javascript which we’ll do in a few moments.

Block class is where you can create all of the droppable objects. To simply explain this. All droppable elements must have their own parent block class like what the example above has.

Droppable Class

This class is used for objects to be dropped into. So for example, you have one draggable object. You can drag this object into this section with droppable class.

Keep in mind that the size of draggable objects MUST be equal to the size of the droppable objects.

And again, you can rename this class to whatever you want as long as you specify this in your javascript.

Draggable Class

This class will make any elements draggable and can be dropped onto any element with the class of droppable. Same with the rest, you can rename this class to whatever you want… and… of course specify it in the javascript. (We really love repeating ourselves, don’t we?)

Let’s continue

Inside the script tag, copy the following code.

const containers = document.querySelectorAll('.block')

const droppable = new Draggable.Droppable(containers, {
  draggable: '.draggable',
  droppable: '.droppable'
});

droppable.on('drag:start', () => console.log('drag:start'));
droppable.on('droppable:over', () => console.log('droppable:over'));
droppable.on('droppable:out', () => console.log('droppable:out'));
Code language: JavaScript (javascript)

The above code is written in Javascript ES6. So make sure you copy this code inside the script tags.

To explain the above code, we firstly declared a constant variable and we called it containers. Then we select all elements with the class of block.

Currently, we have to two div elements with a class of block so that’s what the variable will look for.

Next, we declare a new droppable object and target all the available blocks that can be used by draggable objects and then we assign which element is draggable and droppable.

After that, we initialize the events:

  • drag:start
  • droppable:over
  • droppable:out

And then make a callback where we display in the console which event is currently happening.

Like we have mentioned before, it is important to give your objects their specified sizes to ensure that they will fit in their designated sections.

To do this, copy the following code inside the style tag.

.grid {
	display: grid;
	grid-template: 150px 150px 150px / 150px 150px 150px 150px;
	grid-gap: 10px;
	background-color: #ffffff;
	padding: 10px;
}
.draggable {
	background-color: #ff3946;
	box-shadow: 10px 10px 10px #7777;
}

.draggable, .droppable.draggable-dropzone--occupied{
	width: 100px; 
	height: 100px; 
}
.droppable{
	width: 100px; 
	height: 100px;
	border: solid;
	display: flex;
}
Code language: CSS (css)

The code above will only give our objects a little bit of style which doesn’t actually matter but since we need to give our objects a width then might as well give it a style.

If you have noticed, we have a new class at the top of this CSS which is the .grid class.

This class does not matter as well, but this will organize our grid especially if we want to add more droppable sections on our page.

Let’s go back to our HTML and modify what’s inside the body tag:

<div class="grid">
	<div class="block">
		<div class="droppable draggable-dropzone--occupied">
			<div class="draggable"></div>
		</div>
	</div>

	<div class="block">
		<div class="droppable"></div>
	</div>
</div>
Code language: HTML, XML (xml)

What we changed in our body tag is we simply added the grid class and then inserted our blocks inside of it.

We’re almost done!

Go save your file as index.html and open that file in your browser.

You should see something like this:

Shopify Draggable Tutorial - How to Drag and Drop Objects From One Place to Another

You may drag the red block into the empty block. You may also put it back into its place.

Now, what if you want to add more empty blocks for the draggable object?

The answer is very simple.

Just duplicate the block for the droppable object like below:

<div class="grid">
	<div class="block">
		<div class="droppable draggable-dropzone--occupied">
			<div class="draggable"></div>
		</div>
	</div>

	<div class="block">
		<div class="droppable"></div>
	</div>
	<div class="block">
		<div class="droppable"></div>
	</div>
	<div class="block">
		<div class="droppable"></div>
	</div>
	<div class="block">
		<div class="droppable"></div>
	</div>
	<div class="block">
		<div class="droppable"></div>
	</div>
	<div class="block">
		<div class="droppable"></div>
	</div>
	<div class="block">
		<div class="droppable"></div>
	</div>
	<div class="block">
		<div class="droppable"></div>
	</div>
	<div class="block">
		<div class="droppable"></div>
	</div>
	<div class="block">
		<div class="droppable"></div>
	</div>
</div>
Code language: HTML, XML (xml)

This will give you the following output:

Shopify Draggable - Drag and Drop Features for Shopify Developers

Conclusion

There you go! You have finally developed a simple web page where an object can be dragged and dropped into different blocks.

What we really liked about this library is the fact that you don’t need to use jquery to make this library work. Not only that. It is ridiculously fast and lightweight.

I highly recommend you to experiment with this library. As we said before, this library is extensible meaning you can add more features to it.

If you want us to write more about Shopify Draggable library, let us know in the comments below and let us know as well your reactions by clicking one of the emojis below.

We love seeing your reactions 🙂

How to Add Private Apps to Shopify Development Store

Unlike public Shopify apps, Private apps are built exclusively just for your Shopify store. If you’re a Shopify developer and owns a Shopify store, developing a private app is a great way to add features to your Shopify admin page and access your store’s data using Shopify’s APIs.

You can create as many private apps as you want. However, if your store is under the 14-day trial plan, then you can’t create more than five private apps (which is not a big deal at all since you can do a lot more with just one app).

In this Shopify Private app tutorial, you’ll learn how to create private apps exclusively just for your development store.

Use cases of private Shopify apps

There are many different use cases for private apps, the following are good examples:

  • Build an embed code generator to use for displaying your Shopify store on a website.
  • Display a detailed list or table about your customer’s orders.
  • Build an importer to transfer your data from a different e-commerce platform to Shopify

How to install a private Shopify app

Installing a private Shopify app to a development store is very easy but before you can do that, you need to create the required credentials from the Shopify admin of the store that you want to connect with your app.

It could be a little confusing but don’t worry! We’re here to guide you through the process and it’s very simple.

Manage Private Apps

To create a new private Shopify app, log in to your Shopify store and navigate to the Apps section and select Manage private apps which is located at the bottom of the page.

and navigate to the Apps section and select Manage private apps which is located at the bottom of the page.

Manage Private Apps to Create a private Shopify App for Shopify Development store | Add Private Apps to Shopify Development Store

Then click on the Create a new private app button.

Create a private Shopify App for Shopify Development store | Add Private Apps to Shopify Development Store

This button can be located at the center of the page (if there are no existing private apps yet) and at the top menu (if there are private apps created already).

Shopify Private App Title & Credentials

Installing a private Shopify app to a development store is very easy but before you can do that, you need to create the required credentials from the Shopify admin of the store that you want to connect with your app.

In the App details section, enter the name you wish to call your private app.

The difference between private apps and public apps is that you can call your private apps anything you want since the app is exclusive just for your store.

Create Private Apps with Shopify Development Stores

Shopify Admin API Access

In the Admin API section, you can select the options you want your app to have access on. For example, you want your private app to have access to your analytics. You can do that by just finding Analytics at the bottom of the list and change No access to Read access. Simple as that!

Accessing Analytics with Private Shopify Apps for Shopify Development store | Create Private Shopify App

Storefront API Permissions

On the other hand, if you want your private app to have access to the storefront API, you can select Allow this app to access your storefront data using the Storefront API. Then, select which store data you want to deliver to the app.

By default, Read products and collections, Read and modify customers, Read and modify checkouts, and Read blogs and articles are enabled.

Now, keep in mind that anything that your private does to your storefront will be seen publicly. So you should use the storefront API with care.

Another way to have access to your storefront is by using script tag API. If you’re planning on publishing a Shopify app then script tag API is the one that you should use instead.

Accessing Storefront API for displaying data publicly | How to Add Private Apps to Shopify Development Store

Finally, hit save.

After saving the app, Shopify will generate an API key and a secret key. Treat these credentials as your password for accessing your Shopify app.

Now, to start developing Shopify Private Apps for your development store. You can read my Shopify app development course.

Conclusion

Creating Shopify private apps is very simple and won’t take you that much time. Thanks to Shopify for making it so easy! If you don’t know what’s the next step for developing a private Shopify app, I suggest you read my course on how to build Shopify apps using PHP.

Shopify Theme Development: Building Theme with Slate & Theme Kit

One of the advantages of Shopify development is being able to customize your theme without programming. However, there are instances that you may want to make your store look a certain way. Now here’s the problem. Your theme doesn’t allow you to customize it. Because of that, your only option is to build the theme features yourself.

As an example, you may want to add social links under your products so customers can either bookmark the product or share it with their friends.

In this tutorial, we’re going to learn about Shopify theme development to customize or create a custom Shopify theme with Slate, all from scratch.

Getting Started

To start building a custom theme for Shopify, you need to create a partner account. You can do this by going to their official partner page and by clicking the “join now” button.

After you create a partner account, you can create a free development store to test your custom themes as you build it.

Create a free development store with Shopify Partner account

After creating a development store, Shopify will redirect you to your store admin page. There you can start adding products, collections, etc.

Now, to make this tutorial short but handy, I will assume that you already have products and collections. Why? because we want to focus on theme development. Besides, adding products and collections is very easy. You can do that by yourself 😉

Theme Development Tools

The next step in building Shopify themes is to select which theme development tools you’d want to use. Currently, there are three theme development tools for creating Shopify themes:

  • Slate
  • Shopify Theme Kit
  • Shopify online code editor

Slate

If you have experience with command prompt then Slate might be a good option for you. Slate is more of a command-line tool for developing Shopify themes. It works to help you speed up the process of your development, testing, and deployment to Shopify.

Shopify Theme Kit

Another tool for theme development is the Shopify Theme Kit. It is also a command-line tool that allows you to upload themes into multiple environments.

Now, what is the difference between Shopify Theme Kit and Slate?

Slate is a tool built on top of ThemeKit whereas ThemeKit is just a client with the themes API which is why it allows you to use whatever tools you need on top.

Shopify Online Code Editor

If you’re lazy downloading tools or anything, this is the tool that you may want to use. A very basic code editor for developing Shopify themes. The only disadvantage with this tool is that it doesn’t allow you to create the actual files.

Which Shopify theme development tool do you think is the best? I would say, Slate.

Why? because I believe with Slate, you have more control over your projects compared to the rest of the tools.

With that being said, we’re going to create a custom Shopify theme using Slate.

Create a New Theme with Slate

Creating a new theme with Slate is very simple. All you need to run a single command and command prompt will do all the job for you.

npx create-slate-theme name-of-my-theme
npxA tool for using packages from npm registry
create-slate-themeA package that allows users to create a new Slate project with a single command.
name-of-my-themeName of your project. (must be lowercased and no use of spaces. If so, use a dash instead)

We highly recommend using either yarn create or npx to create a new Slate project. If you don’t know any of these, we suggest you learn NodeJS.

If you already have node installed on your computer, run the following command with command prompt.

mkdir WeeklyHowCustomTheme && cd WeeklyHowCustomTheme

And then use the command

npx create-slate-theme weeklyhow-theme
Installing Shopify Slate or ThemeKit Shopify for Theme Development with Node

Once the command-line finished processing. Use the following command to select your project:

cd weeklyhow-theme

Create a Private App

In your Shopify Admin Dashboard, navigate to apps and select Manage apps.

Creating Private Apps using ThemeKit Shopify

Then select Create a new app.

Building a new Shopify private app with ThemeKit Shopify

Fill up the form and make sure to change the value of theme templates and theme assets to “Read and write”

How to Build Shopify Private App using ThemeKit Shopify

Hit “Save” and click “I understand, create the app

Connecting to your Store

Now that you have created your Slate project and your Shopify private app. You may proceed to your project folder and open and modify the .env file.

# The myshopify.com URL to your Shopify store
SLATE_STORE={store-name}.myshopify.com

# The API password generated from a Private App
SLATE_PASSWORD=

# The ID of the theme you wish to upload files to
SLATE_THEME_ID=

# A list of file patterns to ignore, with each list item separated by ':' (optional)
SLATE_IGNORE_FILES=config/settings_data.json

# The timeout for upload theme (optional)
SLATE_TIMEOUT=2mCode language: PHP (php)

SLATE_STORE

The URL of your Shopify store. Keep in mind that https:// or anything is not necessary.

SLATE_PASSWORD

Your password is located at the Admin API section of your private app.
https://{store-name}.myshopify.com/admin/apps/private

SLATE_THEME_ID

Slate theme ID is the identification number of the theme you wish to upload your files into. You can find your theme ID by navigating to
https://{store-name}.myshopify.com/admin/themes.xml

Finding the SLATE_THEME_ID of Shopify Store for Theme Development

Again the value between the id tag is your SLATE_THEME_ID.

SLATE_IGNORE_FILES

This setting allows you to ignore files from being uploaded to your Shopify store. By default, we want this setting to have a value of config/settings_data.json. This JSON file contains all the data for our theme development but we don’t want this file to overwrite what’s on our Shopify store.

SLATE_TIMEOUT

Setting for request timeout. If you have large files in your project that may take longer than a few seconds to upload then you may want to increase this value. We’ll leave this to 2m (2 minutes) at the moment.

Creating a self-signed SSL Certificate

As you may have guessed it already, Shopify must be served via https. Even if we are under development, installing an SSL certificate is a must.

To create a self-signed SSL certificate, we have to install brew. Now, since we are using Windows PC, we will install chocolatey instead.

Open another command prompt and run the following command

@"%SystemRoot%\System32\WindowsPowerShell\v1.0\powershell.exe" -NoProfile -InputFormat None -ExecutionPolicy Bypass -Command "iex ((New-Object System.Net.WebClient).DownloadString('https://chocolatey.org/install.ps1'))" && SET "PATH=%PATH%;%ALLUSERSPROFILE%\chocolatey\bin"Code language: JavaScript (javascript)

Results should be something like this.

Installing Chocolatey on Windows PC

After that, run the following command

choco install mkcert
Installing mkcert package with Chocolatey for Shopify Theme Development using ThemeKit Shopify

Next, run

mkcert -install
Installing mkcert package

Then

mkcert example.com "*.example.com" example.test localhost 127.0.0.1 ::1Code language: CSS (css)
Installing SSL certificates for localhost with mkcert

Deploying the Theme to Shopify

Deploying your custom theme is very easy. All you need to do is to type the following code to your command-prompt and just say yes to the prompt.

npm start

That’s it! You can now start developing your custom theme for Shopify stores.

How To Display Shopify Products with Laravel & OhMyBrew!

I have been playing around with Laravel and Shopify lately and I’ll admit, it’s much easier to control the Shopify app with Laravel instead of pure PHP.

If you have been following us for a while, you may have noticed already that most of our topic is about Shopify. Well, we treat it like our baby. Full-attention must be provided to it :).

Jokes aside, in this article we’re going to learn together how to display Shopify products using Laravel and OhMyBrew’s laravel-shopify.

Getting Started

Before we start with this tutorial, we’ll assume that you already have created your Laravel Shopify app. If in case not, then you may refer to this tutorial on how to create a Shopify app with Laravel and OhMyBrew!

Let’s begin this tutorial by opening your Shopify app project and serve it with:

php artisan serve

Next, find your ngrok and run it.

Then use the following command:

ngrok.exe authtoken <YOUR_TOKEN_IS_WRITTEN_HERE>Code language: HTML, XML (xml)

You may get your ngrok token from your ngrok account. However, if you already have authenticated your token then you may skip this step.

Connecting Shopify App with ngRok

Next, run the following command to forward your local server to an ngrok URL. Make sure you use the port 8000.

ngrok.exe http 8000Code language: CSS (css)

Now, get the URL generated by ngrok and use it to replace the app URL and whitelisted URL. Like so.

Shopify App Development with ngrok

After that, proceed to your development store and Shopify app.

Displaying Shopify Products

Welcome to another Shopify App Development tutorial! In this article, we’re going to use OhMyBrew’s laravel-shopify package to display the products of our store. Now, before we can do that… we need to create a controller first and then make a route.

Go to your command prompt with your Shopify app project folder selected and run the following command.

php artisan make:controller ShopifyControllerCode language: CSS (css)

The command above will create a new controller named ShopifyController.php. Open that file which is located at app\Http\Controllers.

Shopify Controller

Open ShopifyController.php and replace everything with the following.

<?php
namespace App\Http\Controllers;

use Illuminate\Http\Request;
use OhMyBrew\ShopifyApp\Facades\ShopifyApp;
use Log;

class ShopifyController extends Controller
{
    public function index() {
  
        $shop = ShopifyApp::shop();
	$requests = $shop->api()->rest('GET', '/admin/api/2019-07/products.json');
        return serialize($requests->body);

    }
}
?>Code language: HTML, XML (xml)

Shopify Laravel Router

Next, open your web.php file located at <you_project_folder>/routes/ and copy the following code.

Route::get('/', 'ShopifyController@index')->middleware(['auth.shop']);Code language: PHP (php)

What the code above does is get the response of ShopifyController@index which returns the serialized requests. Why serialize? Well if you don’t know already, serialize will convert an object or an array into a string which is very useful especially if you wanted to know the content of an array.

Now, with that being said. Let’s look at our application and see the results.

Serializing the array from Shopify Product API and display the products

If you have the same results then congratulations! You just made into the basics of getting the data from the REST API.

Show Shopify Items in Laravel View

Now, the next thing that we’re going to do is to actually get this data and pass it into our view files. Because we can’t just do everything in our controllers, we need to manipulate this data in our actual view files.

To do that, we’re going to use the view() function. Views contain the HTML served by your application and separate your controller / application logic from your presentation logic. Views are stored in the resources/views directory.  This is where you can design your app.

Now, before we proceed let’s clean up our code first.

Go to your web.php file located at route folder and change this line:

Route::get('/', 'ShopifyController@index')->middleware(['auth.shop']);Code language: PHP (php)

Into

Route::get('/', 'ShopifyController@index');Code language: PHP (php)

Save your web.php file and open your ShopifyController.php file next and copy the following code.

Make sure you place it above the index() function.

public function __construct() {
    $this->middleware(['auth.shop']);
}Code language: PHP (php)

Next, let’s create a new function just below the index function. And let’s call it products() function. Inside the function we’ll do the same thing, we’ll call the API and get the response code. But this time, we’ll pass it to our view.

public function products() 
{
    $shop = ShopifyApp::shop();
    $requests = $shop->api()->rest('GET', '/admin/api/2019-07/products.json');
    return view("welcome", ["products"=>$requests]);
}Code language: PHP (php)

Go back to web.php and add the following line:

Route::get('/', 'ShopifyController@products');Code language: PHP (php)

Next, open your welcome.blade.php file located at resources/views folder.

Copy the following code:

@extends('layouts.app')

@section('content')
    <h2>Welcome <a href="{{ ShopifyApp::shop()->shopify_domain }}">{{ ShopifyApp::shop()->shopify_domain }}</a></h2>
    <h3>We have new items!</h3>
    @foreach ($products->body->products as $product)
        <p>{{ $product->title }}</p>
    @endforeach
    
@endsection

@section('scripts')
    @parent

    <script type="text/javascript">
        var AppBridge = window['app-bridge'];
        var actions = AppBridge.actions;
        var TitleBar = actions.TitleBar;
        var Button = actions.Button;
        var Redirect = actions.Redirect;
        var titleBarOptions = {
            title: 'Welcome to Shopify Laravel App',
        };
        var myTitleBar = TitleBar.create(app, titleBarOptions);
        console.log('{{ ShopifyApp::shop() }}');
    </script>
@endsectionCode language: PHP (php)

Next, go to your resources/views folder and create a new folder. Make sure you name it layouts.

Inside the layouts folder, create a new view file and make sure it has a filename of app.blade.php.

Laravel Shopify Resources Folder and Layouts

After that, open app.blade.php and copy the following code:

<!DOCTYPE html>
<html lang="{{ str_replace('_', '-', app()->getLocale()) }}">
<head>
    <meta charset="utf-8">
    <meta name="viewport" content="width=device-width, initial-scale=1">
    <!-- CSRF Token -->
    <meta name="csrf-token" content="{{ csrf_token() }}">
    <title>{{ config('app.name', 'Shopify App made with Laravel') }}</title>
    <!-- Scripts -->
    <script src="{{ asset('js/app.js') }}" defer></script>
    <!-- Fonts -->
    <link rel="dns-prefetch" href="//fonts.gstatic.com">
    <link href="https://fonts.googleapis.com/css?family=Nunito" rel="stylesheet">
    <!-- Styles -->
    <link href="{{ asset('css/app.css') }}" rel="stylesheet">
</head>
<body>
    <div id="app">
        <main class="p-4">
            @yield('content')
        </main>
    </div>
</body>
</html>
Code language: HTML, XML (xml)

Final Results

If you encountered no errors at all, you will see the results something like this.

Develop Shopify Apps with Laravel and OhMyBrew Package + Ngrok

Conclusion

That’s it! That’s how easy it is to develop a Shopify app using Laravel. Special thanks to Tyler King for developing the laravel-shopify package.

If somehow you encountered errors, send us a comment below and we’ll respond to you as soon as possible.

We thank you for reading this article until the end. In the next tutorial, I will guide you on how to use Laravel to display product images.

See you next time!