When it comes to selling items online, Shopify can be your reliable e-commerce. Not only it can make your selling easy but it also provides hundreds of Shopify apps available to help you grow your business.
However, due to the amount of the Shopify apps available, finding the best ones can be hard. But don’t worry, we are here to help you find the best Shopify apps to increase sales.
Best Shopify Apps for Sales
One of the most common problems in e-commerce is having a low sales rate. The follow Shopify apps for sales can help you increase your sale.
Mobile App Builder ‑ Shopney

Most of your visitors can be using mobile devices and sometimes you are not able to reach them.
But with Mobile App Creator – Shopney, you can now develop a mobile app that will target your visitors who use android devices and iOS devices without any hassle or purchasing.
Their subscription cost only around $99.99/month for silver plan and $199.99/month for gold plan.
Product Reviews by Shopify
Feedbacks are very important for increasing sales because your customer’s feedback is like free marketing. Whenever your customers give reviews to your products, they’re allowing other customers to know that your product is good.
Shopify Product reviews allows you to add a customer review feature to your products. This provides a way for your customers to engage with you, as well as each other to encourage sales.
- FREE to install! 🤯
- Theme-friendly design – Reviews automatically match your store’s look and feel
- Easy customization – Edit layout options, text, and colours without needing to code
- Bulk actions – Publish, hide, filter, and manage reviews quickly and easily
- CSV import and Export – Import and export your reviews as a spreadsheet
- SEO-friendly review scores – Add review scores to your Google search results.
Ultimate Sales Boost
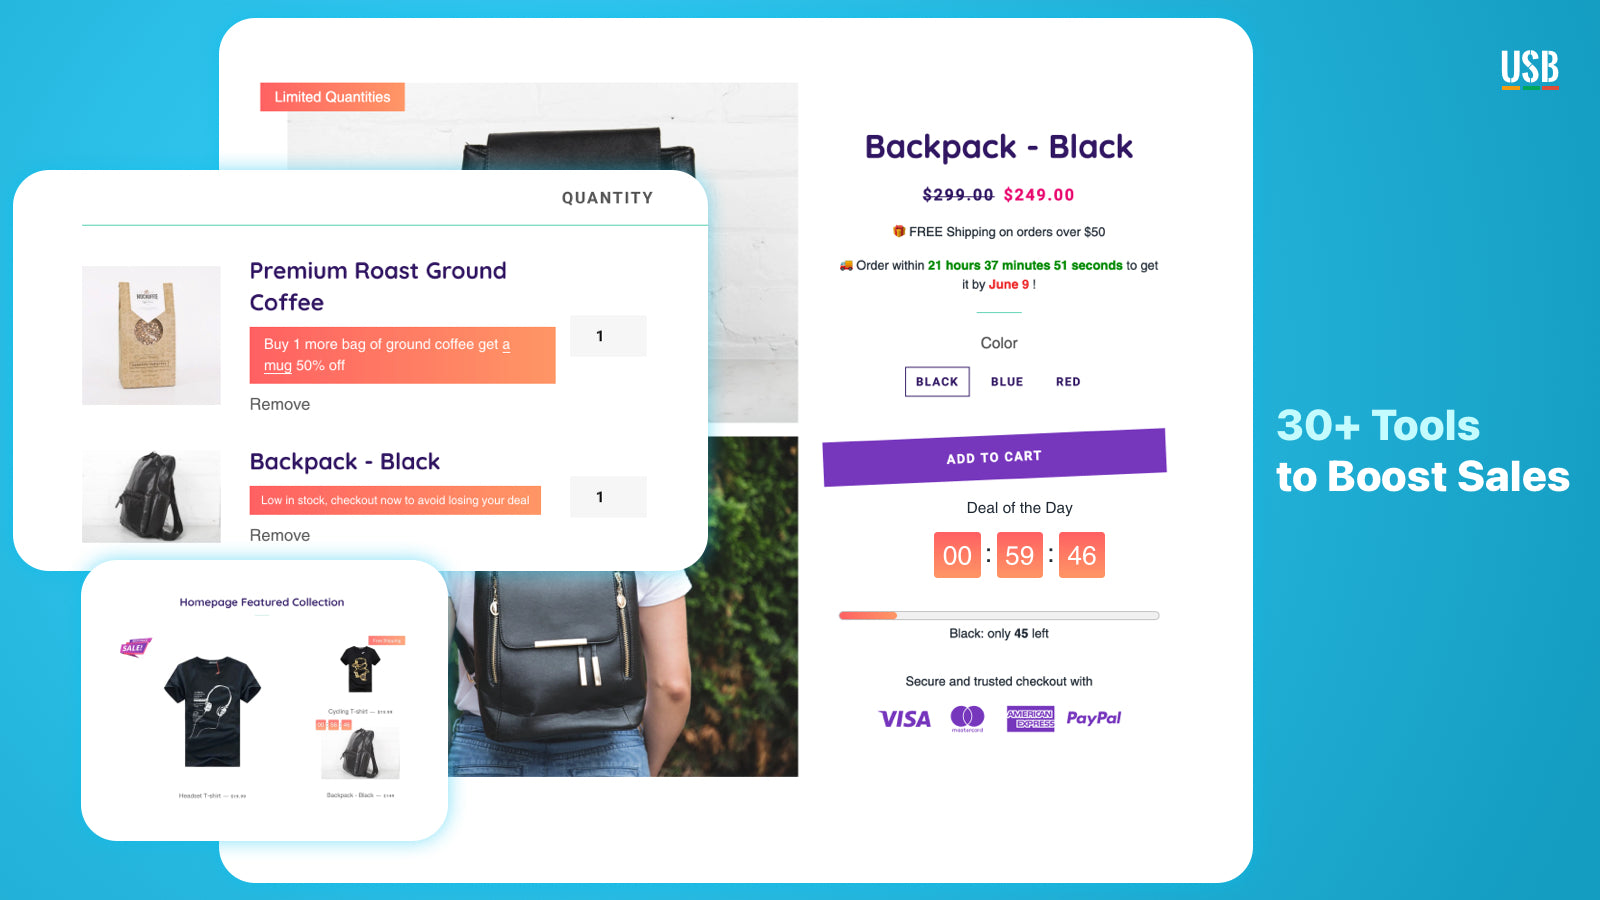
As a buyer, you may already know how exciting it is to see that your favorite item is on sale or discount. That’s one of the features of Ultimate Sales Boost. Ultimate Sales Boost is a Swiss army knife to optimize your checkout flow (a.k.a conversion funnel). You may use it aggressively or moderately to build the path of your eCommerce success.
Another good thing about this app is you don’t need developer anymore. Just one click installation and launch your first campaign in one minute. That’s how easy to use this app is.
Conversion Plus
Most online merchants are losing about 67.45% of sales from cart abandonment and the key factors can be addressed simply by introducing a sense of urgency into the checkout flow.
By incorporating a sense of urgency to your checkout flow, you can make the consumers feel like they could lose out on an appealing offer if they don’t commit to an order immediately.
- Free to use. 🤯
- Cart reservation timer, with adjustable duration.
- Change the displayed text as you see fit.
- Options to define what happens after the timer expires.
- Multi-language support.
- Modify the look and feel to match your theme.
- Optimized across all screen sizes including desktop, tablet, and mobile.
- No App branding, to keep your site professional.
- Easy step-by-step installation – No programming required.
Best Shopify Apps for Marketing
With Shopify apps for marketing, you can capture the attention and loyalty of your customers through social media, contests, programs, and more.
Use the following Shopify apps to effectively capture your customer’s attention.
Kit: Run better Facebook ads
Kit is not just a marketing app, it is an artificially-intelligent assistant that will talk to your customers 24/7. That means even if you’re not online, your Kit will always be reliable to assist your customers.
But of course, that’s not the only thing Kit can do. It can also manage your Instagram and Facebook ads, email marketing, and social posts to drive more sales and help you grow your business. All for Free!
Here’s what Kit can do for you:
- Set up Facebook dynamic ads and retarget shoppers most likely to buy
- Build lookalike audiences to ensure the best targeting for your ads
- Create Facebook and Instagram ads that drive sales
- Post Facebook updates to drive customer engagement
- Send personalized ‘thank you’ emails to generate repeat purchases
- Create and promote discount codes to acquire and retain customers
- Generate quick reports to provide insights on sales and marketing performance


SEO Image Optimizer – SEO
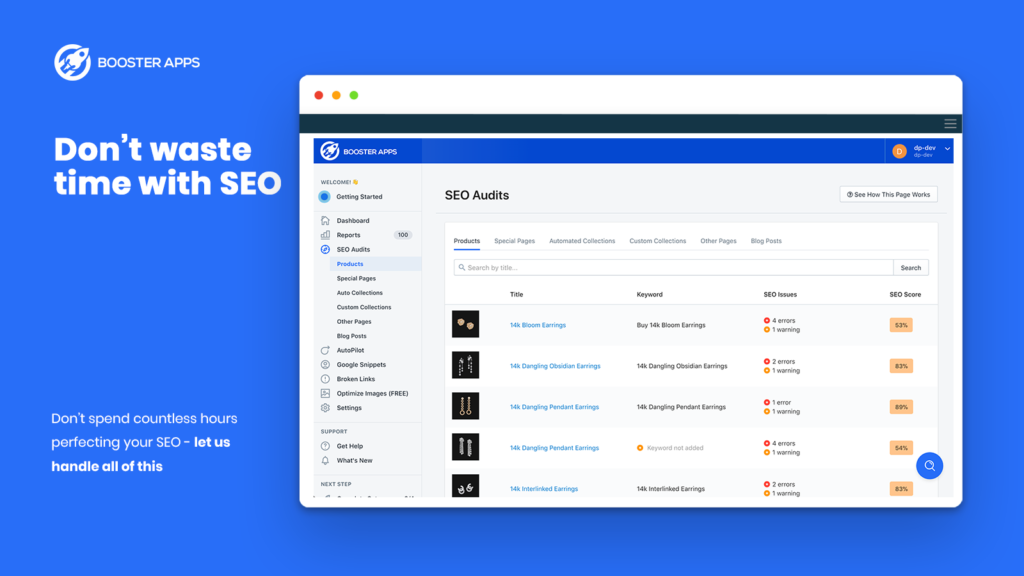
According to a study of U.S. web-based searches, the world’s second most-used search engine is Google Images! That means your store can also get the benefit of getting traffic through proper SEO of images.
With SEO Image Optimizer, you can improve your Google search results and rankings in just a couple of clicks. No coding required!
Features:
- Alt-Text Optimization
- Unlimited Image Sync Quota
- New Images Checked Once per Week
- Always FREE! 🤯
Pro Features:
- Complete SEO Optimization
- Meta Tag Optimization
- Auto Pilot SEO Fixes
- Fix Broken Links
- Google Snippets
- Auto JSONLD
Smile: Rewards & Loyalty
Your customers become more valuable the more they shop and engage with your brand. A rewards program gives you an easy way to encourage the behaviour that builds emotional connections and customer loyalty.
Smile offers three programs that make program management simple and intuitive:
- Loyalty points program
- Referral program
- VIP program
Why should you choose Smile.io for rewards and loyalty?
As the most used rewards program in the world, we’ve learned a lot from helping tens of thousands of businesses with their retention and loyalty strategies. We’ve used that experience to design a rewards solution that makes it easy for anyone using Shopify or Shopify Plus to create a beautiful rewards program that brings customers back.
- Simple design customizations to reflect your brand
- Get your rewards program started in just a few clicks
- Integrate with the marketing tools you already use
We believe the future of commerce is rooted in emotional relationships, and want to help every business build a strong customer retention strategy that promotes sustainable growth.
Best Shopify Apps for Customer Support
The following apps can help you support and track your customers to increase their satisfaction and build more loyalty. I highly recommend you to install at least one of the following Shopify apps as it will no doubt help your business.
Tidio Live Chat
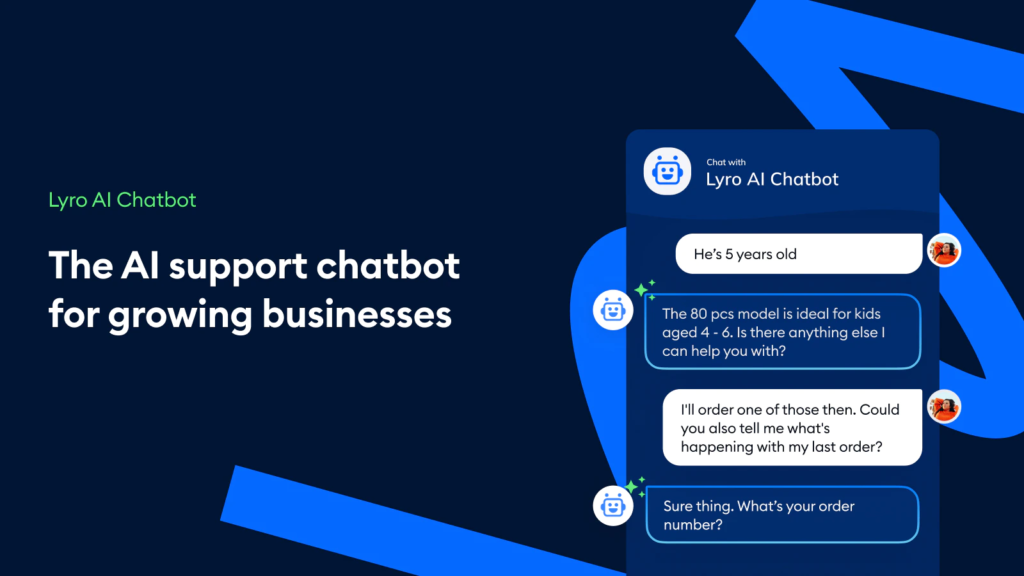
Research shows that live chat can boost sales by as much as 40%. Next time your customer faces an issue, they won’t go to the competitors or waste time — they’ll contact you.
With Tidio, you can help your customers immediately even if you are not available. Thanks to the artificially-intelligent bots. Bots automatically reply to 43% of the most popular inquiries. Right after registering, with a few clicks of the mouse, you’ll be able to add Bots that will check product availability, inform about delivery status, and give the estimated delivery time. When faced with an issue, the Bot will transfer the conversation to an operator.
Tidio uniquely merges live chat, Bots, and Marketing Automation to meet the expectations of the most demanding Shopify store owners.
With its Free plan, you will get the following features:
- Up to 3 operators for a lifetime
- Live Chat
- Messenger Integration
- Email Integration
- iOS & Android App
- 100 Chatbot Triggers a month
100 Chatbot Triggers feels too short? You may upgrade your plan to $18 per month and get UNLIMITED Chatbot Triggers.
AfterShip ‑ Track & Notify

Keep your customers updated of the whereabouts of their orders until delivery through an intuitive, customized tracking page and automated notifications.
Track & Notify is not just a tracking app, it is a Shopify app that will also help your SEO. Thanks to its improved SEO and ranking system that replaces the carrier’s tracking link with their auto-generated link to drive traffic to your site instead of the carrier’s site. Improve SEO and increase organic search.
With its starter plan, you can have the following features:
- 50 shipments quota per month
- Branded tracking page with banner
You may also upgrade your plan to essential, growth and up to PRO and get more shipments quota per month.
If you are having issues with your customers not being able to properly track their orders then I suggest you give Track & Notify a try. It’s worth a shot!
Best Shopify Apps for Products and Inventory
The following apps will help you automate track your inventory to prevent your customers from buying sold out items.
Wipeout: Hide out of stock
If you are having trouble manually setting up your inventory then you’re obviously not using Wipeout. Wipeout is a tool that will quickly hide your sold-out products and show them once they’re on-stock once again. Thanks to its automatic daily hide/publish feature, you won’t have to worry about your items being out of inventory.
Use wipeout for free and get the following features:
- FREE manual option if the store has less than 3000 products
- Manually press “Hide” or “Unhide” buttons whenever needed
- Exclude products
- Reverse within 24 hours
You may also upgrade your plan to automatic plan for $9 per month and get the following features:
- Automatically hide & unhide once a day.
- Daily Email reports
- Exclusion List to exclude products you want the app to ignore
- Reverse within 24 hours
- Multi-location
Oberlo
Oberlo by Shopify is one of my favorite apps. Not only it will help you get started for ecommerce but it will also help you find the products that you wanted to sell and not worry much about inventory and shipping.
You may install Oberlo and get all the free features to get started building your business. But if you want to level up your game, you may upgrade from starter plan to basic plan ($29.90/month) and pro plan ($79.90/month).
What to look for Shopify Apps?
If you are new to Shopify apps, chances are you install apps that you think will help your business. Some entrepreneurs think that Shopify is like a WordPress, you find plugins, install, and see results. Shopify is a different case, you have to do research when you look for Shopify apps.
I would recommend you do the following before hitting the install button.
- Read the reviews of the Shopify apps
- Check if the app is getting high ratings
- Check if the contact is working and see if they will respond
- Look for screenshots
Conclusion
Shopify apps are great, especially if you are working on your business by yourself. You may also check out these 20 Shopify apps that will increase your sales by up to 64.56%. If you have experience with apps both good and bad, you may share them in the comments below. We’d love to have a chat with you below.