
If you are a big fan of 2D Games then you probably know or at least played games like Pokemon or Zelda.
These types of games are usually the ones that allow players to do combats or battles.
In this tutorial, we’ll have a look at how to implement 2D melee combat in Unity 2019 but of course, doing this in 3D should have the following same process.
Before we start, if you’re looking for 2D characters that you can use for your 2D game projects, you may want to check ou the following asset from Unity.
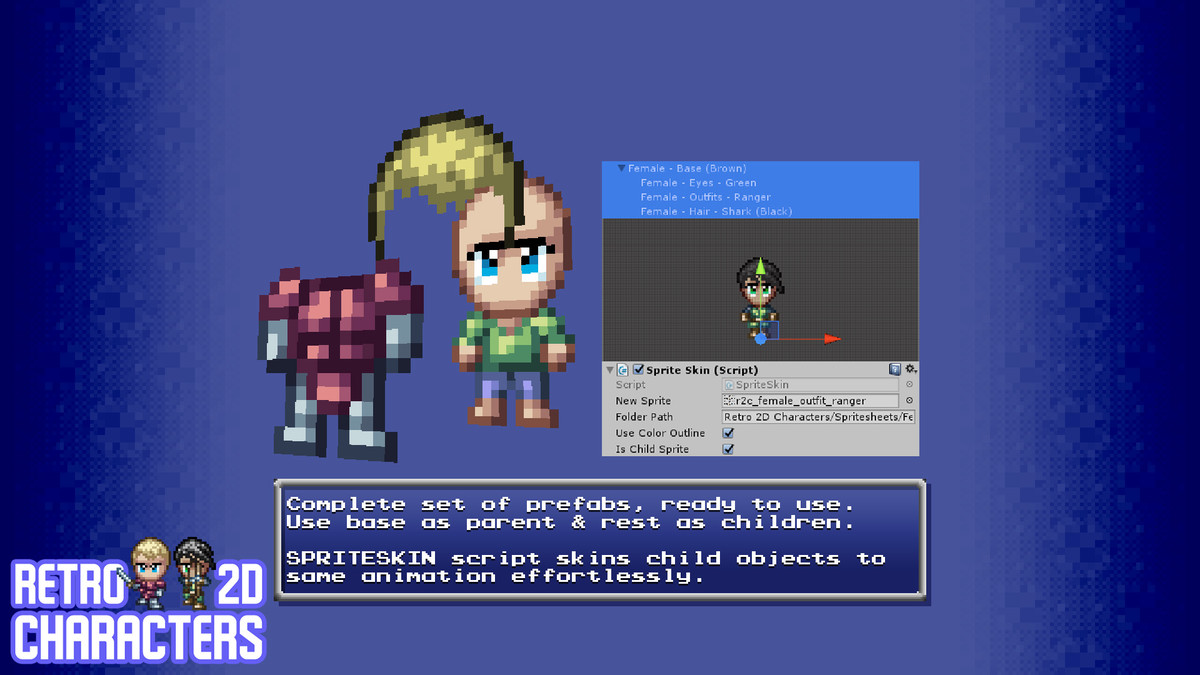
Retro 2D Characters features male and female animated pixel art characters in which you can fully customize their style, hair, clothing, and more! Click the button below to learn more.
Back to the lesson 🙂
Getting Started
We’ll be using the same project that we have created in the last Unity tutorial which is the top-down player movement tutorial. If by any chance, you haven’t followed the said tutorial, we suggest reading it before proceeding with this tutorial.
Read more: Unity 2D Animation: Top-Down Unity Player Movement
If you have already followed our previous lesson then you should be able to make your character move around the platform.
Player Animation
Since we have already created a script for our player, let’s go back to our animation window (CTRL + 6) and add create animations.
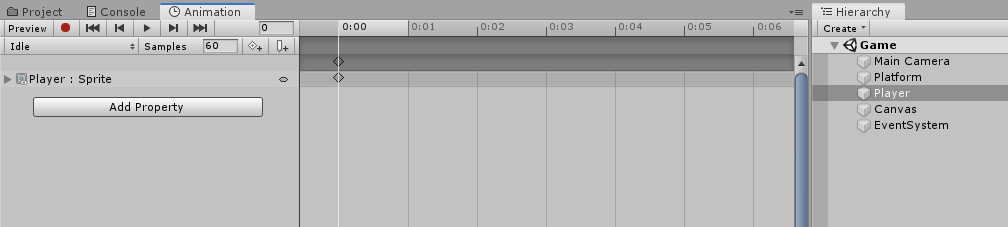
Make sure you select your Player object and go to your animation window.
Next, select the drop-down menu for the list of animations.
Then select Create New Clip.
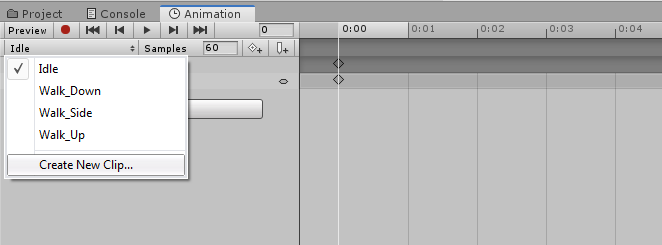
Name the animation Attack_Front.
Next, go to your project window and look for the folder hero-attack-front and drag all the sprites into the animation timeline.
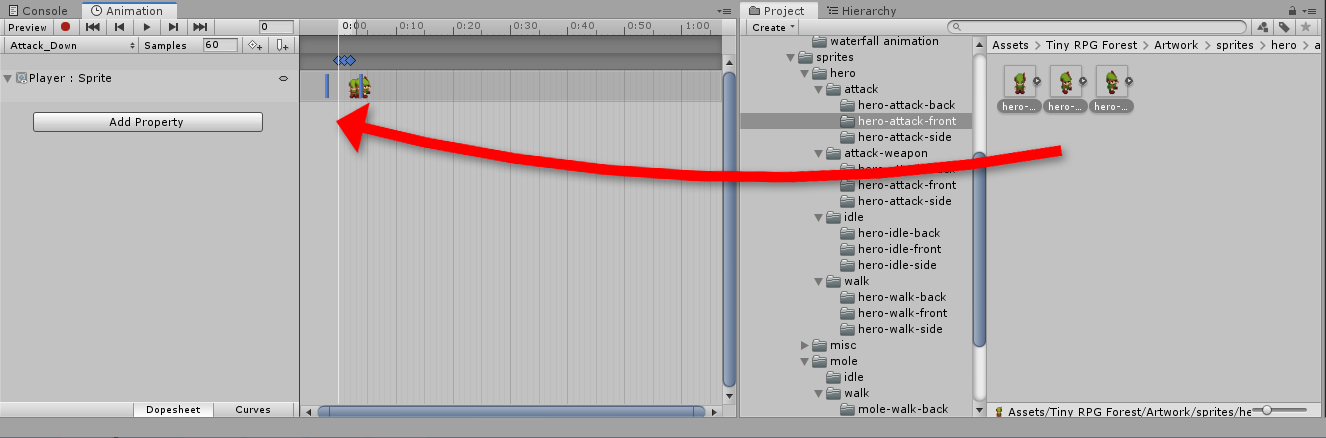
Next, adjust the keyframes in the timeline.
Move the second keyframe in 0:10 and move the last keyframe in 0:20.
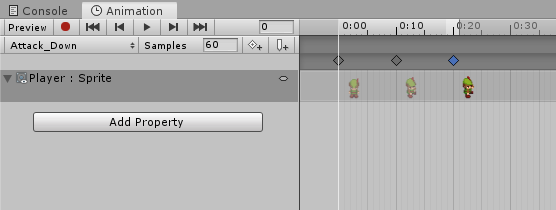
Next, do the same process.
Create new animations for Attack_Up and Attack_Side.
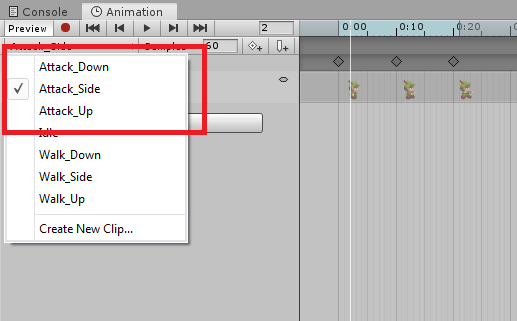
You should have the following animations.
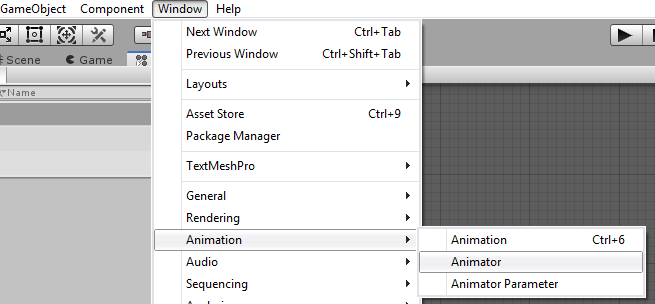
The Animator
Now that we have set up our player attack animations, let’s proceed to our animator and create a new parameter to help our animator change from either idle animation to attack animation or walking to attacking.
Open your animator window by going to Window Tab > Animation > Animator.
Next, select Parameters tab, then click on the plus button and select Bool to create a boolean animator parameter.
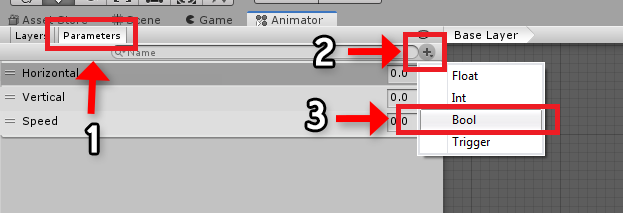
Name the parameter Is_attacking.
Click again the plus button and select Bool and name the parameter Is_Moving_Side.
Next, we’re going to create transitions from all of our previous animations to our attack animations.
For Any State to Attack Up, set the condition, Vertical greater than 0.1 and Is_attacking to true.
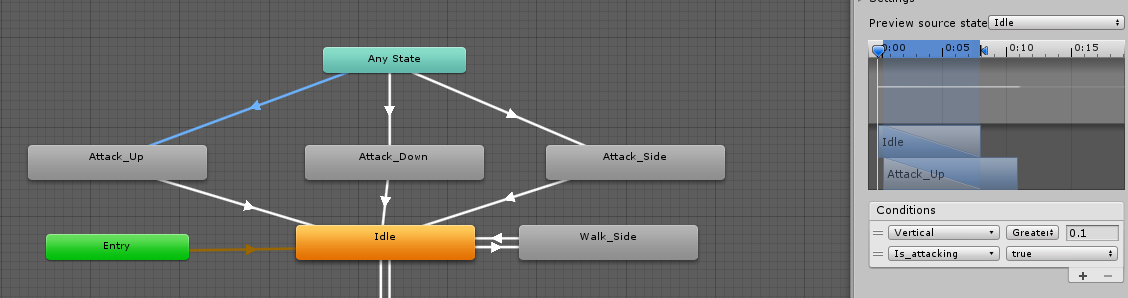
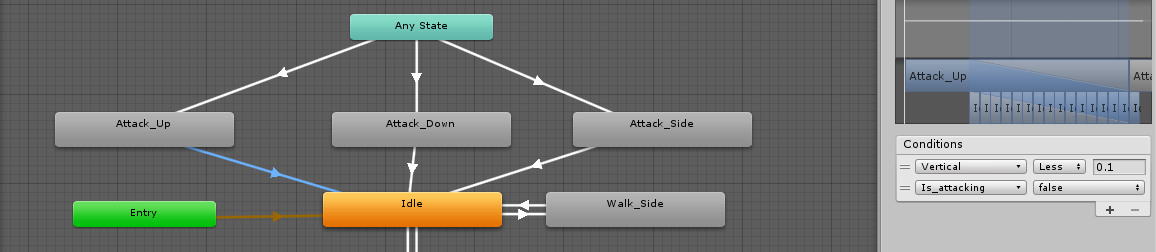
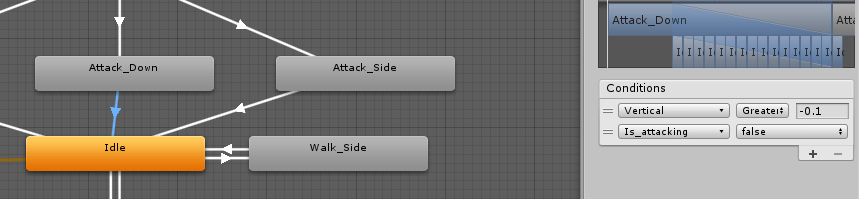
For Attack Up to Idle, set the condition, Vertical less than 0.1 and Is_attacking to false.
Next.
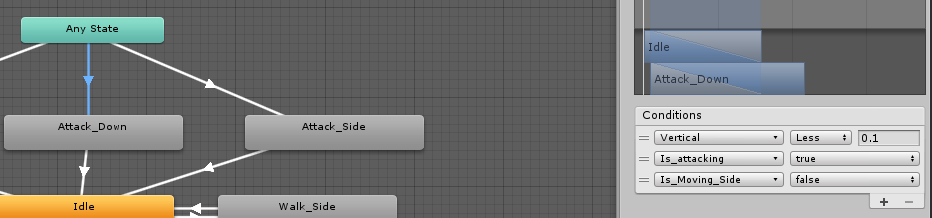
For Any State to Attack Down, set the condition, Vertical less than -0.1, Is_attacking to true, and Is_Moving_Side to false.
For Attack Down to Idle, set the condition, Vertical greater than -0.1 and Is_attacking to false.
Next.
For Any State to Attack Side, set the condition, Horizontal greater than 0.1, Is_attacking to true, and Is_Moving_Side to true.
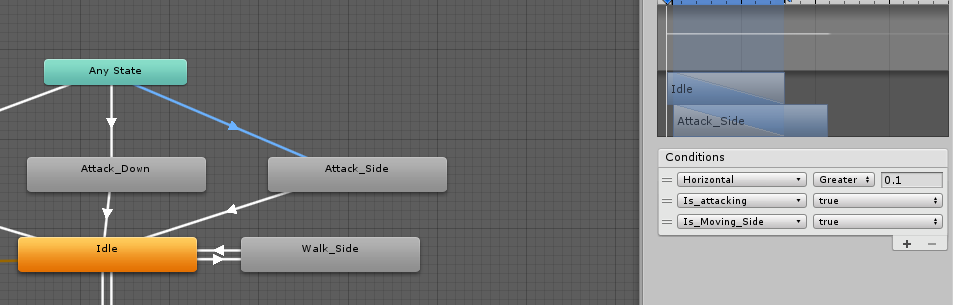
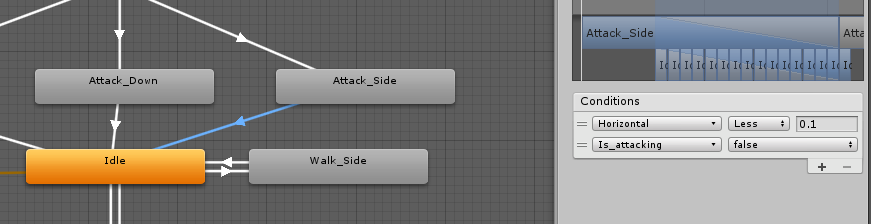
For Attack Side to Idle, set the condition, Horizontal less than 0.1 and Is_attacking to false.
Player Attack Script
Now that we’re down with Player animation and Animator, let’s proceed to create the script to control our player attacks and its animations.
Create a new C# script and name it PlayerAttack.cs then assign it to your Player game object.
using System.Collections;
using System.Collections.Generic;
using UnityEngine;
public class PlayerAttack : MonoBehaviour
{
private Animator anim;
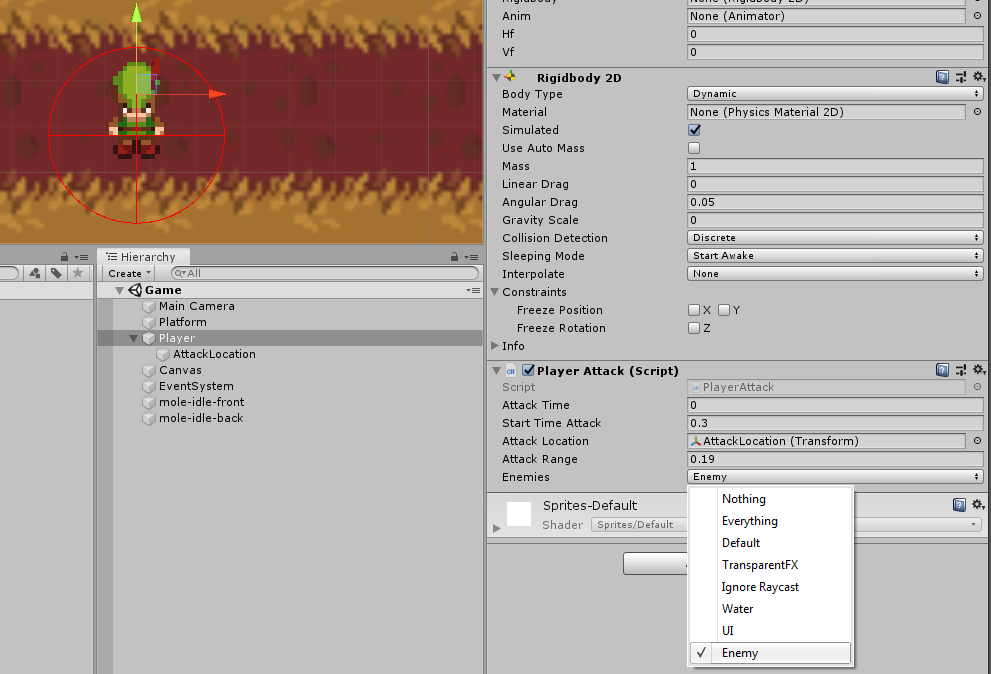
public float attackTime;
public float startTimeAttack;
public Transform attackLocation;
public float attackRange;
public LayerMask enemies;
private void Start()
{
anim = GetComponent<Animator>();
}
void Update()
{
if( attackTime <= 0 )
{
if( Input.GetButton("Fire1"))
{
anim.SetBool("Is_attacking", true);
Collider2D[] damage = Physics2D.OverlapCircleAll( attackLocation.position, attackRange, enemies );
for (int i = 0; i < damage.Length; i++)
{
Destroy( damage[i].gameObject );
}
}
attackTime = startTimeAttack;
} else
{
attackTime -= Time.deltaTime;
anim.SetBool("Is_attacking", false);
}
}
private void OnDrawGizmosSelected()
{
Gizmos.color = Color.red;
Gizmos.DrawWireSphere(attackLocation.position, attackRange);
}
}
Save your script.
Player Movement Script
We have to make an update to our PlayerMovement Script. This is because of the parameters that we have added to our animator.
using System.Collections;
using System.Collections.Generic;
using UnityEngine;

public class PlayerMovement : MonoBehaviour
{
    public float movementSpeed = 1f;
    public Vector2 movement;
    public Rigidbody2D rigidbody;
    public Animator anim;
    public float hf = 0.0f;
    public float vf = 0.0f;

    // Start is called before the first frame update
    void Start()
    {
        rigidbody = this.GetComponent<Rigidbody2D>();
        anim = this.GetComponent<Animator>();
    }

    // Update is called once per frame
    void Update()
    {
        movement.x = Input.GetAxisRaw("Horizontal");
        movement.y = Input.GetAxisRaw("Vertical");

        movement = movement.normalized;

        hf = movement.x > 0.01f ? movement.x : movement.x < -0.01f ? 1 : 0;
        vf = movement.y > 0.01f ? movement.y : movement.y < -0.01f ? 1 : 0;
        if (movement.x < -0.01f)
        {
            anim.SetBool("Is_Moving_Side", true);
            this.gameObject.transform.localScale = new Vector3(-1, 1, 1);
        } else
        {
            this.gameObject.transform.localScale = new Vector3(1, 1, 1);
            anim.SetBool("Is_Moving_Side", true);
        }

        if( movement.x == 0 )
        {
            anim.SetBool("Is_Moving_Side", false);
        }

        anim.SetFloat("Horizontal", hf);
        anim.SetFloat("Vertical", movement.y);
        anim.SetFloat("Speed", vf);
    }

    private void FixedUpdate()
    {
        rigidbody.MovePosition(rigidbody.position + movement * movementSpeed * Time.fixedDeltaTime);
    }
}
Save all your script and go back to Unity.
The Enemy
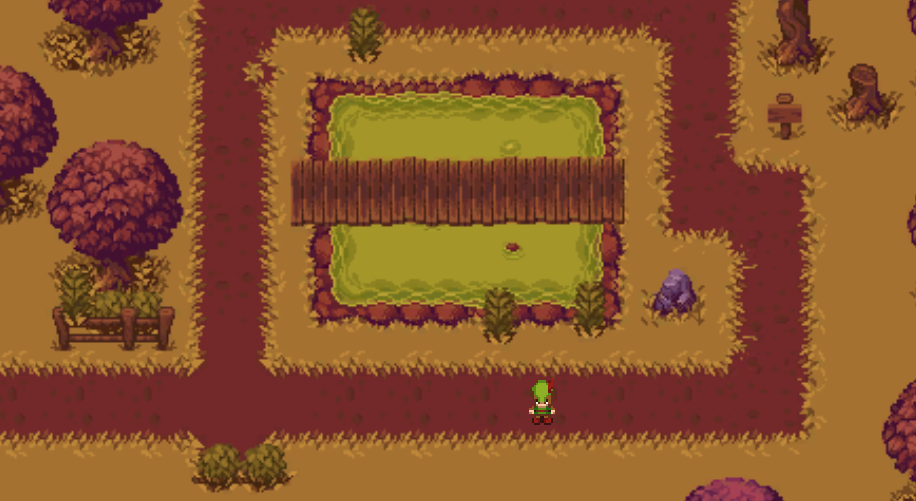
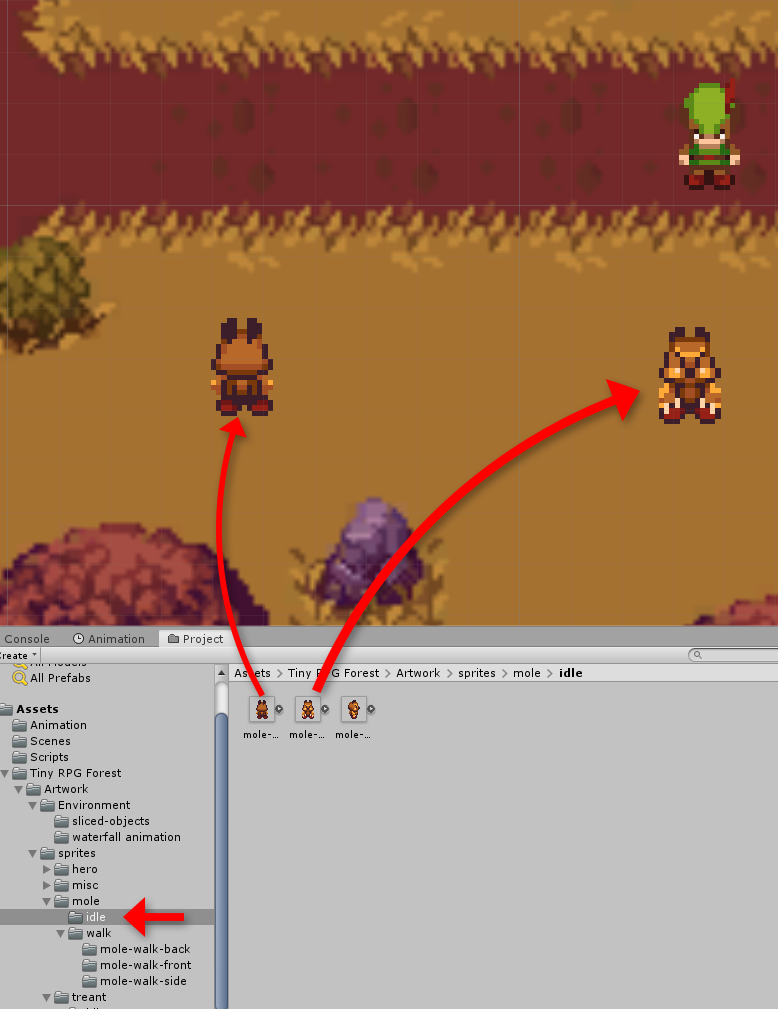
Since we’re working on melee attacks, obviously, we’ll need enemies to test out our attacks.
So go ahead to your project window and look for the sprite mole and drag it to your scene.
Next, select the enemy game objects and add Circle Collider 2D to them.
Then, change the value of Layer from Default to Enemy. However, since there’s no Enemy layer yet, we have to create it ourselves.
So once, Layer dropdown is selected, click Add Layer…
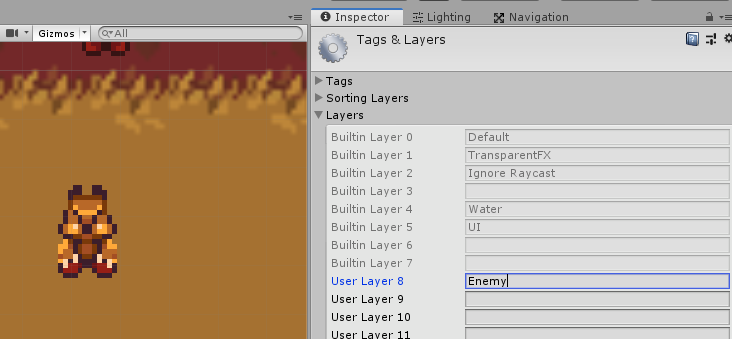
On whatever layer, add Enemy.
Next, select the enemy game object again and this time, change the Layer from Default to Enemy.
Final Touch
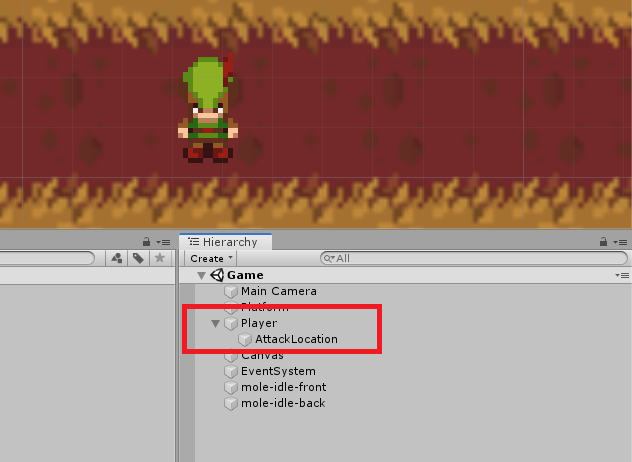
Now that we have the enemy, the last thing we need to do is to create a game object for our attack location.
So go ahead and select your player game object, right-click, and create an empty game object.
Name the empty game object AttackLocation.
Make sure the parent of AttackLocation is the player.
And lastly, select your Player game object and set the PlayerAttack component to:
Conclusion
There you have it! By following the steps above you should have the following results.
Thank you for reaching the end of this tutorial, if you have encountered any issues, let us know in the comments below.
We’ll be continuing this in the future and add more cool stuff like effects whenever the enemy dies. We’ll also add sounds for our player.
For now, we would like to know your reaction to this tutorial? Click any emoticons below 🙂
Disclosure: This article may contain affiliate links, which means we may receive a commission if you click a link and purchase something that we have recommended.
Don’t forget to add the collider to the enemy object. 😉
Thanks for helping out the people like me who are just starting to learn to code. Very epic
I have followed everything that has been put into this, why is my animation constantly looping on one side