After all these years, Unity hasn’t been able to provide a feature where you can simply add a loading screen between your game scenes. Despite that fact, implementing a loading bar in Unity is one of the easiest things.
But before we go right into making a loading bar, let’s understand first what loading a scene/level actually means in Unity.
To be able to load a scene from another scene, you will have to use a function from the Scene Manager known as SceneManager.LoadScene (which is also known back in the day as Application.LoadLevel).
When the said function is used, Unity will perform the following process:
Without a loading screen, gamers will experience lag and glitches in the game and so it is highly suggested to implement a loading screen between levels.
In this tutorial, we’ll be teaching you how to create a loading screen with a loading bar and percentage to load a game scene whenever you trigger a LoadLevel function.
Video Tutorial
If you prefer watching video tutorials instead, you can play the following video:
Getting Started
Create a new project or open your existing project in Unity. Any projects will do as long as there are two or more scenes to switch between.
.
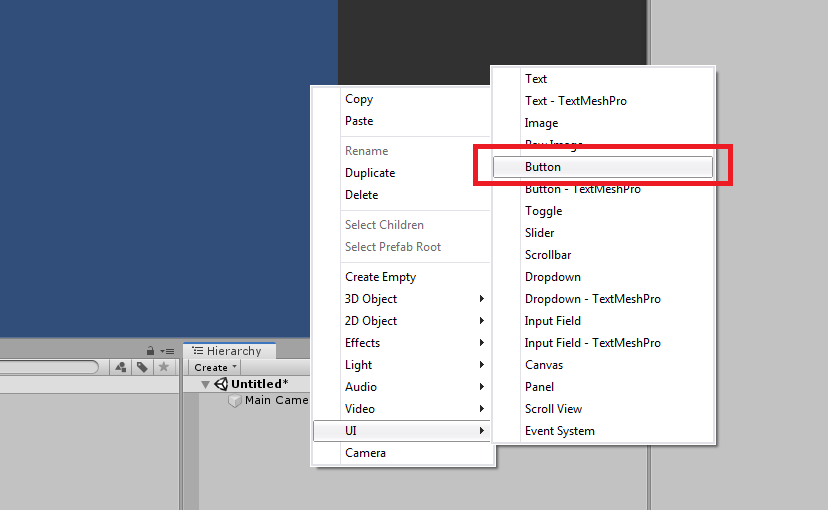
We’ll be using UI for this tutorial to be able to switch from one scene to another. So, to start, right-click into your hierarchy and select UI then Button.
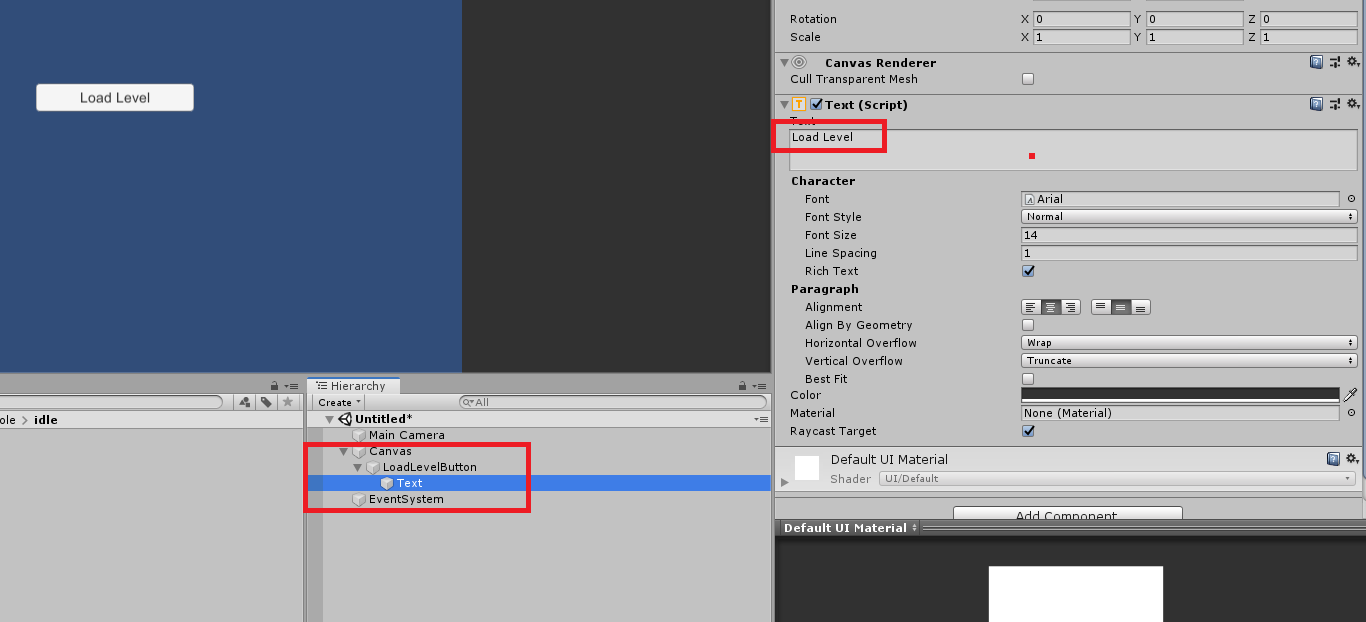
Rename the Button to something like LoadLevelButton.
Next, inside the LoadLevelButton game object, select the Text game object.
Then go to its Text component and change the text from Button to Load Level.
Next, go back to your hierarchy, right-click, create an empty game object and name it SceneManager.
Then, go to your Project window and create a new C# script, name the file LevelManager.cs.
Want to learn how to create a flappy bird game in less than 10 minutes?
How To Make Your Own Flappy Bird Game in 10 Minutes (Unity Tutorial)
Level Manager Script
Open the C# script with visual studio and copy the following code.
using System.Collections;
using UnityEngine;
using UnityEngine.SceneManagement;

public class LevelManager : MonoBehaviour
{
    public void LoadLevel (string levelName)
    {
        StartCoroutine(LoadSceneAsync(levelName));
    }

    IEnumerator LoadSceneAsync ( string levelName )
    {
        AsyncOperation op = SceneManager.LoadSceneAsync(levelName);

        while ( !op.isDone )
        {
            float progress = Mathf.Clamp01(op.progress / .9f);
            Debug.Log(op.progress);

            yield return null;
        }
    }
}

Code language: C# (cs)
Save your script and go back to Unity.
Creating Scenes
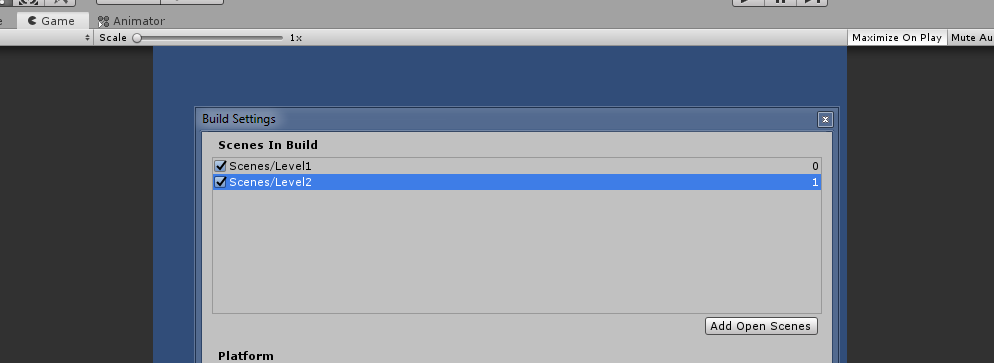
Save your current scene and name it to anything you want. After that, create a new scene and save that scene and name it to anything you want again.
As for the reference, I will have two scenes named Level1 and Level2.
Once you have your scenes created, go to your build settings and add the two scenes.
Keep in mind though that since our levels don’t have that many objects, responses in the console will most likely show nothing.
Because if you remember in our code, we have used the class AsyncOperation. This class will allow us to see all the process that is happening whenever you load a scene.
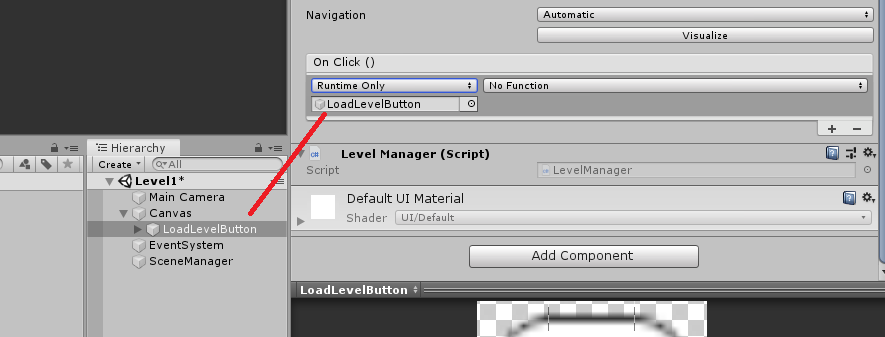
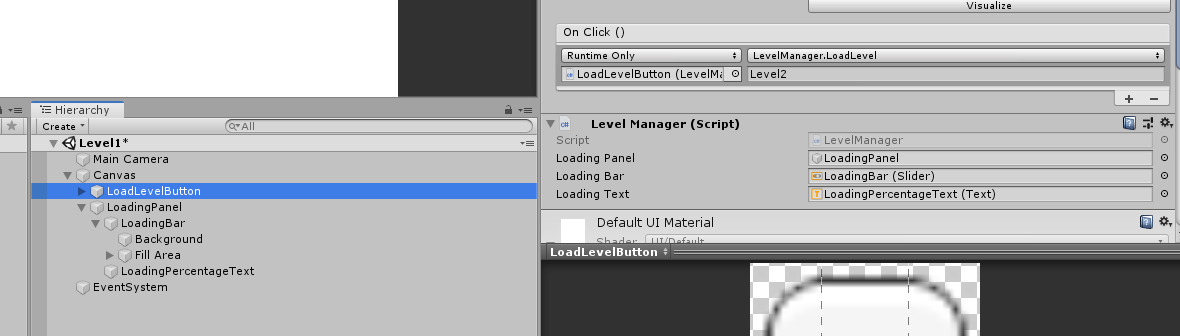
With all that being said, let’s go back to our Level1 scene and add the LoadLevel function to our Button game object.
Select the LoadLevelButton game object, all the way down in the inspector, select Add Component and look for the script Level Manager.
Next, navigate to the Button component, just right underneath the On Click () section, click on the plus button.
Then, drag the LoadLevelButton game object to the box underneath the Runtime Only dropdown.
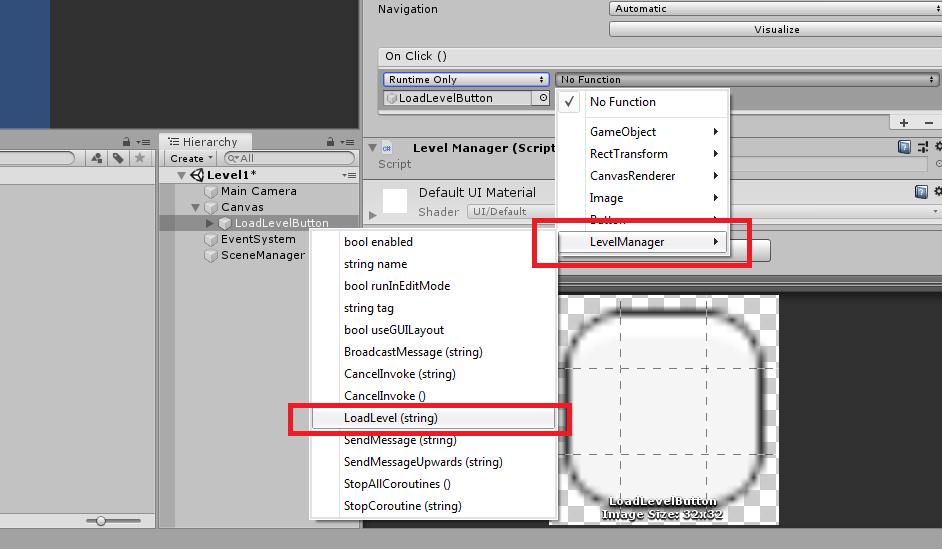
Next, click on the dropdown menu and open the LevelManager and select the LoadLevel (string).
Then, type in the input box the name of the scene that you want to load. In our case, we’ll type Level2.
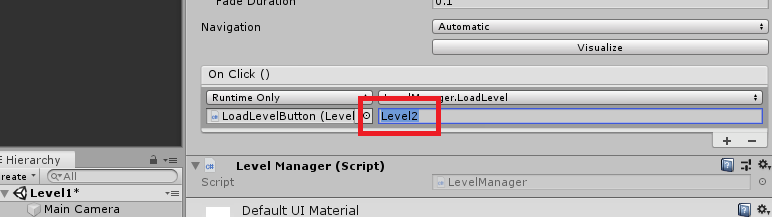
Save your scene and try to run your scene.
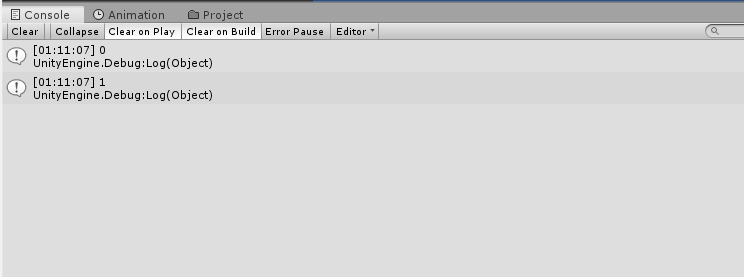
You should be able to load your scene by clicking on the button and at the same time, you should be able to see a response in your console, like the following.
The Loading Bar
.Now that we got our loading script working, let’s start adding a loading bar to our scene by going to the hierarchy once again then right-click on the Canvas game object, select UI and then Panel.
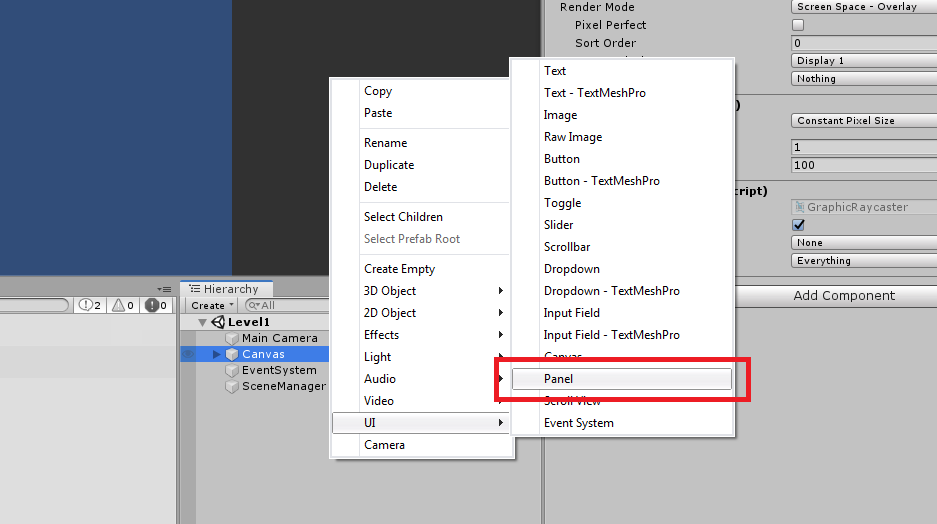
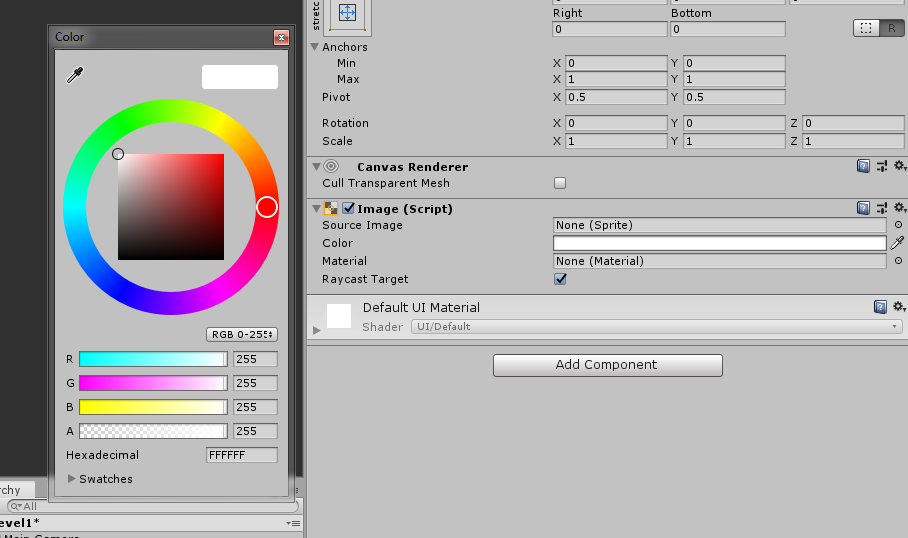
Next, select the Panel game object and go to its inspector and navigate to its Image component, change the source image to none and its color alpha to 255.
Let’s rename our Panel game object to LoadingPanel.
Next, right-click to your LoadingPanel game object and navigate to UI, and select Slider.
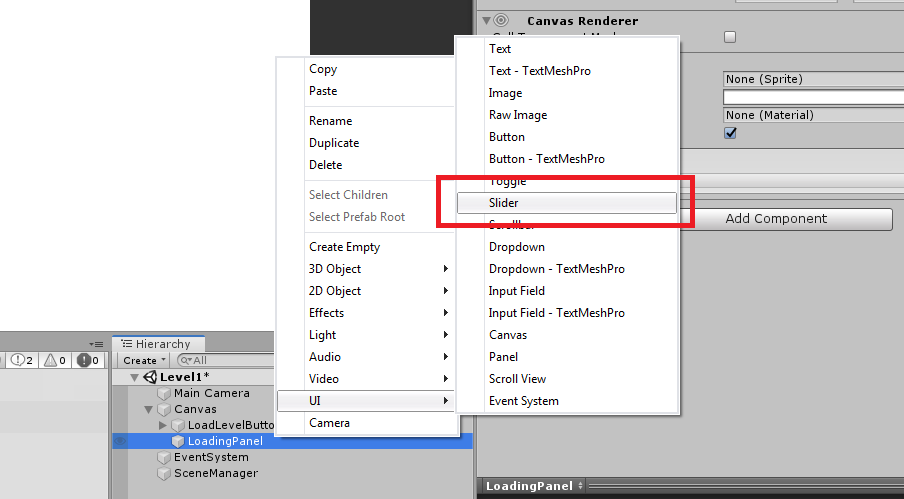
Rename your new slider to LoadingBar.
With your LoadingBar game object selected, go to the inspector and change the following value for the Slider component.
- Interactable : unchecked
- Transition : none
- Navigation : none
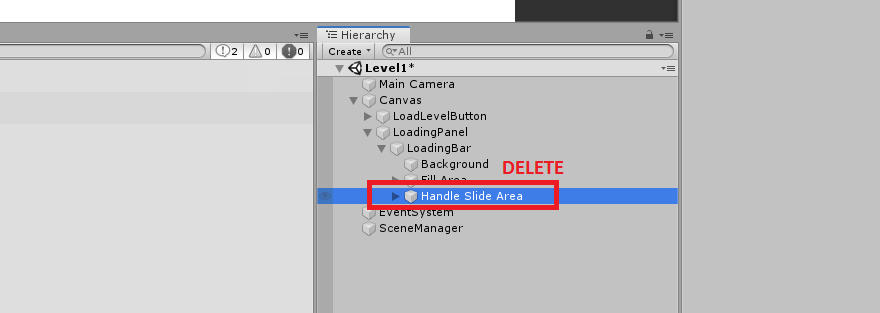
Next, inside your LoadingBar game object, delete the Handle Slide Area object.
And also, I have realized that we didn’t actually use the SceneManager game object for the Level Manager script… So we’ll just delete that as well. (haha)
Alright, going back to the tutorial.
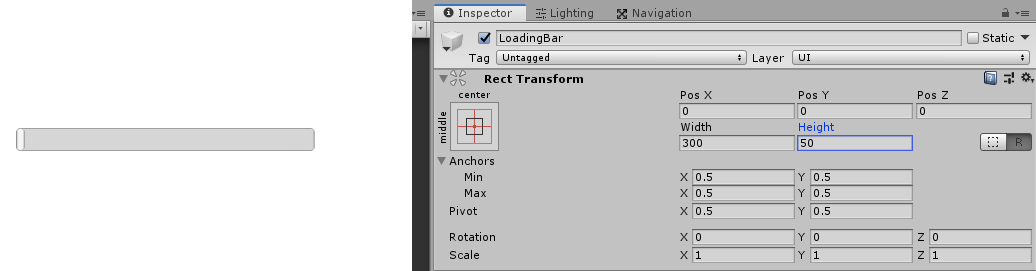
If you want to scale up your loading bar, you may by selecting the LoadingBar game object and adjusting its width and height in the Rect Transform.
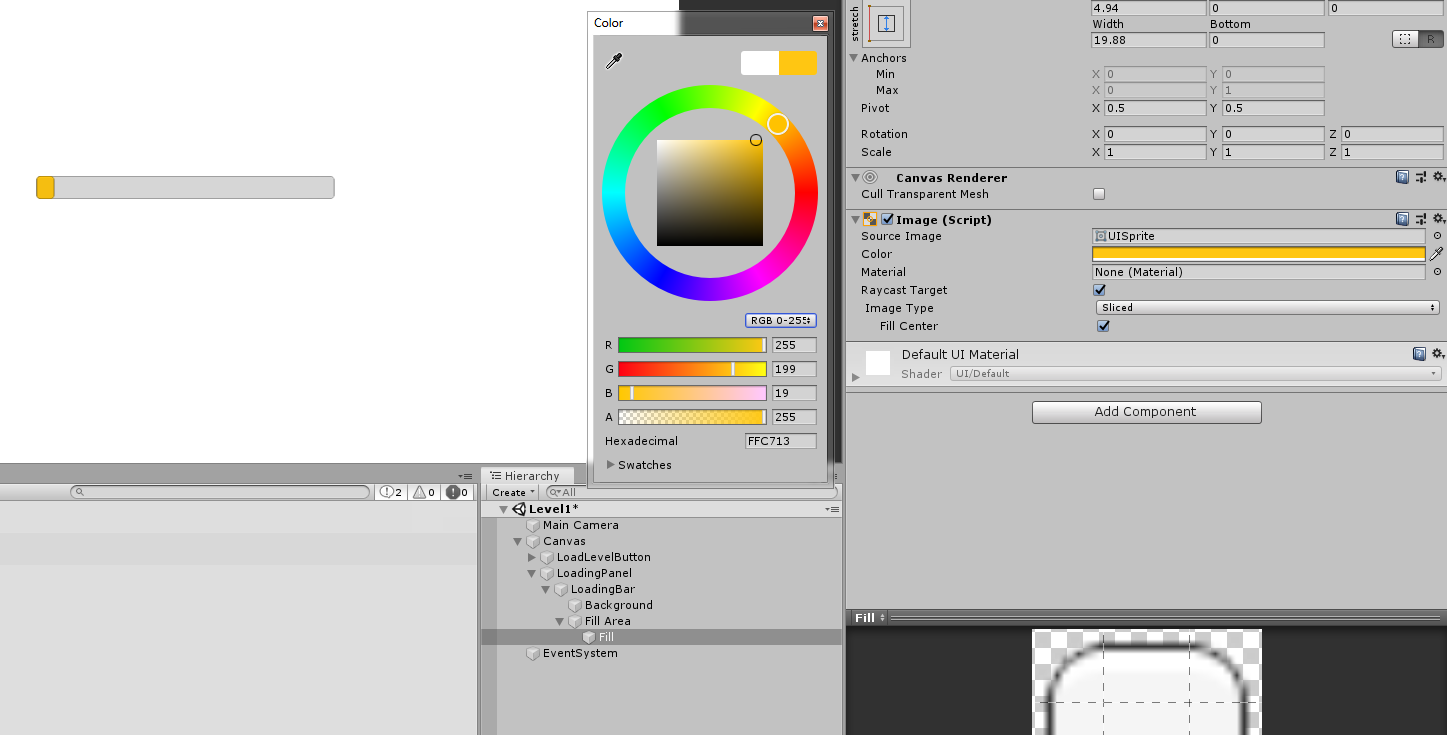
If you want to change the color of your loading bar, you may, by going to the Fill game object inside your Loading bar game object and inside the Fill Area game object.
If you want to add a percentage text in your loading bar, you may as well, by right-clicking on your LoadingBar game object and select UI and then Text.
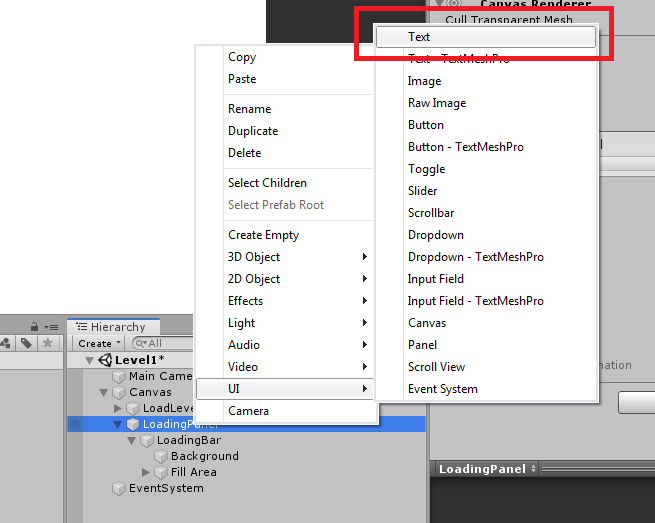
Then rename it to LoadingPercentageText.
Then position the text to wherever you want it to be. And, change the text from New Text to something like a percentage value for preview purposes.
If you want to change the font styles you may do it as well.
Using the Loading Bar
To start using the loading bar, first, we have to hide the loader first since we only need this to show up when we load another scene.
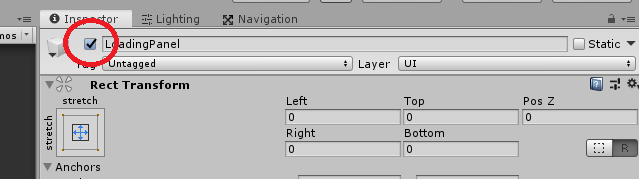
So go to your hierarchy, select LoadingPanel game object and uncheck the checkbox just beside the name of the game object.
Next, we’ll be referencing this LoadingPanel in our script so we’ll be able to enable the game object when the game starts loading another scene.
Open your Level Manager script once again and update your script to the following.
using System.Collections;
using UnityEngine;
using UnityEngine.SceneManagement;
using UnityEngine.UI;

public class LevelManager : MonoBehaviour
{
    public GameObject loadingPanel;
    public Slider loadingBar;
    public Text loadingText;

    public void LoadLevel (string levelName)
    {
        StartCoroutine(LoadSceneAsync(levelName));
    }

    IEnumerator LoadSceneAsync ( string levelName )
    {
        loadingPanel.SetActive(true);

        AsyncOperation op = SceneManager.LoadSceneAsync(levelName);

        while ( !op.isDone )
        {
            float progress = Mathf.Clamp01(op.progress / .9f);
	    //Debug.Log(op.progress);
            loadingBar.value = progress;
            loadingText.text = progress * 100f + "%";

            yield return null;
        }
    }
}

Code language: C# (cs)
Save your script and go back to Unity.
Navigate to your hierarchy once again and select your LoadLevelButton game object.
Then scroll down to your Level Manager script in the inspector and drag the LoadingPanel game object to the Loading Panel slot and drag the LoadingBar game object to the Loading Bar slot and lastly drag the LoadingPercentageText game object to the Loading Text slot.
Save your scene and there you go.
You should be able to load your scene with a loading screen with a progress bar and text. Super easy!