Have you ever thought of getting data from the internet but you’re not sure how to do it? You assume that you can just download it and import it to your projects but then you realized that it’s very tedious to do.
Well, fortunately for you there is the best way to do it.
You can easily get data from the internet without importing it to your project by using REST API.
What is REST API?
Representational state transfer (better known as REST) and Application Programming Interface (also known as API) is a way of creating interactions between a client and a server. This interaction produces a javascript object notation (JSON) which can be used by many software.
With Unity, using REST API can be really helpful. Not only it will make your projects lighter but it can also make it easier for developers to add updated data to games.
Take this scenario, for example, you published a game without a REST API and your players noticed an error inside your game let’s say it’s a typo. Because of that you will have to manually update your game, re-build it, and upload it to the public. Super tedious.
However, if you use REST API, all you need to do is to go to your server, update that specific data, save it, and see the magic works.
That’s why in this tutorial, we’re gonna be looking at how to use REST API with Unity to get JSON data from the internet.
If you are looking for a tool that makes your work with REST API faster and easier? Try API Fetch Kit.
Now, let’s begin.
Getting Started

For this tutorial, we’re gonna be using Fortnite’s API to get items and display them in our game. However, if you have other APIs that you want to use feel free to use it since the process of getting data with REST API is pretty much the same. Just make sure you have the API keys and other keys provided by the API of your choice.
But if you decided to follow along with this tutorial make sure you sign up and subscribe to the endpoint.
Alright, before we start working with the API and other stuff, let’s mold our scene first.
Let’s create a very simple scene where we have a text UI for the item name, a button for generating the next item, and a sprite for the image of the item.
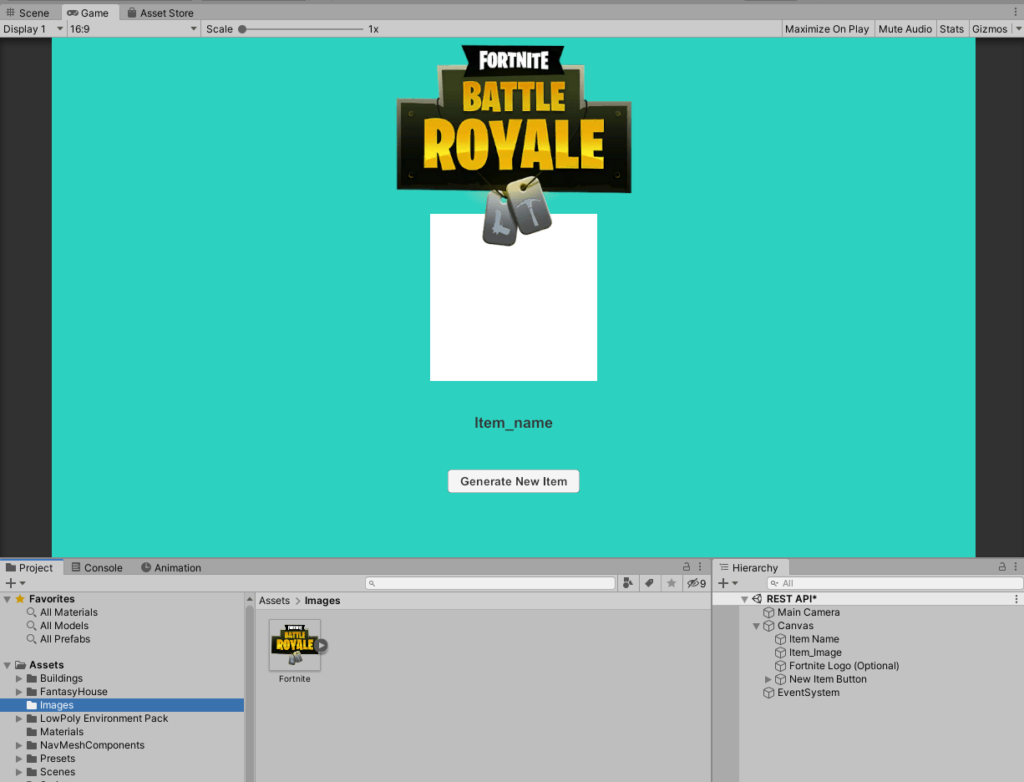
Feel free to add more text objects especially if you want to display more data like the ID of the item, the source URL of the image, etc. but for the sake of the simplicity of this tutorial, we’ll just make it as few as possible.
Making API Calls
Now that we have our scene ready, let’s start asking for a data response from the internet and display it in our scene. To do that, create a C# script and name it FortniteAPI.cs and copy the following code.
using UnityEngine;
using UnityEngine.Networking;
using System.Collections;

public class FortniteAPI : MonoBehaviour
{
    private const string URL = "https://www.weeklyhow.com";

    public void GenerateRequest()
    {
        StartCoroutine(ProcessRequest(URL));
    }

    private IEnumerator ProcessRequest(string uri)
    {
        using (UnityWebRequest request = UnityWebRequest.Get(uri))
        {
            yield return request.SendWebRequest();

            if (request.isNetworkError)
            {
                Debug.Log(request.error);
            }
            else
            {
                Debug.Log(request.downloadHandler.text);
            }
        }
    }
}
Let’s do this step by step so you get the idea of how to request data from the internet. In our code above, we simply created a const string variable which we named URL and we gave it a value of a web URL. Don’t worry, you can enter any URL you want as we’ll just trying it out.
After we entered the URL, we created two functions, one is a public void and another one is a private IEnumerator.
Let’s explain the public function first, the GenerateRequest() function is going to be used by our Generate button. So whenever you click the button, this function will be called. Inside this function, we simply started a coroutine for our IEnumerator function. Since we can’t just call the IEnumerator function, we had to create this function just to fire the IEnumerator.
Now here’s the part that gets really interesting…
Inside the ProcessRequest() function, we initialized the UnityWebRequest and then we send the URL for processing. Then, we wait for its response and after getting the response we check if it’s a failure or a success. If there is an error we display the error in our console and if it’s a success we display the response in the console too. The response from downloadHandler is mostly written in HTML format which is what we’re expecting.
Save the script and head back to Unity.
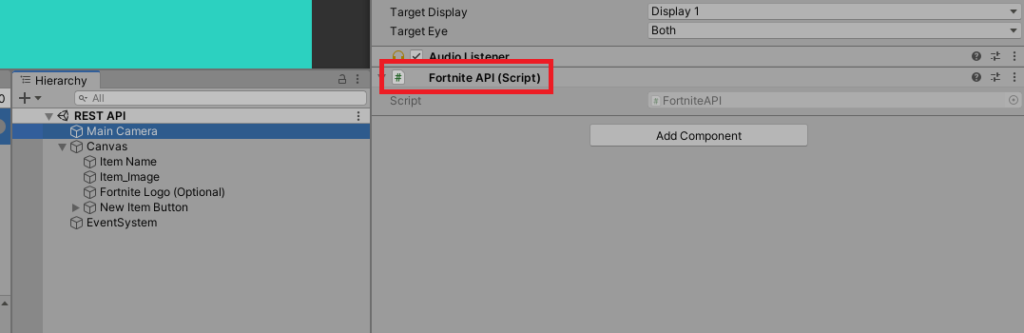
Once the script is saved, applied it to the Main Camera.
Then, select the New Item Button and create a new OnClick event and apply the Main Camera to it.

Once applied, select the No Function dropdown option and look for FortniteAPI > GenerateRequest ().

If you save your scene and run the game, you should be able to see a response when you click the Generate button (Give it time to process).

Awesome! Now that everything is working, let’s proceed using Fortnite’s API.
Let’s head back to our FortniteAPI.cs script and update its code to the following:
using UnityEngine;
using UnityEngine.Networking;
using System.Collections;

public class FortniteAPI : MonoBehaviour
{
    private const string URL = "https://fortnite-api.p.rapidapi.com/items/en";
    private const string HOST = "fortnite-api.p.rapidapi.com";
    private const string API_KEY = "ENTER_YOUR_API_KEY_HERE";

    public void GenerateRequest()
    {
        StartCoroutine(ProcessRequest(URL));
    }

    private IEnumerator ProcessRequest(string uri)
    {
        using (UnityWebRequest request = UnityWebRequest.Get(uri))
        {
            request.SetRequestHeader("X-RapidAPI-Host", HOST);
            request.SetRequestHeader("X-RapidAPI-Key", API_KEY);

            yield return request.SendWebRequest();

            if (request.isNetworkError)
            {
                Debug.Log("Error: " + request.error);
            }
            else
            {
                Debug.Log("Received: " + request.downloadHandler.text);
            }
        }
    }
}
For the updated code above, we simply changed the value of the URL to the endpoint of the API. Then, we created two new const string variables. One is the HOST and two is the API_KEY.
Keep in mind that some API may require you to add more headers so make sure you include that. In our case, the API only wants us to add X-RapidAPI-Host and X-RapidAPI-Key headers.
Then, inside the ProcessRequest() function, just before we send the request, we added the two custom headers using SetRequestHeader().
Save the script and head back to Unity to try it out.
Keep in mind that sending a request and getting a response from the API may take some time. So make sure you patiently wait.
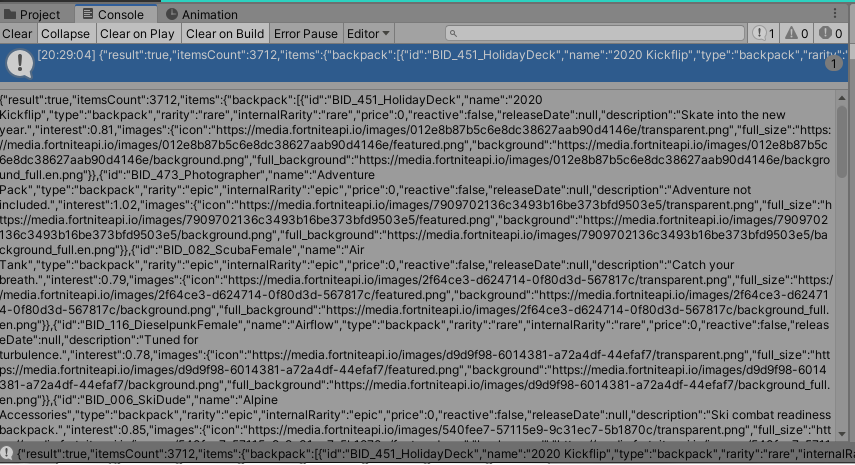
As you can see in the image above, we get a JSON response from the API. This data contains everything about the items of Fortnite that’s why it took some time to return a response.
Parsing JSON Response
Now the next thing we need to do is to parse this JSON data into something that unity can understand and this is where we need to use the plugin SimpleJSON.
Once you have downloaded SimpleJSON, import it to your project. Make sure the script is in the Plugins folder.

Once the script is imported, we can start parsing the JSON response that we got from our request.
Let’s head back to our FortniteAPI script and update its code to the following:
using UnityEngine;
using UnityEngine.Networking;
using System.Collections;
using SimpleJSON;

public class FortniteAPI : MonoBehaviour
{
    private const string URL = "https://fortnite-api.p.rapidapi.com/items/en";
    private const string HOST = "fortnite-api.p.rapidapi.com";
    private const string API_KEY = "ENTER_YOUR_API_KEY_HERE";

    public void GenerateRequest()
    {
        StartCoroutine(ProcessRequest(URL));
    }

    private IEnumerator ProcessRequest(string uri)
    {
        using (UnityWebRequest request = UnityWebRequest.Get(uri))
        {
            request.SetRequestHeader("X-RapidAPI-Host", HOST);
            request.SetRequestHeader("X-RapidAPI-Key", API_KEY);

            yield return request.SendWebRequest();

            if (request.isNetworkError)
            {
                Debug.Log(request.error);
            }
            else
            {
                //Debug.Log(request.downloadHandler.text);

                JSONNode itemsData = JSON.Parse(request.downloadHandler.text);

                int randomNum = Random.Range( 1, itemsData["items"]["backpack"].Count);

                Debug.Log("The generated item is: \nName: " + itemsData["items"]["backpack"][randomNum]["name"]);
            }
        }
    }
}
We firstly added the namespace SimpleJSON. Then, we proceed to the line of the code where the request is successfully taken. We created a JSONNode object and used the JSON.Parse() function to convert the string from the downloadHandler to an array.
That’s why after that parsing, we can access the array like the following:
Debug.Log("The generated item is: \nName: " + itemsData["items"]["backpack"][randomNum]["name"]);Code language: CSS (css)Keep in mind that every JSON data that you received from your request can have different keys, that’s why you have to make sure that you have a guide of how the JSON response looks like if it’s an array.
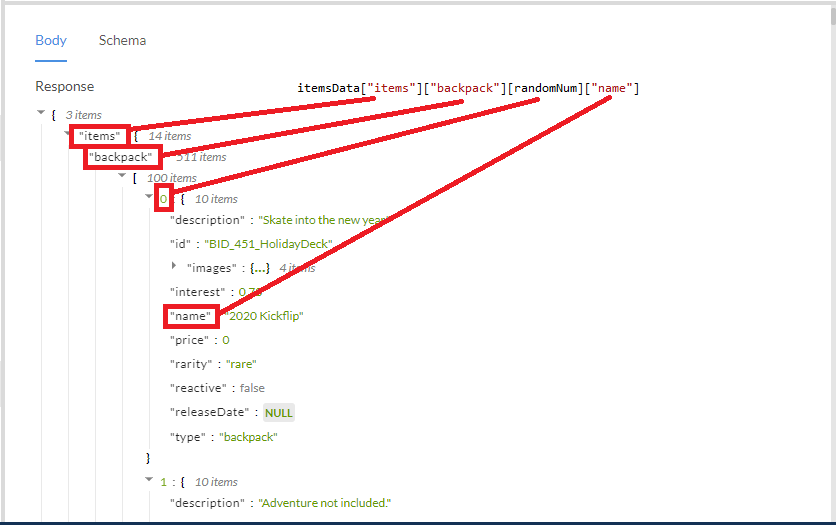
Take the image above as an example. You see, the JSON contains multi-dimensional data. The first key is the items, inside this key contains 14 more keys and one of them is the backpack. Inside of the backpack key, there are 511 keys which are in number formatting. If the key is in number format that’s the time we can use a looping statement or a random number.
But in our case, we just used Random.Range() function to generate a random number from 1 to the length of the backpack key which is 511. In other words, Random.Range() will give us a value between 1 and 511.
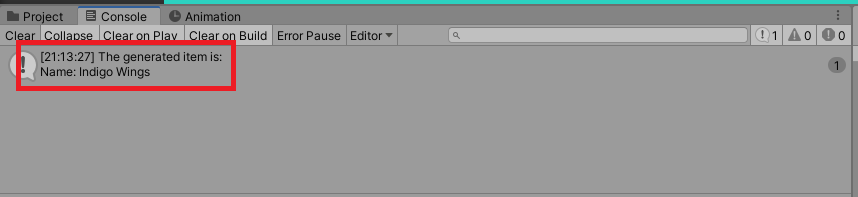
Now if you save the script and try it on Unity. We should be able to get the name of a random item.
Awesome! Now we can pass this data and more to our game objects.
Let’s head back to our FortniteAPI script and update its code to the following:
using UnityEngine;
using UnityEngine.Networking;
using System.Collections;
using SimpleJSON;
using UnityEngine.UI;

public class FortniteAPI : MonoBehaviour
{
    [SerializeField] private Text _itemNameUI;
    [SerializeField] private RawImage _itemIconUI;

    private const string URL = "https://fortnite-api.p.rapidapi.com/items/en";
    private const string HOST = "fortnite-api.p.rapidapi.com";
    private const string API_KEY = "ENTER_YOUR_API_KEY_HERE";

    public void GenerateRequest()
    {
        StartCoroutine(ProcessRequest(URL));
    }

    private IEnumerator ProcessRequest(string uri)
    {
        using (UnityWebRequest request = UnityWebRequest.Get(uri))
        {
            request.SetRequestHeader("X-RapidAPI-Host", HOST);
            request.SetRequestHeader("X-RapidAPI-Key", API_KEY);

            yield return request.SendWebRequest();

            if (request.isNetworkError)
            {
                Debug.Log(request.error);
            }
            else
            {
                //Debug.Log(request.downloadHandler.text);

                JSONNode itemsData = JSON.Parse(request.downloadHandler.text);

                int randomNum = Random.Range( 1, itemsData["items"]["backpack"].Count);

                string item_name = itemsData["items"]["backpack"][randomNum]["name"];
                string item_image_url = itemsData["items"]["backpack"][randomNum]["images"]["icon"];

                UnityWebRequest itemImageRequest = UnityWebRequestTexture.GetTexture(item_image_url);

                yield return itemImageRequest.SendWebRequest();

                if(itemImageRequest.isNetworkError || itemImageRequest.isHttpError)
                {
                    Debug.LogError(itemImageRequest.error);
                    yield break;
                }

                _itemNameUI.text = item_name;
                _itemIconUI.texture = DownloadHandlerTexture.GetContent(itemImageRequest);
                _itemIconUI.texture.filterMode = FilterMode.Point;
            }
        }
    }
}
We created two new private variables, one is for the text UI and the other one is for the Raw Image game object. Again, use Raw Image instead of just Image.

And of course, since we’re using UI in our script, we’ll need to use the namespace UnityEngine.UI.
Next, after getting the response and parsing it from JSON format, we created two inline strings variable, one is for the item name and another one is for the item icon URL.
Now, for the item icon URL, since it is a URL, we’ll need to do another web request. However, since this is an image, we’ll be using a different function and that is UnityWebRequestTexture.GetTexture().
After checking if we successfully received the response, then we apply the value of the item_name to our text UI and the texture of the item image request using the DownloadHandlerTexture.GetContent().
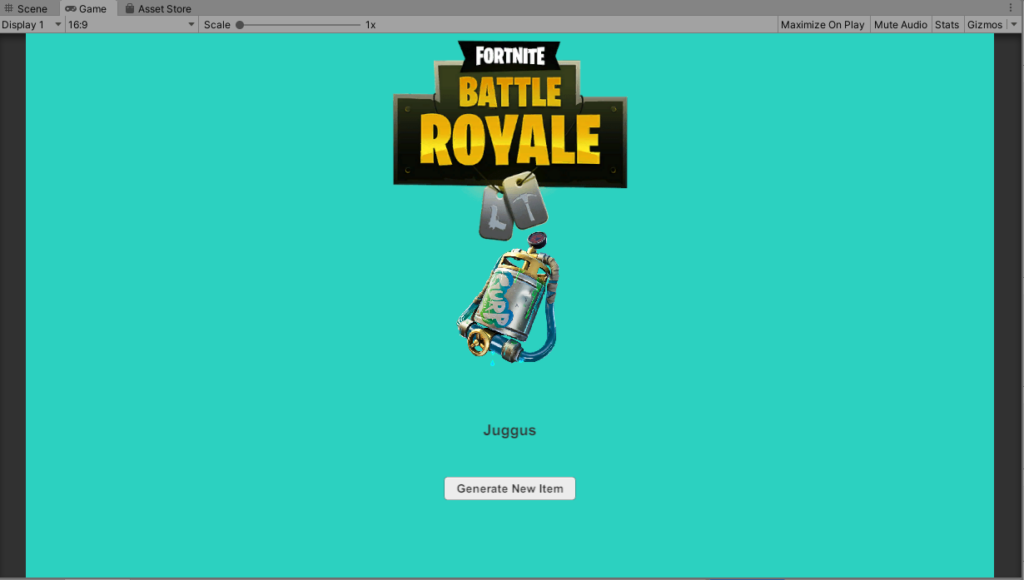
Now, save the script and see the magic happens 🙂
Conclusion
RESTful API is one of the best features that have happened to programming. It allows us to develop applications comfortably and faster. With REST API, you can do more things other than displaying items from Fortnite. You can display real-time currency value. You can even use real-time weather data to control weather particles in your games which is really cool!
If you have enjoyed this lesson let us know in the comments below. If you have encountered any issues, don’t hesitate to let us know either. We’d love to help out.
Disclosure: This article may contain affiliate links, which means we may receive a commission if you click a link and purchase something that we have recommended.
Thanks mate! 🙂 I´m working on a thing for my game, you can use your Minecraft Skin as ingame Skin (Minecraft cause there are loads of APIs) providing a username. That image part still has to come, I have to do it differently than you did, but thanks!
P.S.: Nice Blog! I have some WP-based blogs too 😀
Hi Ole!
Thank you for checking out our guide. We’re glad you find it somehow useful.
Good luck with your game project!
Best