
If you’re an old time Windows PC user that is about to transfer to Mac, you might be wondering how to take a screenshot. Most of us are. Without the “Print Screen” key on our keyboard, we won’t be able to screencap our Mac. But don’t worry no more, in this article we will sure you how to screenshot on mac.
Using Keyboard Commands
The easiest and quickest way to screen capture on a Mac is by using its keyboard commands.
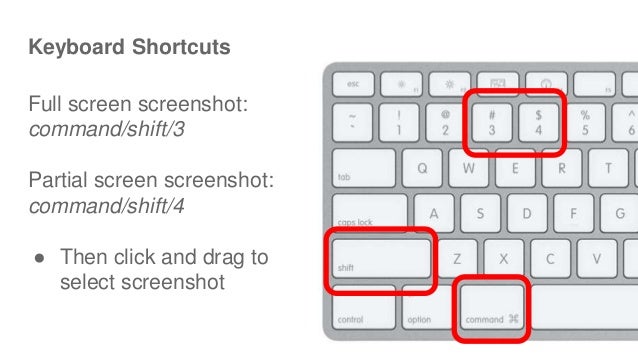
- Press the Command + Shift + 3 keys simultaneously. By doing so, your Mac will capture the entire screen and saves it as a file on the desktop. The file name will look like “Screen shot 2019-02-04 at 11.10.00 PM.png”.
How To Screen Capture on Mac Partially?
If you want to capture your screen partially, all you need to do is to press number 4 instead of 3.
- Press the Command + Shift+ 4 keys simultaneously.
- Use your mouse to draw a rectangle to specify which area to capture or you can press the spacebar and then click on a window to capture it. Your Mac then saves it as a file on the desktop.
Learn more
- To cancel taking a screenshot, press the Escape key before clicking capture.
- To store the screenshot in the Clipboard instead of saving it to the desktop, press and hold the Control key while you click to capture.
- You can open your screenshots with Preview, Safari, and other apps that can edit or view pictures.
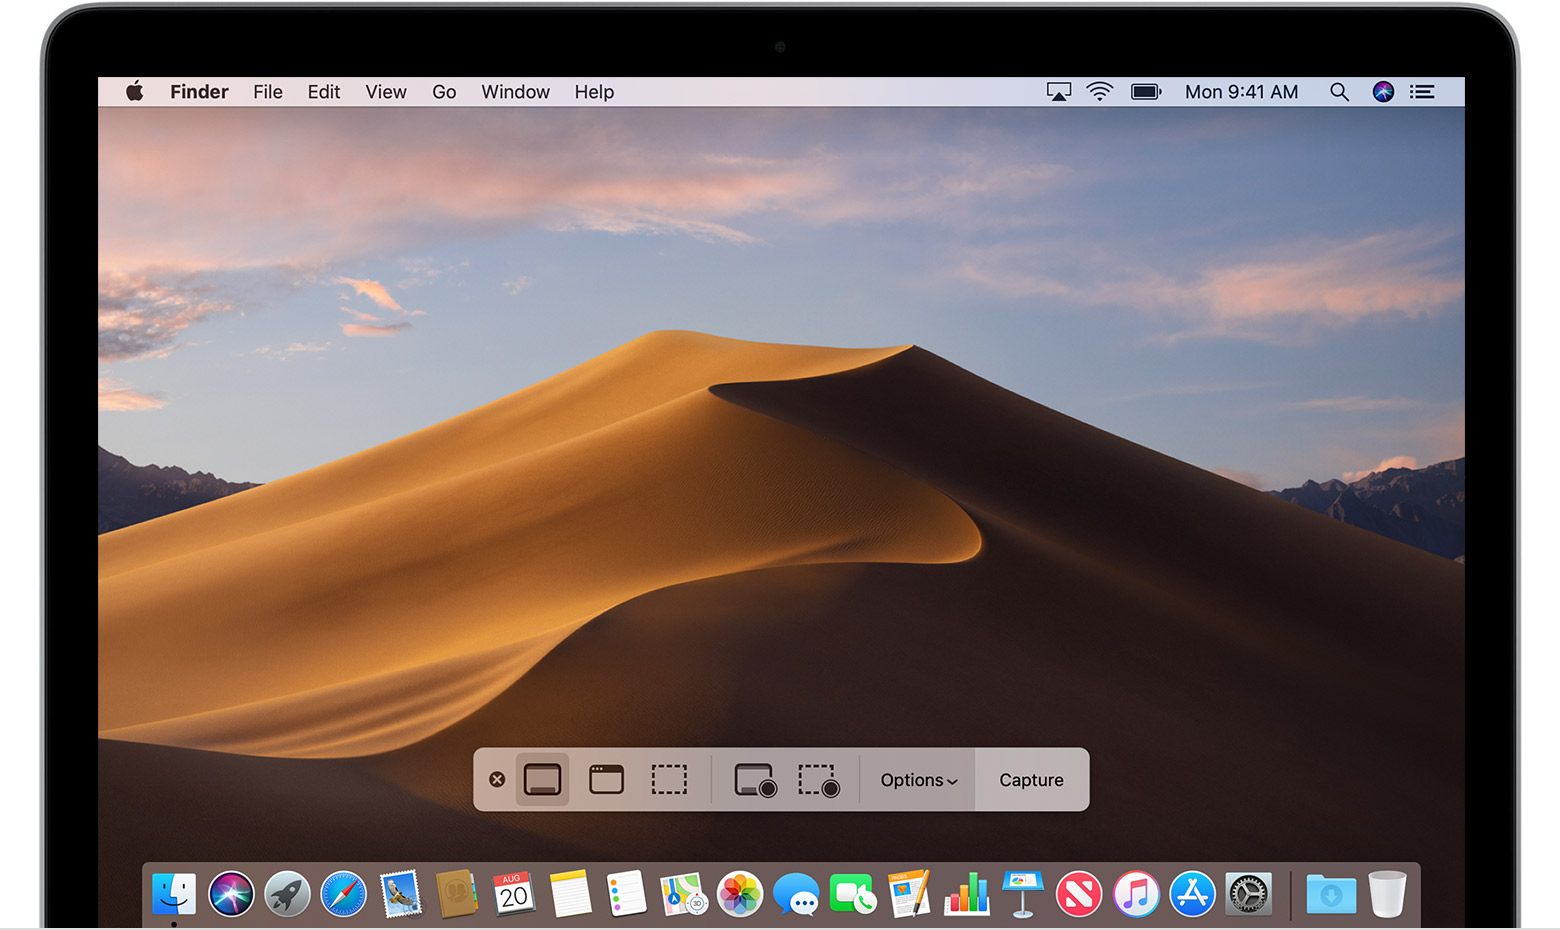
- The screenshot controls in macOS Mojave are provided by the Screenshot app, which is in the Utilities folder of your Applications folder. This app replaces the Grab app from earlier versions of macOS.