
In the previous tutorial, we have managed to setup our Unity project together with Photon Unity Network (PUN 2) and because of that, we are now able to make a server and clients where they can connect to each other.
If you haven’t setup your Unity project with PUN2 yet, make sure you read the previous article where I explain how to connect Unity with Photon Network.
In this article, we’ll be using Unity Canvas or UI instead of GUI so it’ll be much easier for you to modify the buttons, panels, etc. Just in case you want them to look good.
Let’s begin
Open your Unity Project
If you haven’t opened your Unity Project yet, do so by running Unity and select the Project you have used in the previous article.
After that, make a new scene by clicking on File and New Scene, or you can just press CTRL+N to create a new scene.
Create User Interface
The next thing we’re going to do is to create a user interface where the players can select a room and then click a button where it says Join Game.
To do that, right-click on the hierarchy and select UI then Canvas.

You can also do this by going to Game Object > UI > Canvas
Next, save your scene by going to File > Save or you can just press CTRL+S to save the scene. Name the scene file Main Menu. This is where we’re going to create rooms for players to join in.
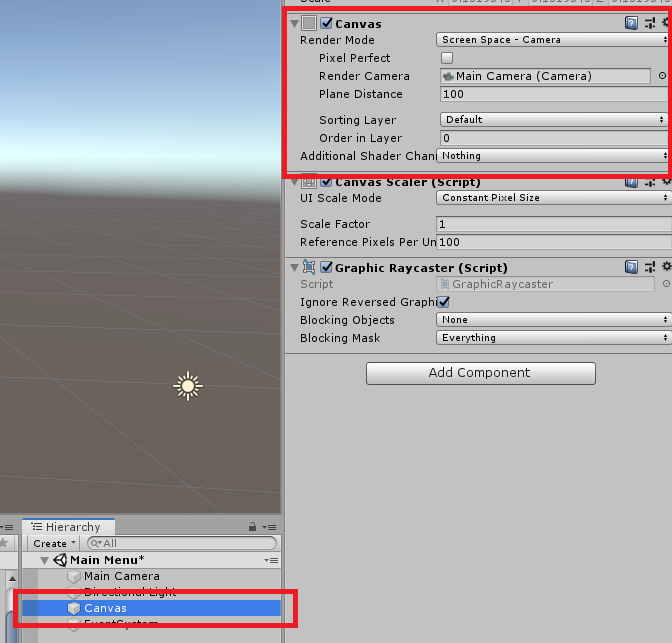
The next thing we’re gonna do is modify the component of Canvas. So while you selected the Canvas game object, go to the inspector and change the Render Mode from Screen Space – Overlay to Screen Space – Camera.
Now, you might have noticed that there’s a warning sign saying that there is no camera assigned to the render camera. So go ahead and drag your Main Camera to the Render Camera.
This will make the canvas shrink depending on the size or ratio of the camera. So let’s say you have set your game to 16:9 ratio. The canvas itself will also adjust to 16:9 ratio and so on.
This is very convenient especially if the other players have different sizes of monitors and you won’t have to code it yourself through GUI.
Here’s how it should look like:
Creating the Lobby
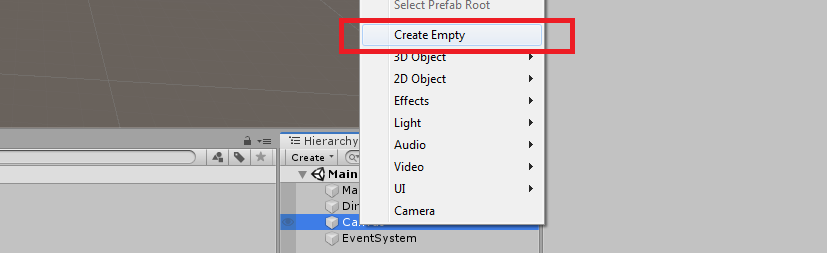
Lobby is where all the players gather together to either create their own rooms or find rooms to join in. To create a lobby, right-click on Canvas and select Empty Game Object then rename it to Lobby by pressing F2.
Now we want to adjust the size of the lobby so go-ahead to the inspector and modify the Rect Transform by clicking on the Anchor presets and select the very bottom right option where it says stretch and then HOLD ALT KEY and then click the same option you have selected.
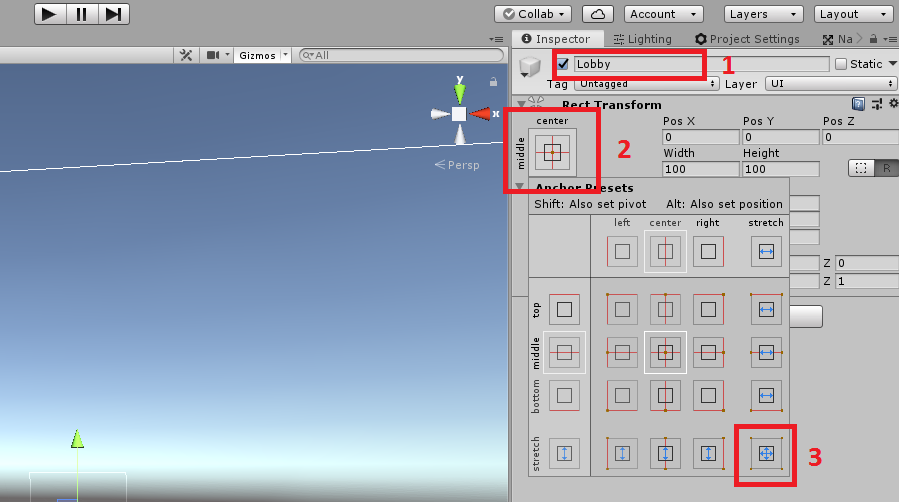
- Make sure the name of the game object is Lobby
- That is anchor presets, click that and;
- select that very bottom right corner option. That will stretch the size of the game object dynamically depending on the size of the canvas.
We’re going to repeat the same thing, select lobby game object, right-click then go to UI > Image then rename it to Background.
Select the Background game object and go to the inspector and do the same thing just like the lobby game object. Adjust the size by clicking on the anchor presets and select the bottom right option stretch and hold the ALT key once again and select the same stretch option.
If you like, you may set the color of the Image component, but in this tutorial. I won’t do that because I prefer white color 🙂
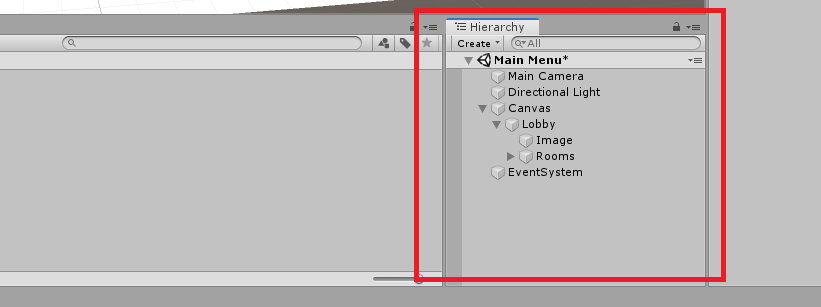
Next, select Lobby game object once again and create a scroll view by right-clicking on the Lobby game object > UI > Scroll View. Rename the Game Object to Rooms.
This is what your hierarchy should look like.
Next, adjust your scroll view game object in the scene view instead of using hierarchy.
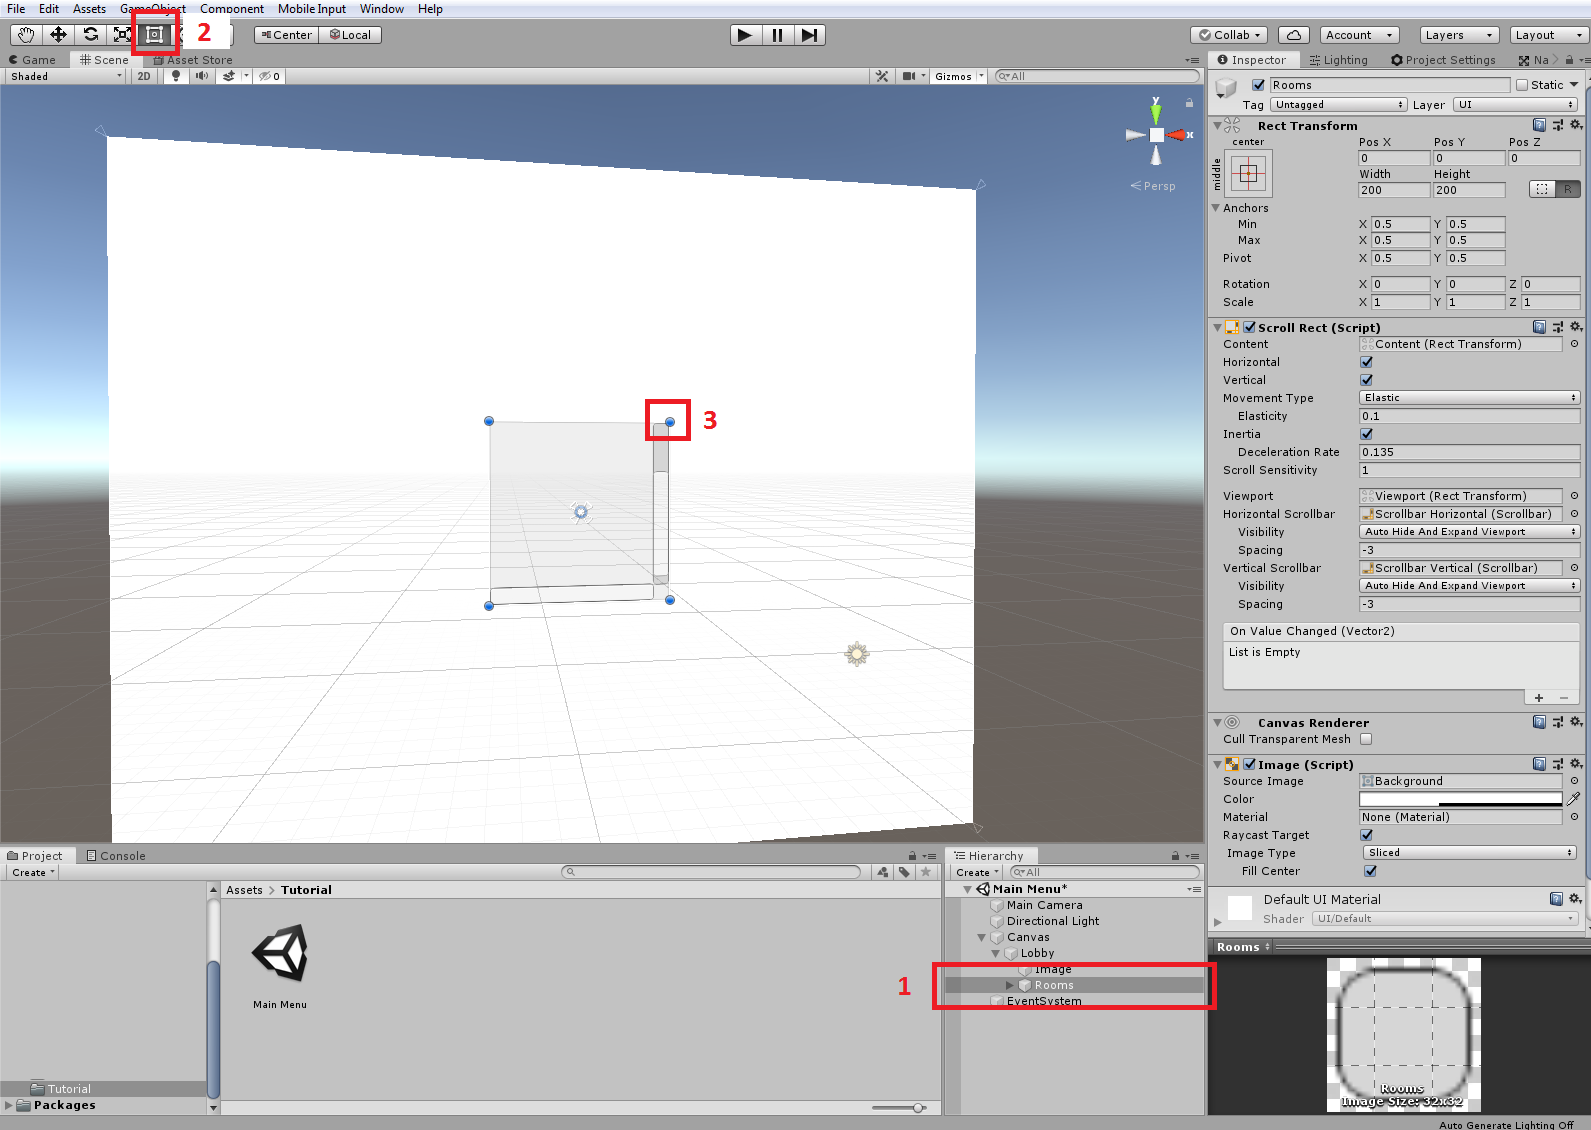
- Make sure you have selected Rooms game object
- Click the UI tool to freely adjust the UI.
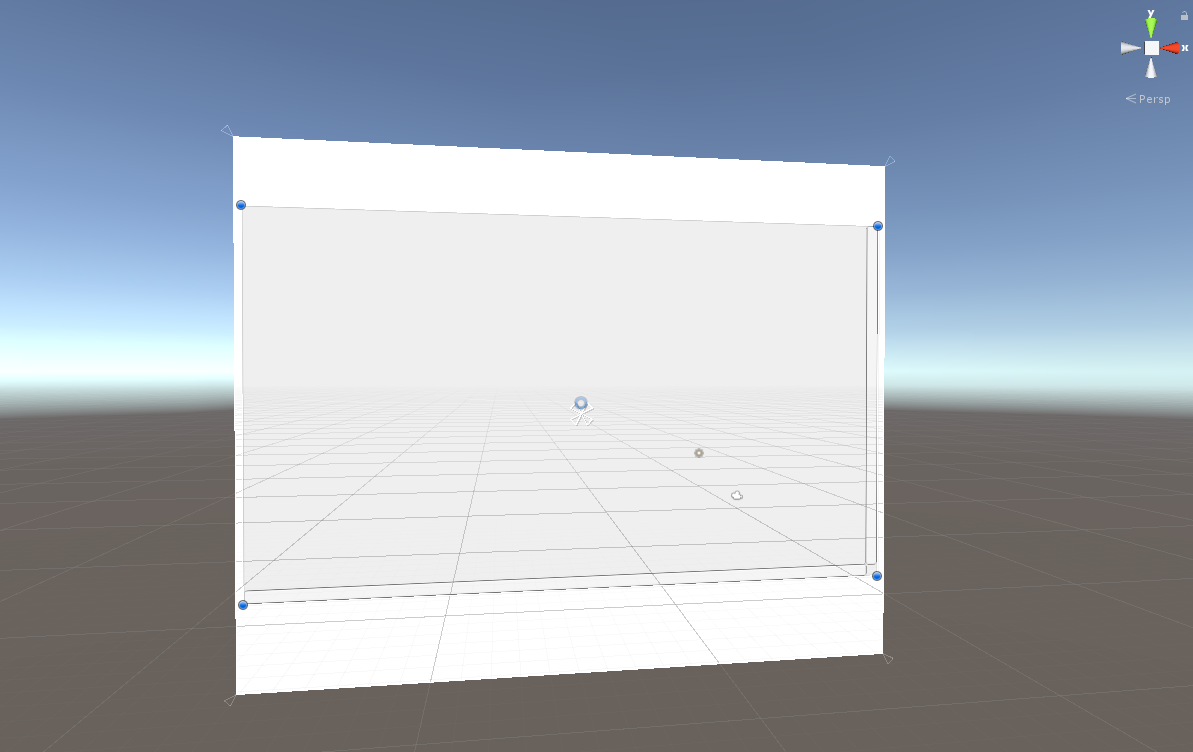
- Drag the blue circle of each corner of the Rooms game object. You may place the scroll view on any place you like as long as it’s inside the canvas. In my case, I will make it look like this:
Next, we’re going to modify the functionality of the scroll view. That means, we’re going to remove some of its features like the scroll bar. We don’t really need those scroll bars since you can actually use your mouse to scroll down and up.
Alright, to do that. Select the scroll view game object that we named Rooms and then go to the inspector.
Now let’s focus on the Scroll Rect component:
Uncheck the Horizontal, this will stop the scroll view from being able to scroll horizontally. Besides, we’re gonna be displaying rooms vertically so there’s no need for horizontal scrolling.
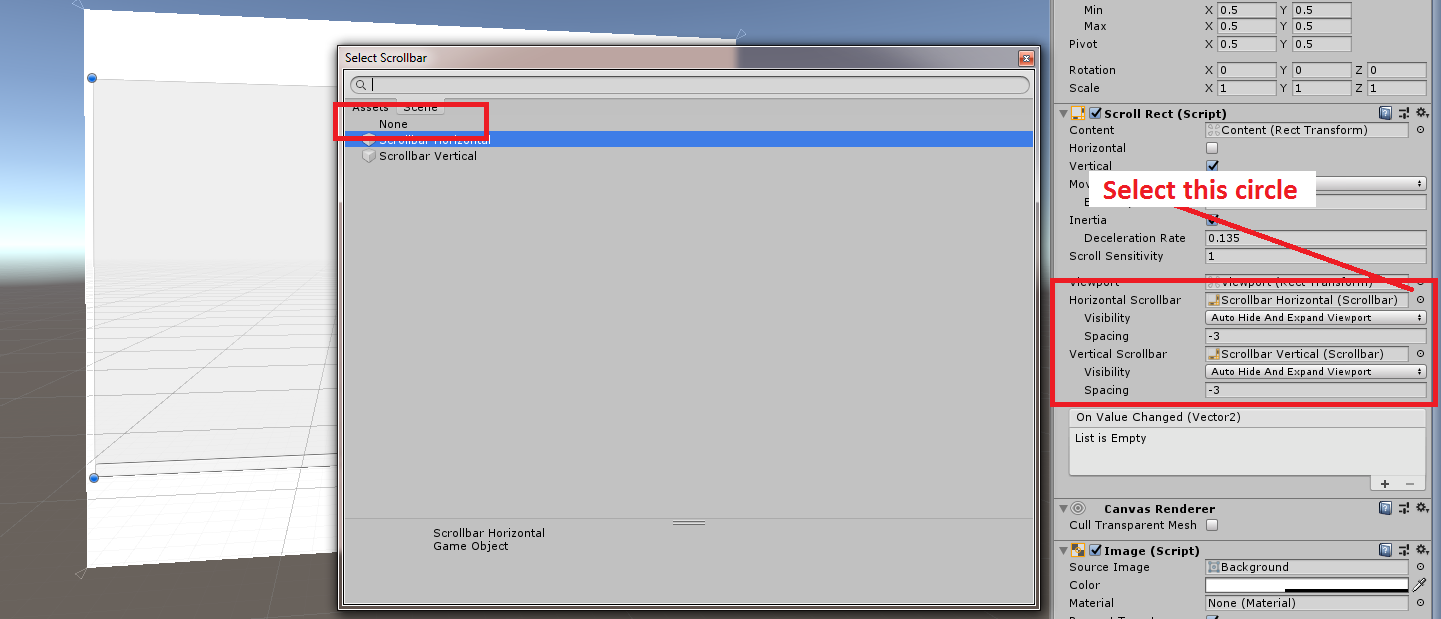
Next, remove the scroll bars by going underneath the viewport variable and click that little circle beside Horizontal Scrollbar. This will pop out a window. After that, select none.
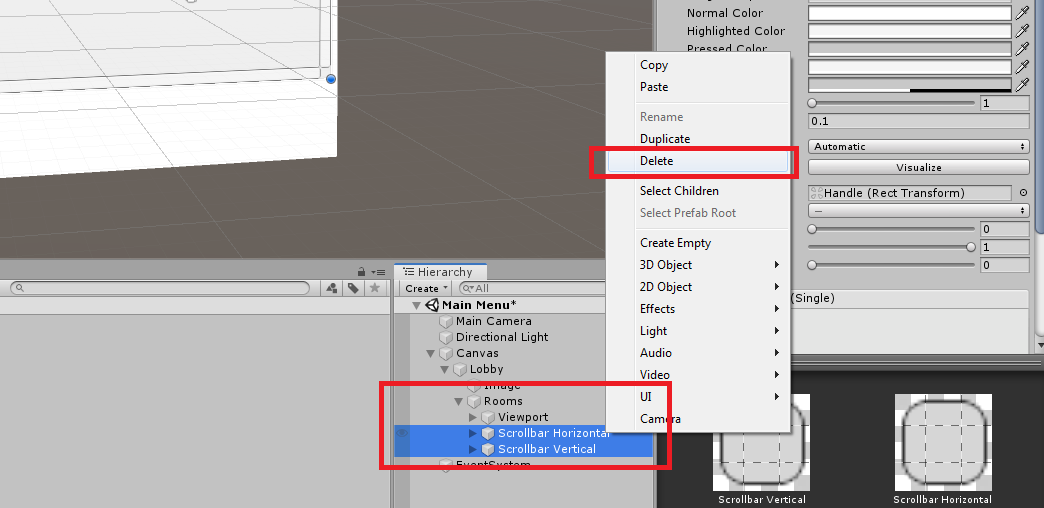
Next, we’re going to delete the scroll bars game object. To do that, go to your hierarchy and select Rooms game object and then delete both Horizontal and vertical scroll bars.
To select game objects at once, select a game object and then hold CTRL then select another game object.
Now go ahead and select viewport game object and add components called Vertical Layout Group and Content Size Fitter. You can do this by clicking on Add Component > Layout > Vertical Layout Group.
Same with Content Size Fitter: Add Component > Layout > Content Size Fitter.
Now go ahead and set the value of Vertical Fit to Min Size and on Vertical Layout Group component, uncheck both width and height of Child Force Expand.
Next, rename the game object Content to RoomContent
The component of the game object should look like this:

Creating Room Options
The next game object that we’re going to create is the button in which the players can press and be redirected to the room that they have joined in.
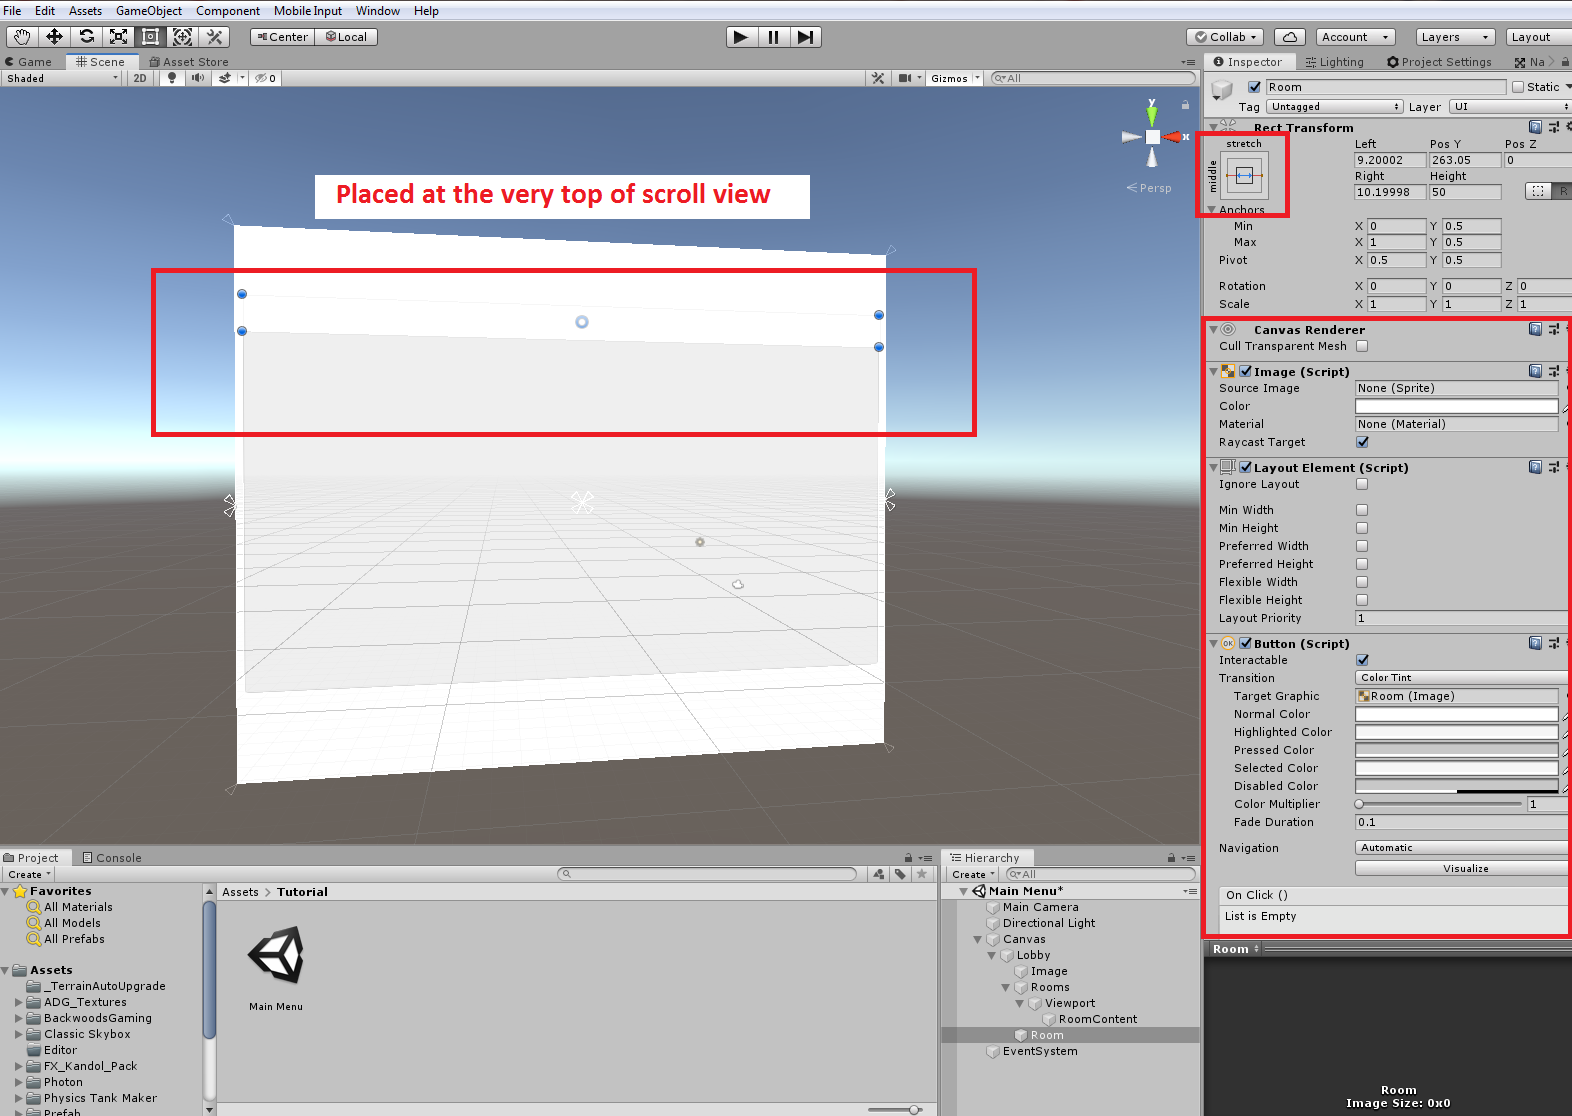
To do this, select the Lobby game object and then right-click and select Create Empty then rename it to Room.
Next, select the Room game object that we have just created and add the component Image. Another component that we’re gonna need is the Layout Element. Go add this component by going to Layout > Layout Element.
Next, adjust the width of the Room Game Object. You may use Anchor presets and select stretch width.
And before I forget, add another component which is Button. Go to Add Component > UI > Button.
The Room game object should look like this:
The next thing to do is to select the Room game object, and then right-click then select UI > Text. We’re gonna be using this Text game object to name the room that the players created.
Rename the game object to RoomName.
You can modify this text to whatever you want it to look like. In my case, I’ll be aligning this text to the left-center and then use anchor presets to dynamically adjust its width depending on the size of the button. I’ll be making the text bold as well and resize it to 18 pixels.
This is how mine looks like:

Now we’ll be saving this game object as a prefab so go ahead and drag Room game object to your Project Folder.
Now save your scene by pressing CTRL+S
Note: If somehow the width of Room game object becomes negative on Prefab. Set it to positive and drag it the RoomContent and see if it’s being displayed. If not, adjust the width of the prefab until you get the width you desired.
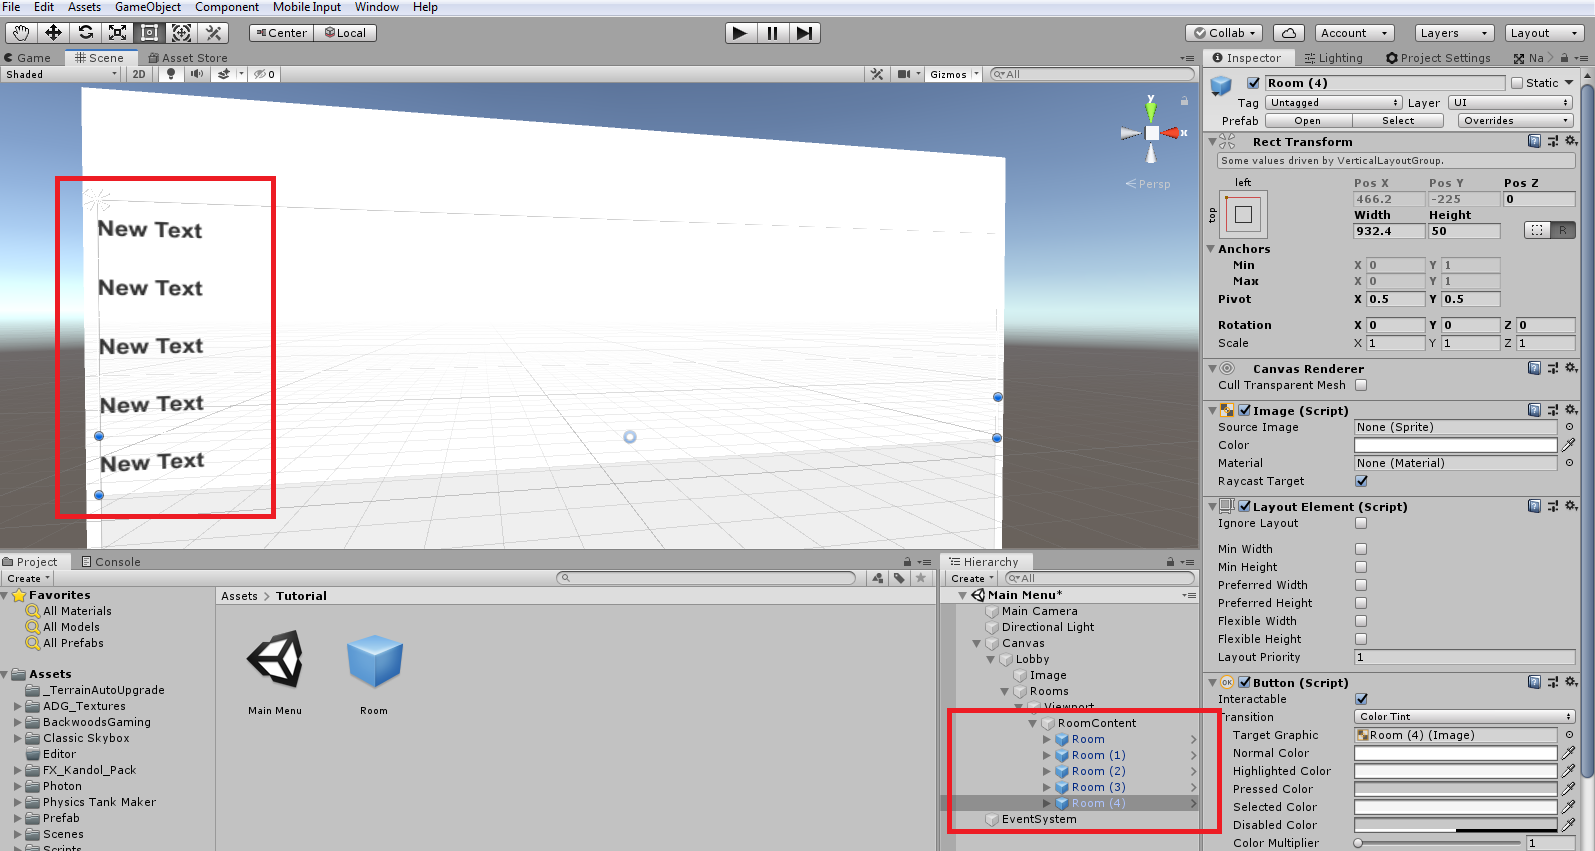
Now once everything works, try to duplicate the Room game object and see if it’s being displayed as a list.
Like this:
Creating Lobby Buttons
Creating buttons is very easy especially now that you can create a scroll view. In this part, we’re going to create the button as well as the input box for creating rooms and being able to name it.
Now with your Lobby selected, right-click and go to UI > Button and then name it to CreateRoomButton.
Now inside the CreateRoomButton, modify the value of text to Create Room.
We’re going to need an input field for players to name their rooms so go ahead and select the CreateRoomButton game object. Right-click and add UI > InputField.
If you get confused on what we have just added, here’s how it should look like:

Notice that I have already moved the button and input field to the top left corner of the canvas. You can just move the button after you created both button and input field. Keep in mind that the input field is the children of the button so if you move the button, the input field will be dragged as well.
Next
In the next tutorial, we’ll be starting coding the user interface to be able to connect to Photon Network. We’ll also add another important panel for players once they have finally created the room.