Search Results for: theme development

Best WordPress Themes in 2023: 13 Clean WordPress Themes for Business

So you’re looking for a WordPress theme for your business? Don’t worry; Today, we’ll be giving you 13 WordPress themes that are clean and modern-looking to make your business look more appealing than ever.

Best WordPress Themes for Business Category

Before wasting time, let’s take a look at 13 of the best WordPress themes that are responsive and beautifully designed in 2020.

REHub

REHub is said to be one of the best WordPress themes in the market that offers not only a nice WordPress theme but also a way of generating money through eCommerce. So if selling products is your business, then this WordPress theme will definitely serve you in a long run.

Like most people say about this theme. This WordPress theme is a money maker. Even Amazon recommends this WordPress theme.

  • High conversional Gutenberg blocks
  • Elementor compatible
  • Extended AMP support
  • SEO optimized
  • WooCommerce ready

Divi

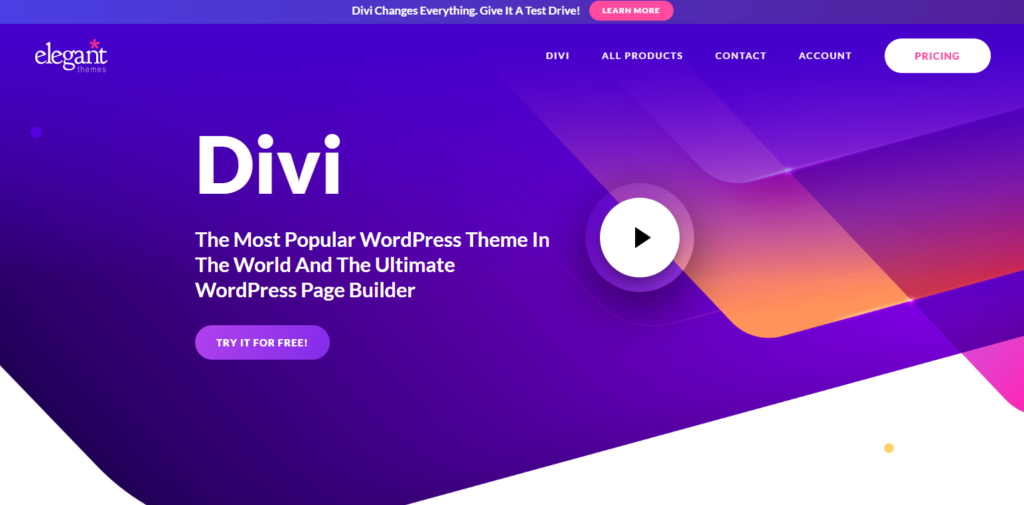
Divi is a WordPress page builder that is very popular in the WordPress community. In fact, it’s very popular that it is being used by more than 600,000 users around the globe.

Its drag and drop builder allows you to create a professional-looking website in less than 15 minutes and if you don’t feel making a web design from scratch then Divi comes with 20 pre-structured layouts allowing you to start your new project instantly. This is perfect for businesses that wish to have this glamorous look.

  • Built-in layouts
  • Over 46 content modules
  • Color, style and size customization
  • Advanced Tools for Developers
  • Advanced Visual Builder
  • Live preview

Yes, Divi is one of the most used WordPress themes in the market but it’s not always perfect. The downside of using Divi is it tends to make your web pages very slow and its code is not SEO-friendly. Not only that, if you use Divi and you decided to change themes, it will be very difficult to transfer your content to other WordPress themes.

ThemeForest best selling themes

Enfold

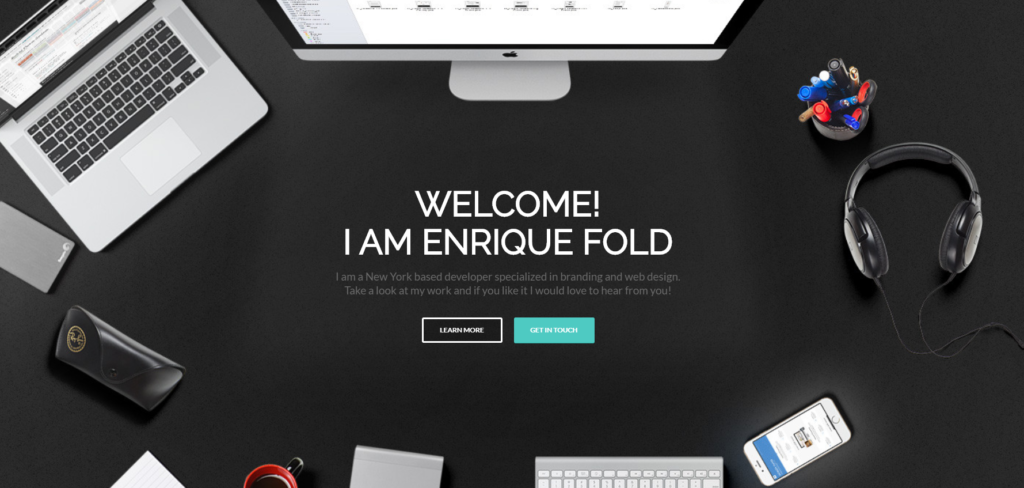
If you’re looking for a WordPress theme that is clean, flexible, and fully responsive then your search is about to be over. Enfold is one of the best themes that is known for having a good reputation in the WordPress community.

This WordPress theme offers a very modern design that can be used for any kind of business like corporate, e-commerce, and more. Not only that but it also offers plenty of good features such as:

  • Fully responsive layout design
  • AJAX instant search
  • Unlimited sidebars
  • Contact form builder
  • Retina ready
  • Documentation & support
  • WooCommerce ready
  • Translation ready
  • 2D/3D/Parallax Slideshows
  • Shortcode editor
  • 30+ PSD files
  • and many more!

Astra

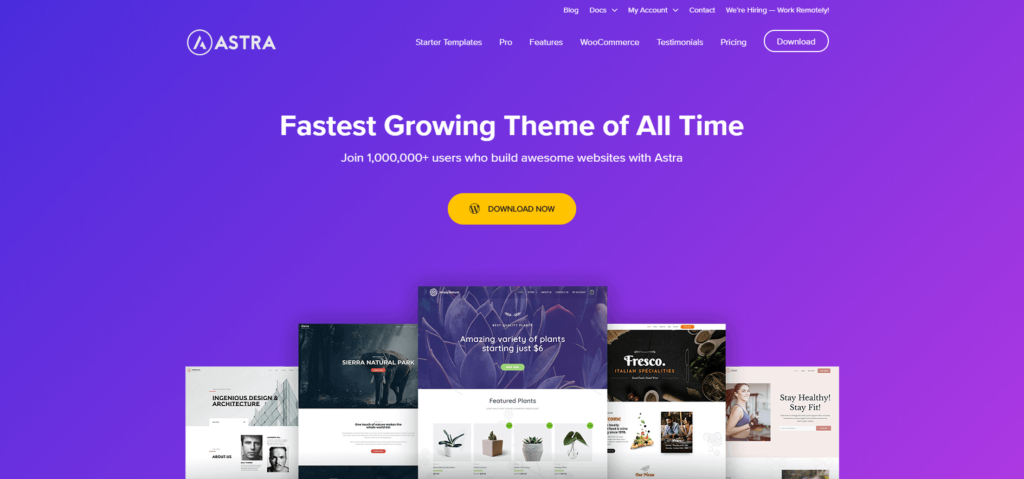
Astra is no doubt one of the best free WordPress themes that you can use for any kind of business that you have. This WordPress theme provides many features that are perfect not only for beginners but also for experienced WordPress site owners.

Our favorite best features that they offer are the following:

  • Powerful design options
  • Multiple site layouts
  • Custom post-types
  • WooCommerce Compatible
  • Great widgets

Veen

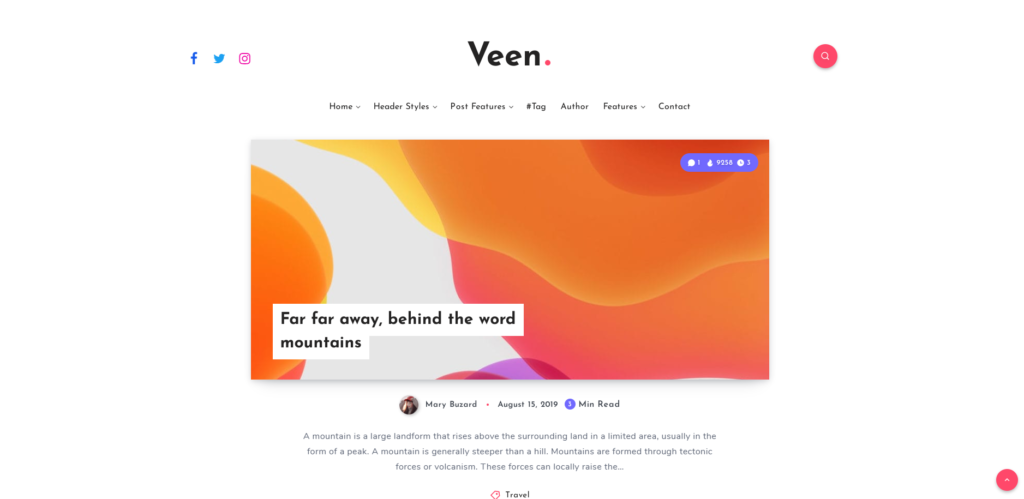
Veen is yet another type of premium WordPress theme that focuses on a modern blog design that is super attractive thanks to its animations. With Veen, website visitors will never have an issue to navigate around your website as it is very organized and clean.

If your business is blogging, then this kind of WordPress theme is the best option for you, it offers the following great features:

  • 100% Fast and responsive
  • Full theme options
  • 6 Free custom shortcodes
  • 10 different types of demos
  • 5 post formats
  • Unlimited & customizable colors
  • Great animations
  • SEO optimized

Alterna

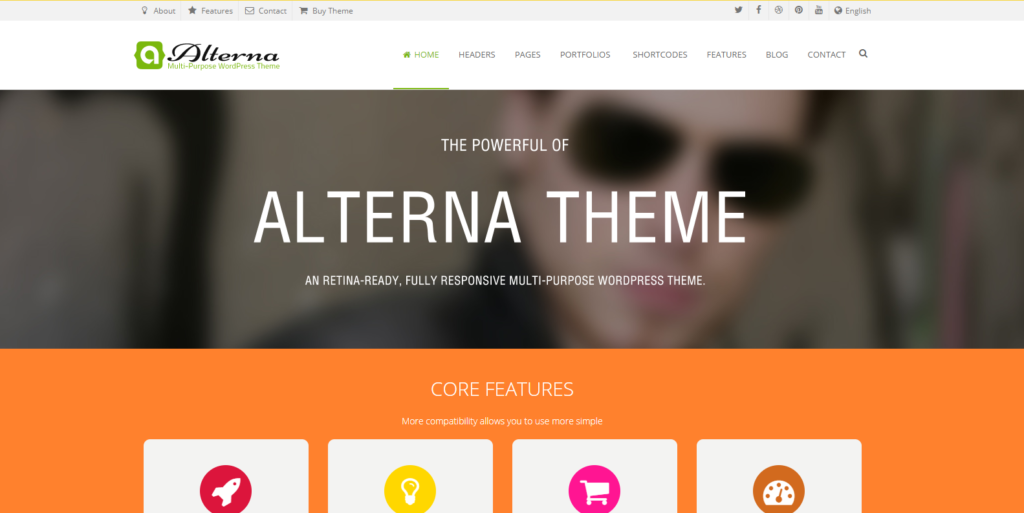
Alterna is one of the hottest and best-selling WordPress themes this 2020. With Alterna, you can create any type of website for any kind of business using its drag and drop visual composer page builder. The best thing with this WordPress theme is it provides features and plugins that are more expensive than the theme itself.

It comes with an amazing slider plugin, parallax slider, premium fancyBox, waterfall Flux with AJAX, and many more!

  • Unlimited Sidebar
  • Unlimited Colors
  • Lots of shortcodes & widgets
  • SEO optimized
  • Google Maps support
  • WooCommerce ready
  • Multilingual languages ready

Ocean WP

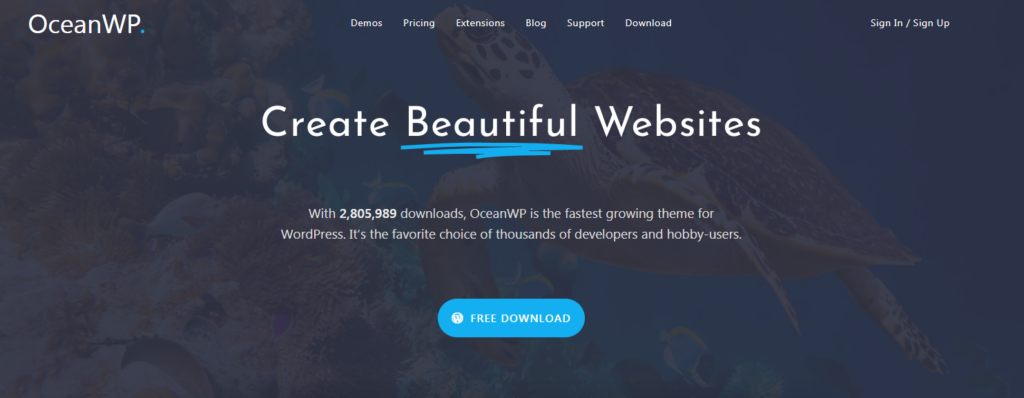
One of the fastest-growing themes for WordPress. This extendable and lightweight theme will allow you to create different kinds of WordPress websites for any kind of business that you can think of. It can be integrated with multiple platforms such as WooCommerce and other page builders.

With Ocean, you won’t need to install external plugins because it already provides awesome features like image sliders, multiple custom widgets, color options, header layouts, and many more.

  • Fastest page-load time
  • Fully responsive
  • Powerful design options
  • Multiple site layouts
  • Blog layout options
  • WooCommerce ready
  • Translation ready
  • SEO Optimized

Avada

This is one of the excellent premium WordPress themes. This multi-purpose theme allows you to develop versatile websites within a few clicks. Avada comes with over 41 featured websites and more than 255 web page designs. 

You can use their demo installer to set up the content. Moreover, it comes with over 1000 customization options. It is compatible with many WordPress themes. 

  • Unlimited design options and integrations
  • Drag & Drop page builder
  • Fully responsive
  • Free premium tools
  • Awesome fonts
  • User friendly

Soledad

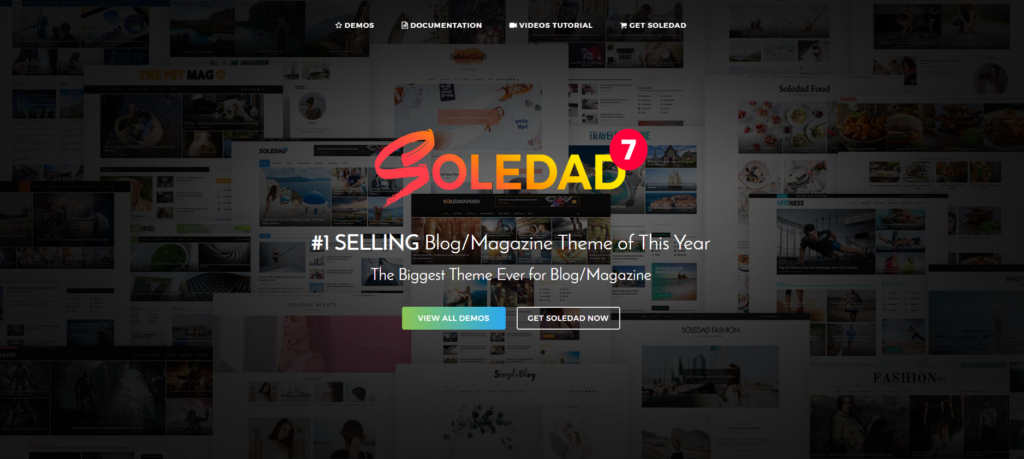
Are you planning on making a magazine-type of blog? Then you should take Soledad as your WordPress theme.

There’s no doubt that this is the best WordPress theme that you find from ThemeForest. It comes with excellent magazine layout options, over 1000+ sliders, and many more. Its single post templates are worth mentioning that allow you to share your stories. 

You can create a completely customized website using its page editor support. It is compatible with the WP bakery and Elementor page builder.

  • Very easy to use WordPress theme
  • Superfast load times
  • Unlimited layout options
  • White label tool
  • WooCommerce ready
  • SEO Optimized

The 7

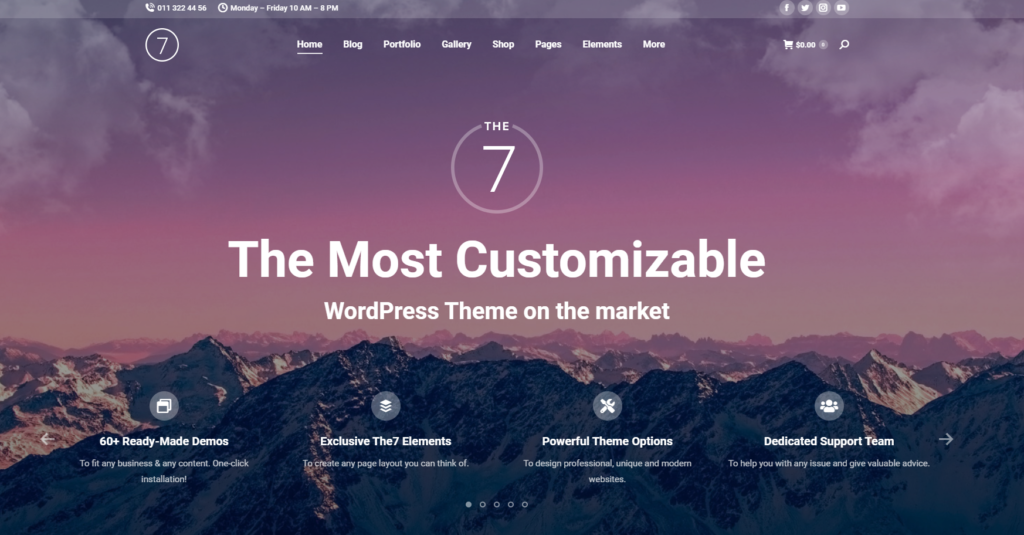
The 7 is one of the easiest to customize WordPress theme ever. It offers more than 1000+ theme options to allow you to build everything that you can think of for your website.

If you like using Page Builders then this theme is perfect for you as it offers full and seamless integration with WPBakery Page Builder and Ultimate Addons.

But of course that is not the only thing that is best with The 7. It also offers:

  • Unlimited web designs
  • Fully responsive & High-speed theme
  • Unlimited header layouts
  • Free premium plugins
  • Customizable sidebar & footer
  • WooCommerce ready
  • SEO optimized

Newspaper

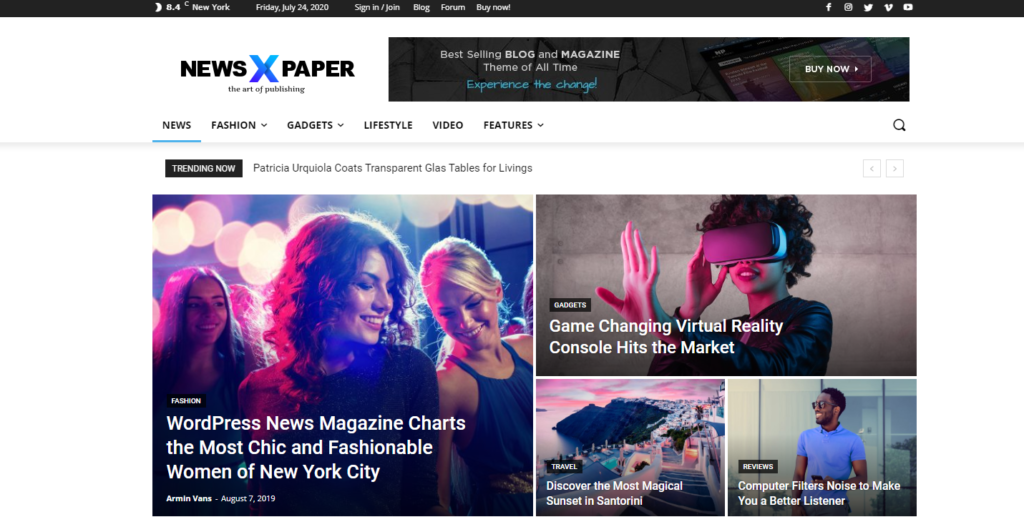
Are you planning on building a news website or blog? Then Newspaper is the WordPress theme that you should be using.

With Newspaper, you can create a great news website that look simple yet professional and organized. You can also use this WordPress theme for different types of websites like fashion, food blogs, travel, and lifestyle.

  • Fully optimized theme (Lightning fast)
  • Fully responsive
  • 30 Free pro demos
  • Free premium plugins
  • Flexible header builder
  • No coding required
  • AdSense compatible
  • SEO ready

Bimber

Bimber is yet another newspaper WordPress theme that allows you to create an attractive, high-speed, and fully functional website in less than one day. It offers a bunch of powerful plugins that can improve the functionality of your website inside and out.

With Bimber, newsreaders won’t finally have trouble reading your news day and night. Thanks to its powerful dark mode feature, readers can finally switch your website into a dark mode setting in just one click of a button.

If your niche is about viral content then this theme is perfect for you.

  • 2X faster than other WordPress themes
  • Offers too many plugins
  • Outstanding dark mode
  • Instant Search Results
  • Easy to monetize
  • Image editor
  • SEO optimized

RealHomes

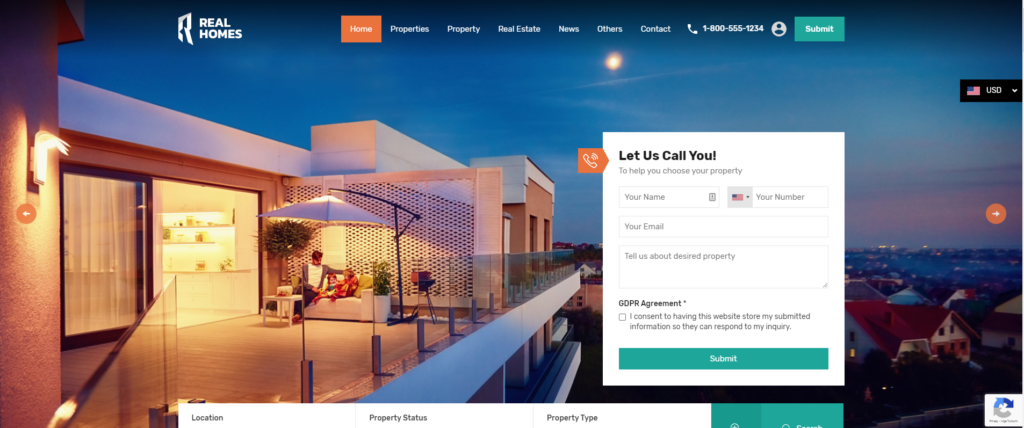
It’s quite hard to find a WordPress theme that matches with real estate niche right? Fortunately, it isn’t. RealHomes is a WordPress theme created specifically for real estate niche websites.

With RealHomes, you can easily create a website that showcases your properties. It’s super easy you can create a website in less than an hour.

  • Advanced & customizable real estate search
  • Google maps integration
  • OpenStreetMap integration
  • Gallery Templates
  • User registration & Login support
  • Fully documented
  • and more!

Conclusion

It can be a bit hard to find a great WordPress theme that fits your business requirement but we hope that in this article, you found one or two WordPress themes that you can use in a long run. If in case you haven’t found what you’re looking for, then feel free to talk to us! We offer WordPress theme development and we can help you create the theme that you’re looking for.

Disclosure: This article may contain affiliate links, which means we may receive a commission if you click a link and purchase something that we have recommended.

Shopify Liquid Programming Tutorial: Learn How Themes Work

Whether you are new to Shopify, or you are already a Shopify store owner, you’ve probably encounter a code that looks something like this:

{% assign first_model = product.media | where: "media_type", "model" | first %}
{% if first_model %}
{{ 'product-media.js' | asset_url | script_tag }}
{% endif %}Code language: PHP (php)

This is Shopify liquid, a template language created by Shopify that serves as a framework for all Shopify themes. If you’re unfamiliar with Shopify themes, they are the templates that controls the styles and the layout of your online stores. So, if you wish to customize your online store, it’s best to learn liquid programming.

In this article, we’ll take a look at Shopify liquid.

We’ll start by understanding the Shopify liquid programming, and then we’ll learn about its features such as:

  • Objects in Liquid
  • Tags in Liquid
  • Filters in Liquid

So if you’re ready, let’s begin learning Shopify liquid!

Video Tutorial

Do you prefer video tutorials instead of reading? You may watch the video version of this article below:

What is Shopify Liquid?

Shopify liquid is a template language used for creating or modifying Shopify themes. If you’re familiar with Ruby, you probably have heard about this template language because it’s written in Ruby or it’s known to be written in Ruby, but in terms of syntax, it’s very different compared to other programming languages.

In addition, Shopify liquid is very limited. Like there’s a lot that you cannot do with liquid. For example, you cannot retrieve a data from a third party server. Just from Shopify.

What is it used for?

Shopify Liquid is mainly used as the “backend template language” of Shopify themes. Meaning, it is only used to control what is displayed in the Shopify storefront. Don’t get the wrong idea though because Liquid cannot do many things like connect to a third-party server, creating directives, etc.

In web development, there are two contents that you can render: static content and dynamic content.

Static content is a content of a page that stays the same and is usually hard-coded in HTML whereas dynamic content. It’s the content of a page that changes depending on specific parameter.

For example, we have the following product page.

It specifically rendered the product for cats because in the URL, we specified that we want to render this specific product.

The highlighted text above is called a handle. By changing this to a different handle of a product, the product page will render a different product.

In addition to that, Shopify uses its own architecture or template files to display this pages.

For example, the product page is using product.json. It’s a JSON template that uses sections to complete the page, taking a closer look at the section files you will see that there’s a liquid code mixed with HTML, CSS, and JavaScript.

{% comment %}theme-check-disable TemplateLength{% endcomment %}
{{ 'section-main-product.css' | asset_url | stylesheet_tag }}
{{ 'component-accordion.css' | asset_url | stylesheet_tag }}
{{ 'component-price.css' | asset_url | stylesheet_tag }}
{{ 'component-rte.css' | asset_url | stylesheet_tag }}
{{ 'component-slider.css' | asset_url | stylesheet_tag }}
{{ 'component-rating.css' | asset_url | stylesheet_tag }}

<link rel="stylesheet" href="{{ 'component-deferred-media.css' | asset_url }}" media="print" onload="this.media='all'">

<script src="{{ 'product-form.js' | asset_url }}" defer="defer"></script>

{%- assign first_3d_model = product.media | where: "media_type", "model" | first -%}
{%- if first_3d_model -%}
  {{ 'component-product-model.css' | asset_url | stylesheet_tag }}
  <link id="ModelViewerStyle" rel="stylesheet" href="https://cdn.shopify.com/shopifycloud/model-viewer-ui/assets/v1.0/model-viewer-ui.css" media="print" onload="this.media='all'">
  <link id="ModelViewerOverride" rel="stylesheet" href="{{ 'component-model-viewer-ui.css' | asset_url }}" media="print" onload="this.media='all'">
{%- endif -%}

<section class="page-width">
...Code language: HTML, XML (xml)

Note that the code above is just an example of what code can a liquid file have.

So to put it simply Shopify Liquid is like the middle man between Shopify stores and the server of Shopify (where all the data about your Shopify store is stored).

When a Shopify store asks for a data through liquid, Shopify liquid will ask the server of Shopify if that data that is being requested is available.

If the server returns 200 OK, then the server will give the requested data back to liquid. Then liquid will hold that data and bring that to the Shopify store’s theme.

If the requested data is not available, then the server of Shopify will just return a 404 error response. Meaning, Shopify liquid won’t have anything to bring.

Shopify Liquid Features

Shopify liquid is categorized by three features: objects, tags, and filter.

Objects

Also known as variables are wrapped in double curly braces {{ }}. And it’s used to output pieces of data from a Shopify store. For example, this is a shop object:

{{ shop }}

Inside of the shop object, there are properties or attributes that you can use by using dot notation ( . ).

Let’s say we use the name attribute. It should be something like this:

{{ shop.name }}

So you’re going to type it like above. The above attribute should render the name of your Shopify store.

There are plenty of attributes that you can use from most of the objects in Shopify. So if you wish to learn more about these objects and attributes, I suggest going to the Shopify developers’s documentation page and get to know these attributes or objects. Now let’s proceed to tags.

Tags

Tags in Shopify liquid are the programming logic that tells templates what to do. This tags are wrapped in curly braces, followed by percentage symbols {% ... %}.

And it’s usually followed by a closing tag or an end tag {% end... %}.

Tags are divided into four categories: control flow, iteration, theme, and variable tags.

Control flow tags are the tags that you can use to create conditions. These control flow tags are the:

  • if
  • unless
  • else/elsif
  • case/when

And lastly, the operators and/or.

To create a tag, you need to start it with a tag itself. Say, for example, the, if tag:

{% if condition %}
...

Then you need to close it with a closing tag.

{% if condition %}
...
{% endif %}
Code language: PHP (php)

However, not all tags are required to have a closing tag. A good example of this is else or elsif. These tags can only be used between if and, endif.

For example:

{% if condition %}
...
{% elsif condition %}
...
{% else %}
...
{% endif %}
Code language: PHP (php)

Now, if you want to create multiple conditions for a control flow tag, you can use the operators and, or, or.

For example, we have the following condition:

{% if condition_A and condition_B %}
...

If you’re using and, the two conditions (condition_A and condition_B) must be true in order to execute the block of codes inside of the if.

If you’re using or, either of the two conditions can be true, it will still execute the code inside of the if tag.

{% if condition_A or condition_B %}
...

Now, all of this are part of the fundamentals of programming. And so if you’re a familiar with it, I suggest go and learn that because that’s quite a huge topic for this article.

There are plenty of good resources out there that will teach you everything about programming like the Introduction to Programming and Computer Science by freeCodeCamp.

Next is the iteration tags.

Iteration tags are the tags that you can use to repeat blocks of code. This is where you can use the for tag to loop through an array of values. For example, we have the following for tag:

{% for product in collection %}
{{ product.title }}
{% endfor %}Code language: PHP (php)

In the example above we have a condition that for each product in the collection, we are going to render the name of the product.

So for example, in that collection, we have three products: Product #1, Product #2, and Product #3. The entire code above will basically output three, heading title ones (<h1>) with a text: Product #1, Product #2, and Product #3.

You can also combine for tag with an {% else %} tag. This is very useful too, especially if you want to know whether the {% for %} tag executed the codes inside of it or not.

Next up are the theme tags.

Theme tags are the tags that you can use:

  • to generate template specific HTML codes;
  • to divide arrays into multiple pages, and;
  • to tell Shopify themes to render or use a specific layout or snippets.

So this is where you’ll find the form tag, the section tag, the pagination tag, and the layout tag.

Lastly, is the variable tags, variable tags are the tags that you can use to create liquid variables. If you’re familiar with JavaScript or other programming languages, you can create variables (most of the time) using var keyword or a data type. In Shopify liquid, you can use either the {% assign %} tag or {% capture %} tag to create variables.

So how can you create a variable?

{% assign variable_name = shop.name %}

In the example above, we use the assign tag to create a variable. You can create the assigned tag, followed by the name of the variable. Then followed by an equal sign to create or assign a value. In the example above, we used the name of the Shopify store.

Now, if you use this variable, like how you use an object, this will output the name of the Shopify store.

Now let’s continue to the last feature of Shopify liquid. And that is the filters.

Filters

Filters are kind of hard to explain, but to put it simply, they are methods that modifies the value or the output of an object.

They are placed within an object tag and it’s denoted by a pipe symbol.

Now let’s take a look at this example above. Here we have a product.title object. Now we can use a filter by adding a pipe symbol and then specify what filter that you want to use. Let’s say we use the upcase filter.

{{ product.title | upcase }}

This will then change the output of the object and make the string output all uppercase. That’s basically how filters work. They change or modify the output of an object.

Now, there are plenty of filters that you can use for every situations. There are filters for strings, for numbers, for arrays, for URLs, for colors, et cetera, but they all do the same thing. They modify the value or the outputs of an object.

Closing lines

So that is Shopify Liquid, a template language used for rendering pieces of data from a Shopify store. Now, if you have any question, let me know in the comments below, otherwise, feel free to subscribe to our YouTube channel and like the attached video. We have plenty of good videos in our channel so feel free to check them out! If you have request, let us know!

Shopify Development – Learn Shopify Liquid Programming

Do you want to learn Liquid programming so that you can customize or understand the codes of your Shopify theme? If yes, then you have come to the right place!

Welcome to the Shopify Liquid Programming course! In this course, my goal is to help you understand what is Liquid in Shopify: what it does, and how to use it.

In this course, I’m going to cover the following features of Liquid:

  • Objects: Global objects & content objects
  • Tags: Making conditions & looping statements
  • Filters
  • Metafields & Metaobjects

If you are a Shopify store owner, and you’d like to understand how a Shopify store is running, then learning Liquid can be extremely helpful.

In this course, I will also give you as many examples as possible to make Shopify Liquid easy to understand and how it blends with markup languages like HTML.

You will learn:

  • How to create navigations / menu links
  • How to create paginations
  • How to create custom sections
  • and more!

🤔 Why Take This Course?

One of the biggest mistakes that people make is that they customize their Shopify theme aimlessly. What they usually do is Google the features that they’re looking for, then they will copy a code from someone else and apply it to their Shopify store without understanding the code that they copied and pasted. This can be an issue since they don’t understand the objects, tags, and filters.

That’s why I’m here to help you avoid making that mistake!

📌 Before Taking This Course

Now, what are the things that you need to know before taking this course? To get the best experience out of this course, it’s highly recommended that you know how to use Shopify. What I mean is, you should know your way around Shopify from admin, to settings, and to the storefront.

Next, it’s important that you know at least the fundamentals of programming (Like the operators, or data types). Though I will do my best to explain what is going on in each lesson so that even if you have less knowledge about programming, you’ll be able to understand the code. In addition, for each lesson, I will provide resources related to the lessons (e.g. PDFs or articles) so that you can use those resources to learn more about Liquid.

Another thing that you can do is post questions in the Q&A section. So if you have questions, you can post them in the Q&A. I will also include in this course, quizzes or questionnaires so that you can test yourself if you can finally use Liquid.

So are you ready to learn Liquid? If yes, join me and I will see you on the other side.

Changelog

December 12, 2023

  • Added/Update lesson(s)

September 07, 2023

  • Updated course description

April 13, 2023

  • Added new chapter
  • Added/Updated lesson(s)
  • Updated course description

March 05, 2023

  • Added new lesson(s)
  • Fixed video/lesson(s) misspellings & errors
  • Updated course description to match the lessons

February 07, 2023

  • Added new lesson(s)

How To Create FAQs Page for Shopify Theme Dawn (Online Store 2.0)

So you’ve built a new Shopify store or let’s just say you’re using now the new Shopify theme called Dawn. Now you wanna customize it, but the problem is you don’t know how to do it because it’s a new Shopify theme and it’s written differently compared to the previous Shopify theme Debut.

You see, Shopify just recently rolled out the Online Store 2.0 and new Shopify themes must be using JSON templates for Shopify Theme Development instead of the previous liquid templates.

This made it very confusing especially to those merchants who are used to the old template system. But don’t worry, I’m going to walk you through how to customize the Shopify theme Dawn.

So, what are we going to add to Dawn, you ask?

In this article, we will be creating an FAQ page for the Shopify theme called Dawn. If you don’t know, I’ve already created a lesson about the same topic but back then we were using Debut. So I personally feel like this needs to be recreated.

Video Tutorials

If you’re still using Debut, and you’re interested to learn how to create an FAQs page without using any apps, feel free to watch the video tutorial below.

Otherwise, you can watch me do what’s written in this article in the video below.

Getting Started

In order for this to work, we’re gonna need three (3) things. The first is the page that will render the FAQs. The second is the JSON template that we will use on our page and the third is the liquid codes and a stylesheet to render the FAQs.

This may sound too much for you but it’s honestly not that difficult.

If I’m gonna be honest with you, there’s a simpler and shorter way to create an FAQs page for Dawn, and that is by using sections and schema settings. However, I would like to guide you on how to create a JSON template so that you understand how JSON templates work.

Okay, I’m talking too much, let’s start and create the FAQs page.

How To Create FAQs Page for Dawn

We’re going to divide this section into three (3) parts:

  1. Creating the JSON template for the FAQs page
  2. Creating the page in the admin
  3. Creating the accordions

Let’s start by creating the JSON template for the FAQs page.

Create the JSON template

Open your Shopify store admin page. Then, access the Online Store’s theme page, and there open the Code Editor by clicking the actions dropdown menu and there select Edit Code.

Once you have the Code Editor page loaded, the next thing that you’re going to do is to create the JSON template and the template section for the JSON template. Sounds confusing? Let’s do it step by step.

First, open the Templates folder and click the Add a new template file. Then, for the “Create a new template for” select page. Then, for the “Template type“, make sure you’re using JSON. And lastly, name the template file page.faq.

Once the file is created, apply the following code:

{
  "sections": {
    "main": {
      "type": "main-page-faq"
    }
  },
  "order": ["main"]
}
Code language: JSON / JSON with Comments (json)

In the JSON template above, we are referencing a section file called main-page-faq, so of course, we’re going to create that file.

So open the Sections folder and click the Add a new section file and name the file main-page-faq.

Once the file is created, we’re going to apply the same code that we have from the main-page.liquid section file. But, you can just copy the following code below:

<link rel="stylesheet" href="{{ 'section-main-page.css' | asset_url }}" media="print" onload="this.media='all'">
<link rel="stylesheet" href="{{ 'component-rte.css' | asset_url }}" media="print" onload="this.media='all'">

<noscript>{{ 'section-main-page.css' | asset_url | stylesheet_tag }}</noscript>
<noscript>{{ 'component-rte.css' | asset_url | stylesheet_tag }}</noscript>

<div class="page-width page-width--narrow">
  <h1 class="main-page-title page-title h0">
    {{ page.title | escape }}
  </h1>
  <div class="rte">
    {{ page.content }}
  </div>
</div>

{% schema %}
{
  "name": "FAQs Page",
  "tag": "section",
  "class": "spaced-section"
}
{% endschema %}

Code language: HTML, XML (xml)

Awesome! Now we have the JSON template and the template section ready. Let’s continue by using them on a new page.

Create a new page called FAQs

Go back to your Shopify admin page and access the Online Store’s “pages” page. Then, create a new page and call it FAQs (or whatever you wish to call it) and make sure that the Theme template it’s using is set to faq.

Nice! Now we have the page to render the accordions. The last thing that we need to do is to write the code for these accordions.

Create the accordions for FAQs

Go back to your main-page-faq section file and update its code to the following:

<link rel="stylesheet" href="{{ 'section-main-page.css' | asset_url }}" media="print" onload="this.media='all'">
<link rel="stylesheet" href="{{ 'component-rte.css' | asset_url }}" media="print" onload="this.media='all'">

<noscript>{{ 'section-main-page.css' | asset_url | stylesheet_tag }}</noscript>
<noscript>{{ 'component-rte.css' | asset_url | stylesheet_tag }}</noscript>

<div class="page-width page-width--narrow">
  <h1 class="main-page-title page-title h0">
    {{ page.title | escape }}
  </h1>
  <div class="rte">
    {{ page.content }}
  </div>
  
  <div class="faq-container">
    <div class="tabs">
    	{% for block in section.blocks %}
      		{% assign item = block.settings %}
      		
      		<div class="tab">
      			<input type="checkbox" id="faq_checkbox_{{ forloop.index }}" class="faq-checkbox">
        		<label for="faq_checkbox_{{ forloop.index }}" class="tab-label button button--primary">{{ item.question }}</label>
        		<div class="tab-content">{{ item.answer }}</div>
      		</div>
      	{% endfor %}
    </div>
  </div>
</div>

{% schema %}
{
  "name": "FAQ Page",
  "tag": "section",
  "class": "spaced-section",
	"blocks": [
		{
			"name": "FAQ Item",
			"type": "faq",
			"settings": [
				{
					"type": "text",
					"id": "question",
					"label": "Question",
					"default": "Do you have a question?"
				},
				{
					"type": "richtext",
					"id": "answer",
					"label": "Answer",
					"default": "<p>I have an answer</p>"
				}
			]
		}
	]
}
{% endschema %}

Code language: HTML, XML (xml)

The code that we added above should allow you to add blocks to your FAQs page through the customizer page.

Awesome! Now the last thing that we need to do is to use CSS and make the FAQ items an actual accordion. So go back to the code editor and open the Snippets folder, click the Add a new asset. Then, select the Create a blank file and for its name, call it faq-style and make sure the file extension is set to .css.

Once, the file is created, apply the following code:

.faq-checkbox {
  position: absolute;
  opacity: 0;
  z-index: -1;
}

.tabs {
  border-radius: 10px;
  overflow: hidden;
}

.tab {
  width: 100%;
  color: white;
  overflow: hidden;
}

.tab-label {
  width: 100%;
  display: flex;
  justify-content: space-between;
  padding: 1em;
  font-weight: bold;
  color: white;
}	

.tab-label:after {
  content: "+";
  width: 1em;
  height: 1em;
  text-align: center;
  transition: all 0.5s;
}

.tab-content {
  max-height: 0;
  padding: 0 1em;
  background-color: white;
  transition: all 0.5s;
  color: black;
}

.tab-content p {
  margin: 0; 
}

.faq-checkbox:checked + .tab-label:after {
  content: "-"; 
}

.faq-checkbox:checked ~ .tab-content {
  max-height: 100vh;
  padding: 1em;
}
Code language: CSS (css)

Make sure to save your file.

Last step is to apply that CSS stylesheet to our section file.

<link rel="stylesheet" href="{{ 'section-main-page.css' | asset_url }}" media="print" onload="this.media='all'">
<link rel="stylesheet" href="{{ 'component-rte.css' | asset_url }}" media="print" onload="this.media='all'">
<link rel="stylesheet" href="{{ 'faq-style.css' | asset_url }}" media="print" onload="this.media='all'">

<noscript>{{ 'section-main-page.css' | asset_url | stylesheet_tag }}</noscript>
<noscript>{{ 'component-rte.css' | asset_url | stylesheet_tag }}</noscript>

<div class="page-width page-width--narrow">
  <h1 class="main-page-title page-title h0">
    {{ page.title | escape }}
  </h1>
  <div class="rte">
    {{ page.content }}
  </div>
  
  <div class="faq-container">
    <div class="tabs">
    	{% for block in section.blocks %}
      		{% assign item = block.settings %}
      		
      		<div class="tab">
      			<input type="checkbox" id="faq_checkbox_{{ forloop.index }}" class="faq-checkbox">
        		<label for="faq_checkbox_{{ forloop.index }}" class="tab-label button button--primary">{{ item.question }}</label>
        		<div class="tab-content">{{ item.answer }}</div>
      		</div>
      	{% endfor %}
    </div>
  </div>
</div>

{% schema %}
{
  "name": "FAQ Page",
  "tag": "section",
  "class": "spaced-section",
	"blocks": [
		{
			"name": "FAQ Item",
			"type": "faq",
			"settings": [
				{
					"type": "text",
					"id": "question",
					"label": "Question",
					"default": "Do you have a question?"
				},
				{
					"type": "richtext",
					"id": "answer",
					"label": "Answer",
					"default": "<p>I have an answer</p>"
				}
			]
		}
	]
}
{% endschema %}
Code language: HTML, XML (xml)

Now, if you open your FAQs page, you should have the following:

Conclusion

So there you have it! We have created an FAQs page for the Shopify theme called Dawn without using any Shopify apps. Like I said earlier, there is a faster and more practical way of creating accordions and that is by using sections.

Maybe in the future, I will create a separate lesson discussing this but for now, that’s how you create FAQs or accordions.

If you want to support me or WeeklyHow, feel free to subscribe to our YouTube channel or if you want to learn more about Shopify Theme Development, I have a course for that and there you will learn more about Liquid programming and Templates.

Shopify Development – Learn Shopify Liquid Programming

Do you want to learn Liquid programming so that you can customize or understand the codes of your Shopify theme? If yes, then you have come to the right place!

Welcome to the Shopify Liquid Programming course! In this course, my goal is to help you understand what is Liquid like what it does, and how to use it.

We’re going to cover the following features of Liquid:

  • Objects
  • Tags
  • Filters

If you are a Shopify store owner, and you’d like to understand how a Shopify store is running, then learning Liquid can be extremely helpful.

One of the biggest mistakes that people make is that they customize their Shopify theme aimlessly. What they usually do is Google the features that they’re looking for, then they will copy a code from someone else and apply it to their Shopify store without understanding the code that they copied and pasted.

This can be an issue since they don’t understand the objects, tags, and filters.

That’s why I’m here to help you avoid making that mistake!

Now, what are the things that you need to know before taking this course?

To get the best experience out of this course, it’s highly recommended that you know how to use Shopify.

What I mean is, you should know your way around Shopify from admin, to settings and to storefront.

Next, it’s important that you know at least the basics of programming (Like the operators, or data types). Though I will do my best to explain what is going on in each lessons so that even if you have less knowledge about programming, you’ll be able to understand the code.

In addition, for each lessons, I will provide resources related to the lessons (e.g. PDFs or articles) so that you can use those resources to learn more about Liquid.

Another thing that you can do is to post questions in the QnA section. So if you have questions, you can post them in the QnA.

I will also include in this course, quizzes or questionnaires so that you can test yourself if you can finally use Liquid.

So are you ready to learn Liquid? If yes, join me and I will see you on the other side.

How To Migrate Shopify Themes to Online Store 2.0 (JSON Templates)

Let’s say you have a Shopify store and you’ve been working on it for years. Then, after some time, you’ve taken a look at your Shopify homepage and you’ve decided to customize your Shopify store for a little bit.

But then, BOOM!

You’ve found out that Shopify just recently changed the look of the customizer page and now, you’re lost. So you started reading about it and then you’ve realized that there are new features that you can do.

But, unfortunately, it looks like you can’t do any of the new features (like the “modularity” of the entire Shopify store, app blocks or app extensions, etc.) and that’s because you’re using an old Shopify theme and you need to upgrade it to a JSON template.

So, how can you upgrade your Shopify theme?

Well, in this article we are going to learn how to migrate a Shopify theme from Liquid to Online Store 2.0 (aka JSON templates).

Video Tutorial

If you prefer watching video tutorials, you can watch the following video version of this article.

Otherwise, you can continue below.

Getting Started

Before we get started, I want to point out that we are going to use Debut as an example in this article. We are also going to ONLY show you how to migrate a single template file from Liquid to JSON template and so if you’re looking for an in-depth tutorial about migrating all of the template files to JSON, I highly recommend taking the Shopify Theme Development course. In that course, I will be covering all of the template files from 404 to Search template file.

Also, before we begin, make sure that you BACKUP your Shopify theme. There are a lot of ways to backup a Shopify theme so make sure you do that before doing any of the steps that I will be mentioning in this article.

Migrating Shopify Themes to JSON Templates

You can migrate a Shopify theme in 5 simple steps:

  • Identify the sections of your theme templates
  • Replace the Liquid template with JSON template
  • Test your theme

Looks very simple no? Well, let’s see how to do them.

1. Identify the sections of your Shopify theme templates

Before you can start migrating your template files to a JSON template, you need to make sure that all of the {% section %} tags inside of a template are removed. This is because Shopify doesn’t allow you anymore to use the {% section %} tag inside of a section file and by using a {% section %} tag in a section file, you will receive the following error:

Liquid error (section/section-example.liquid line 58): Cannot render sections inside sections

Once you have found a section tag inside of your section, you have two options:

  1. Move the code of that section to the section referencing that section. (Might be confusing)
  2. Create a layout that reference that section.

The second option is quite advanced so to make this article shorter and simple, we’ll just do the first option and so that you get what I’m trying to say in that list.

  1. Open your theme code editor
  2. Locate a template file (They’re usually inside of the /templates directory). Let’s use the article.liquid in this tutorial.
  3. Search for {% section %} tags. (If this is your first time opening that template file, you should be able to find a section tag that references the section named “article-template”).

    Did you find one? Great. Remove that section tag and open that “article-template” section file.
    Inside of that section file, you should see a part of the article template that renders the blog post.

    So what you’re going to do is to move all of that code to the article.liquid. Because the whole point is to remove all of the section tags from your template.

    Now, keep in mind that you should move or paste the code of the “article-template” to the line where the {% section %} tag is located. So if the section tag is located in line 17, then you should paste the code of that section in line 17.
  4. Do the same steps for the rest of the section tags that you find.

2. Replace the old template with JSON template

Now that we have removed the section tags from our template file, we can finally replace this template file with JSON template. But first, we need to move the code of the article.liquid to a section file and then, we can delete the article.liquid and replace it with article.json.

  1. Go to /sections directory or folder and create a new section. Name it whatever you what but make sure you remember this name because we’ll use this name in the article JSON template file.
    In my case, I’ll name it template-article.
  2. Inside of the template-article.liquid, I’ll move ALL of the code from the article.liquid template file.
  3. Delete the article.liquid.
  4. Go to /templates directory or folder and create a new template file and select article and make sure that you select JSON instead of Liquid.
  5. Once the article.json is created, replace its code with the following:
{
 "sections": {
   "template": {
     "type": "template-article"
   }
 },
 "order": ["template"]
}Code language: JSON / JSON with Comments (json)

Save the file.

3. Test your Shopify theme.

Once you have created your new template, open it with the customizer and check if you can add sections to your article template. If you can, then that means you have successfully migrated your template file from Liquid to JSON template.

Now the next thing that you’re going to do is to apply the same steps to the rest of the template files.

Conclusion

Migrating your Shopify themes from the old template system to Online Store 2.0 is honestly very easy, but it can be very difficult depending on what Shopify theme you’re about to migrate. So my advice, especially if you’re using a different theme, is to learn your Shopify theme first, back it up, and use it with a development store or a test store. That way, your Shopify store is safe from being broken.

We haven’t covered in this article how to use app blocks in JSON template so we’ll probably just cover them in the next video of our YouTube channel. So, if you’re interested, make sure you subscribe to our YouTube channel so we can notify you when we upload a new lesson.

Learn Shopify Development. Anywhere

Hello, WELCOME TO WEEKLYHOW

Learn how to code. Anywhere.

Learn from a trusted instructor.

With over 5,000+ learners around the world and growing online community.

Shopify Apps

Shopify Themes

Shopify Liquid

Become a Shopify developer.

Becoming a Shopify developer can be extremely challenging and frustrating but with our tools and top-quality courses, you can become a Shopify expert in a short period of time. Join our community!

Help Shopify Merchants

Become a Shopify expert and help merchants grow their businesses.

Master Web Development

Learn new skills like Liquid and web programming to become a web master.

Build Your Own Business

Learn Shopify development and create web applications that you can sell online.

Become a Shopify Developer Pack!

Learn how to create Shopify apps and themes through the following highly-rated courses.

Learn shopify liquid onlinw

Unleash Your Shopify Store’s Potential: Master Liquid Programming!

Create shopify themes 2.0 with TailwindCSS course

Build Stunning Shopify Themes with Shopify CLI & TailwindCSS!

Create shopify apps using PHP online course

Jumpstart Your Shopify App Journey: Beginner-Friendly Development!

Everything is a learning experience

Learning online can sometimes be boring and slow but it doesn’t have to. With WeeklyHow, you can learn in a fun way with our well-produced lessons.

Learner’s Success Stories

Real feedbacks from our students.

Vu Vo

Bernard really helped us get exposed to the fundamentals of Shopify theme code and a few pitfalls that you may run into while developing Shopify themes

Gopal Satam

Amazing! Great course on Shopify Theme Development. After watching all the lessons so far I found learning Liquid language is quite enjoying and easy to understand. Thanks Bernard!

Jessica Doram

I learned a lot from Bernard’s course. I was from 0 Shopify knowledge to expert dev in just a few days. Job well done, thanks for sharing your knowledge!

How To Customize Shopify Themes with Theme + Asset API

We have a Shopify App Development Course! Be one of the first students!

Are you looking for an in-depth guide on how to create Shopify apps? Click the enroll button !

Building a brand is never an easy task for everyone especially these days. With too many competitors popping out of nowhere, the only way to get your brand well-known is by selling a completely new product that is not yet discovered in the market.

Shopify offers you mostly with everything for selling products but there are further steps that you can do to increase your chances of getting known to the public.

If you are a developer and you own a Shopify store, you are one step ahead of your competitors! You can use your programming skills to develop additional features that your competitors don’t have yet in their store. However, if you don’t know how to write codes then you can always hire Shopify developers to do the job for you.

One of the tricks is to customize Shopify themes that will make your online store stand out from other brands. Building Shopify themes can be also one of the tricks that you can do if you are a developer.

In this tutorial, we’ll guide you on how to customize Shopify themes using Theme API and Asset API from Shopify API version 2021-01.

Getting Started

Before we begin with this tutorial, we’ll assume that you already have your Shopify app installed in your development store. Also, we’ll assume that you are using the same script that we’re using to interact with Shopify API.

If you haven’t setup your Shopify app yet then we highly recommend you to follow WeeklyHow’s YouTube channel and watch our Shopify App Development tutorial series.

Customizing Shopify Themes

Whether it’s a premium Shopify theme or a free Shopify theme, you can customize that using Shopify apps. To start customizing themes you will need an app that has access to themes and its assets. Otherwise, you will see an error such as:

This action requires merchant approval for the read_themes scope error


How can you have access to themes and their assets?

The answer is very easy and simple.

You only need to add additional access scopes to your install script.

Open your install.php file and look for the $scopes variable.

If you have been following our Shopify app development series then you probably have a$scopes variable that looks something like this:

$scopes = "read_orders,write_products";Code language: PHP (php)

To have access to your themes, you will need the following access scopes:

  • read_themes
  • write_themes

You can also use other access scopes such as write_script_tags and read_script_tags to install javascript files to your Shopify store.

With all that being said, your $scopes variable should look something like this:

$scopes = "read_orders,write_products,read_themes,write_themes";Code language: PHP (php)

Keep in mind that you should never add spaces between these scopes otherwise, you will get an error.

Save your install.php file and install the app in your store.

You should see the following page:

Installing Shopify apps to a Shopify store with Theme API

Shopify Theme API

Before you can customize your Shopify theme, you have to list down first all the themes you have in your Shopify store. You can do this using Shopify Theme API.

After getting all the themes available in your Shopify store, that’s the time you can select which theme you want to customize.

There are three types of themes that might be present in your Shopify store.

  • Main theme
  • Unpublished
  • Demo

Main theme is the published theme that is currently viewable by everyone. Whereas unpublished is the theme that is not viewable by everyone. The demo is the theme that you can’t publish unless you purchase the full version of the theme.

With that being said, we’ll be using the main theme and its assets to display a simple text in the homepage.

To do that, we’ll use the following code.

$token = "xxxxxxxxxxxxxxxxxxxxxxxxxxxxxxxxxxxx";
$shop = "weeklyhow";
$theme = shopify_call($token, $shop, "/admin/api/2021-01/themes.json", array(), 'GET');
$theme = json_decode($theme['response'], JSON_PRETTY_PRINT);
Code language: PHP (php)

Replace the value of the $token variable with the token you have generated. Again, if you don’t have an access token you can always read our generating access token guide.

Next, replace the value of the $shop variable with your store subdomain.

For example, we have weeklyhow.myshopify.com.

Then we’ll only get the subdomain which is weeklyhow.

After that, we’ll use the shopify_call() function to get all the themes in our store using the theme API.

Next, we’ll use foreach() functions to get the main theme and then we’ll display which theme we’re currently using.

foreach ($theme as $cur_theme) {
	foreach ($cur_theme as $key => $value) {
		if($value['role'] === 'main') {
			$theme_id = $value['id'];
			$theme_name = $value['name'];

			echo "Theme ID: " . $theme_id . "<br />";
			echo "Theme Name: " . $theme_name . "<br />";
		}
	}
}
Code language: PHP (php)

You should see the following output.

Displaying Shopify themes with Shopify Theme API and PHP

Shopify Asset API

A theme is constructed by its assets. These assets consisted of templates, images, stylesheets, and javascript can be customized using asset API.

Before you can modify asset files, you will need to provide at least one theme ID which can be retrieved using theme API.

We’ll be using the theme ID displayed in our Shopify app (displayed in the screenshot above). This ID could be different from yours so be sure that you copy your own theme ID instead of ours.

Now, we’re going to add a little code inside of the foreach() loop.

Copy and paste the following code underneath the echo statements.

$array = array(
	'asset' => array(
		'key' => 'templates/index.liquid', 
		'value' => '<h1>Hello World from WeeklyHow!</h1>'
	)
);

$assets = shopify_call($token, $shop, "/admin/api/2021-01/themes/".$value['id']."/assets.json", $array, 'PUT');
$assets = json_decode($assets['response'], JSON_PRETTY_PRINT);
Code language: PHP (php)

Your foreach loops should look something like this:

foreach ($theme as $cur_theme) {
	foreach ($cur_theme as $key => $value) {
		if($value['role'] === 'main') {
			echo "Theme ID: " . $value['id'] . "<br />";
			echo "Theme Name: " . $value['name'] . "<br />";

			$array = array(
				'asset' => array(
					'key' => 'templates/index.liquid', 
					'value' => '<h1>Hello World from WeeklyHow!</h1>'
				)
			);

			$assets = shopify_call($token, $shop, "/admin/api/2021-01/themes/".$value['id']."/assets.json", $array, 'PUT');
			$assets = json_decode($assets['response'], JSON_PRETTY_PRINT);
		}
	}
}
Code language: PHP (php)

Save your script and run your app.

Before & After

Before the app is installed, the storefront with the Debut theme installed should look something like this:

Shopify Debut theme Default shopify theme

After installing the Shopify app, and running the app.

Your index.liquid file will be modified and the result will look something like this:

Shopify Debut theme after installing Shopify app with theme API and asset API

It’s important to remember that once you run the app using the code above, all of the code inside the index.liquid file will be replaced.

If you only want to append a snippet code then the best way to do that is to get first the content of templates/index.liquid and then append the code that you want to add.

If you mistakenly replaced the codes, you can always undo your changes using Shopify code editor and change the date from current to a date that you desire.

Shopify theme code editor changing date changes

Conclusion

Customizing your Shopify store is one of the things that you can do to improve your customer’s experience. With Shopify’s Theme and Asset API, you can build additional features that your competitors don’t have yet in their brand.

For example, with Asset API, you can modify the theme.liquid file and add a script where it shows an alert window that you have an event or a promo.

We really hope that you have learned at least the basic usage of theme and asset API.

Let us know what you think in the comments below! If you encountered issues, don’t hesitate to contact us and we’ll do our best to help you.

How To Make Premium WordPress Theme Header (Tutorial)

Greetings! Welcome to another part of the Premium WordPress Theme development tutorial series. In this lesson, we’re going to learn how to create the header for our premium WordPress theme.

If you remember, last time we have set up our Premium WordPress theme using Local by Flywheel. We have created the basic boilerplate HTML for our index, header, and footer. We have also added a screenshot for our theme so it will display in our dashboard how the theme will look like once activated.

Join FlyWheel for FREE and get a free SSL Certificate to keep your site secure!

If in case you haven’t followed our first tutorial, we highly recommend you to catch up first before proceeding to this part.

Read: Getting Started for Premium WordPress Theme 101


Getting Started

In this second part of our Premium WordPress tutorial series, we’re going to start taking a look at how we can implement custom CSS and JavaScript, and properly include them in our theme.

We’re going to learn how to use the functions.php file on WordPress, which is one of the most powerful files in WordPress.

Custom CSS & JavaScript

Let’s start by making two new folders inside our project, and name it css and js. This is where we’re going to store our CSS files and JavaScript files.

Flappy Bird Game

Then inside the css folder, create a new CSS file and name it style.css.

html, body {
	margin: 0;
	padding: 0;
}Code language: CSS (css)

And then inside the js folder, create a new JavaScript file and name it script.js.

//Let's make our script.js empty for nowCode language: JSON / JSON with Comments (json)

Our file structure should look something like this.

WordPress Theme Premium Project Files

Save all your scripts.

The Functions File

Now, let’s create the functions.php file so go back to your code editor, if you’re using Sublime, just press CTRL + N and CTRL + S to save, and name it functions.php.

Keep in mind that the file name is plural, with an s.


Inside the functions.php file, we want to create a function or at least use a function that will allow us to include our CSS file in our header and JavaScript file in our footer.

For now, let’s create a function that will load all of the scripts required by our theme like jQuery, Bootstrap, our script, etc.

<?php

function esquela_scripts_enqueue() {

}

?>Code language: HTML, XML (xml)

If you look at your footer.php file, you will see that there are scripts that are being referenced by our footer.

Footer PHP file with jQuery and Bootstrap

What we’re going to do is to remove all the scripts from our footer, but copy all the URLs and paste it in our functions.php file. However, we’re going to change the URL for the jQuery since bootstrap is only using the slim version of jQuery.

We’ll end up with something like this:

<?php

function esquela_scripts_enqueue() {
	//https://code.jquery.com/jquery-3.4.1.min.js
	//https://cdnjs.cloudflare.com/ajax/libs/popper.js/1.14.7/umd/popper.min.js
	//https://stackpath.bootstrapcdn.com/bootstrap/4.3.1/js/bootstrap.min.js
}

?>Code language: HTML, XML (xml)

Next, we’re going to register all the links using the WordPress function wp_register_script() and then we’ll enqueue them next using wp_enqueue_script().

We should end up with something like this by now:

<?php

function esquela_scripts_enqueue() {
	wp_register_script( 'jQuery', 'https://code.jquery.com/jquery-3.4.1.min.js', array(), 1, true );
	wp_enqueue_script( 'jQuery' );

	wp_register_script( 'Popper', 'https://cdnjs.cloudflare.com/ajax/libs/popper.js/1.14.7/umd/popper.min.js', array(), 1, true );
	wp_enqueue_script( 'Popper' );

	wp_register_script( 'Bootstrap', 'https://stackpath.bootstrapcdn.com/bootstrap/4.3.1/js/bootstrap.min.js', array(), 1, true );
	wp_enqueue_script( 'Bootstrap' );

	wp_register_script( 'Esquela', get_template_directory_uri() . '/js/script.js', array(), 1, true );
	wp_enqueue_script( 'Esquela' );
}

?>Code language: HTML, XML (xml)

Coding Reference

If in case you don’t know the functions that we used above, you can always refer to the following.

wp_register_script()

Description: A WordPress function that registers a script to be enqueued later by another WordPress function wp_enqueue_script().

Parameters:

$handle(string) (Required) The name of the script and should always be unique.
$src(string|bool) (Required) The full URL of the script, or path of the script relative to the WordPress root directory. If the source is set to false, the script is an alias of other scripts it depends on.
$deps(array) (Optional) An array of registered script handles this script depends on.
Default value: array()
$ver(string|bool|null) (Optional) A string specifying the script version number, if it has one, which is added to the URL as a query string for cache busting purposes. If version is set to false, a version number is automatically added equal to current installed WordPress version. If set to null, no version is added.

Default value: false
$in_footer(bool) (Optional) Whether to enqueue the script before </body> instead of in the <head>. Default ‘false’.

Default value: false

wp_enqueue_script()

Description: Registers the script if the $src is provided (does NOT overwrite), and enqueues it.

Parameters:

$handle(string) (Required) The name of the script and should always be unique.
$src(string|bool) (Required) The full URL of the script, or path of the script relative to the WordPress root directory. If the source is set to false, the script is an alias of other scripts it depends on.
$deps(array) (Optional) An array of registered script handles this script depends on.
Default value: array()
$ver(string|bool|null) (Optional) A string specifying the script version number, if it has one, which is added to the URL as a query string for cache busting purposes. If version is set to false, a version number is automatically added equal to current installed WordPress version. If set to null, no version is added.

Default value: false
$in_footer(bool) (Optional) Whether to enqueue the script before </body> instead of in the <head>. Default ‘false’.

Default value: false

Awesome! Now that we have created a dedicated function for our scripts, let’s actually enqueue our scripts using the add_action() function.

So right underneath our esquela_scripts_enqueue() function, type in, add_action('wp_enqueue_scripts', 'esquela_scripts_enqueue');

Our functions.php file should have the following:

<?php

function esquela_scripts_enqueue() {
	wp_register_script( 'jQuery', 'https://code.jquery.com/jquery-3.4.1.min.js', array(), 1, true );
	wp_enqueue_script( 'jQuery' );

	wp_register_script( 'Popper', 'https://cdnjs.cloudflare.com/ajax/libs/popper.js/1.14.7/umd/popper.min.js', array(), 1, true );
	wp_enqueue_script( 'Popper' );

	wp_register_script( 'Bootstrap', 'https://stackpath.bootstrapcdn.com/bootstrap/4.3.1/js/bootstrap.min.js', array(), 1, true );
	wp_enqueue_script( 'Bootstrap' );

	wp_register_script( 'Esquela', get_template_directory_uri() . '/js/script.js', array(), 1, true );
	wp_enqueue_script( 'Esquela' );
}

add_action('wp_enqueue_scripts', 'esquela_scripts_enqueue');

?>Code language: HTML, XML (xml)

Next, let’s open our header.php file once again and add the following code inside the <head> tag.

<?php wp_head(); ?>Code language: HTML, XML (xml)

Then, let’s open our footer.php file and add the following code just before the closing body tag.

<?php wp_footer(); ?>Code language: HTML, XML (xml)

Save all of your scripts and head to your website. You should see the following results in your browser inspector.

Importing CSS and JS files with WordPress Enqueue functions

As you can see, our theme started including the scripts that we listed in our functions.php file. Not only that, but it also added the meta tags that are required for every WordPress theme which is great!

That’s how you load your javascript in WordPress.

Now.

What about CSS stylesheets? How do you import them?

The answer is fairly easy and the way you do that is quite similar to how you import your scripts. The only difference is the functions that we’re going to use and that is the wp_register_style() function and wp_enqueue_style() function.

Let’s create a new function and we’ll name it esquela_style_enqueue().

function esquela_style_enqueue() {
	
}Code language: JavaScript (javascript)

Go to your header.php file and remove the Bootstrap CSS file that is being referenced.

Then, go back to functions.php file and update your esquela_style_enqueue() function to the following:

function esquela_style_enqueue() {
	wp_register_style('Bootstrap', 'https://stackpath.bootstrapcdn.com/bootstrap/4.3.1/css/bootstrap.min.css', array(), 1, 'all');
	wp_enqueue_style('Bootstrap');

	wp_register_style('Esquela', get_template_directory_uri() . '/css/style.css', array(), 1.2, 'all');
	wp_enqueue_style('Esquela');
}

add_action('wp_enqueue_scripts', 'esquela_style_enqueue');Code language: PHP (php)

Save all your scripts and you should have the following results.

WordPress Enqueue Syle

Great! now all of our files are being loaded.

Now that we finally understand how the functions work, let’s add another resource to our theme. Since we need icons, we’re gonna need Font Awesome.

Font Awesome Official Webpage

So go ahead to Font Awesome, login to your account, go to your kit, and copy the URL of the script.

Font Awesome Kit Script URL

Next, go back to your functions.php file and add the following code inside your esquela_scripts_enqueue() function.

wp_register_script( 'FontAwesome', 'https://kit.fontawesome.com/YOUR_FONTAWESOME_KIT_NAME.js', array(), 1, true );
wp_enqueue_script( 'FontAwesome' );Code language: PHP (php)

Save all your scripts!

WordPress Theme Header

Now that we’re done with the functions, let’s proceed to our theme and design our header.

Open your header.php file once again, and add the following code just below the opening body tag.

<header id="es-header">
	<div class="logo" id="logo">Esquela</div>
	<nav>
		<ul class="menu">
			<li><a class="nav-links" href="#">Home</a></li>
			<li><a class="nav-links" href="#">About</a></li>
			<li><a class="nav-links" href="#">Menu</a></li>
			<li><a class="nav-links" href="#">Contact</a></li>
		</ul>
		<ul class="social">
			<li><a href="#"><i class="fab fa-instagram"></i></a></li>
			<li><a href="#"><i class="fab fa-facebook-f"></i></a></li>
			<li><a href="#"><i class="fab fa-twitter"></i></a></li>
			<li><a href="#"><i class="fab fa-whatsapp"></i></a></li>
		</ul>
	</nav>
	<div class="menu-toggle" id="toggle"><i class="fas fa-bars"></i></div>
</header>Code language: HTML, XML (xml)
WordPress Premium Theme Header Tutorial

Awesome! Now let’s style our header with CSS.

Open your main.css file inside the css folder and copy the following CSS code.

header {
	padding: 25px 100px;
	background: #3952a6;
	width: 100%;
	box-sizing: border-box;
	z-index: 99;
	transition: .5s;
	height: 100px;
}

header .logo {
	color: #fff;
	height: 50px;
	line-height: 50px;
	float: left;
	font-size: 25px;
	font-weight: bold;
	transition: .5s;
}

header nav {
	float: right;
}

header nav ul {
	margin: 0 50px;
	padding: 0;
	display: inline-flex;
}

header nav ul li {
	list-style: none;
}

header nav ul li a {
	position: relative;
	font-size: 15px;
	height: 50px;
	line-height: 50px;
	padding: 0 20px;
	color: #fff;
	text-decoration: none;
	display: block;
	transition: .5s;
	text-transform: uppercase;
}

.social li {
	background: #fff;
	border-radius: 50%;
	margin: 0 5px;
}

.social li a {
	position: relative;
	color: #3952a6;
	font-size: 15px;
	width: 25px;
	height: 25px;
	padding: 5px;
	line-height: 5px;
	text-decoration: none;
	display: block;
	transition: .5s;
	text-align: center;
}

.menu-toggle {
	color: #fff;
	float: right;
	line-height: 50px;
	font-size: 25px;
	cursor: pointer;
	display: none;
	transition: 0.5s;
}
@media screen and (max-width: 1027px) {
	header {
		padding: 20px 40px;
	}
}

@media screen and (max-width: 991px) {
	.menu-toggle {
		display: block;
	}

	header nav {
		position: absolute;
		width: 100%;
		height: calc(100vh - 50px);
		background: #333;
		top: 90px;
		left: -100%;
		transition: 0.5s;
	}

	header nav.active {
		left: 0;
	}

	header nav ul {
		display: block;
		text-align: center;
	}

	.social {
		margin-top: 20px;
		display: inline;
	}

	.social li {
		margin: 20px 0;
		background: none;
	}

	.social li a {
		width: 100%;
		font-size: 50px;
		text-align: center;
		border: none;
		height: auto;
		color: #1f1e1e;
	}

	header nav ul a {
		border-bottom: 1px solid rgba(0,0,0, .2);
	}
}

@media screen and (max-width: 580px) {
	header {
		padding: 20px 30px;
	}

	.body-m {
		padding-top: 110px;
		padding-left: 10px;
		padding-right: 10px; 
	}
}Code language: CSS (css)

Save your files! You should have the following results for desktop.

WordPress Esquela Theme Premium Header tutorial

And for mobile, you should end up with the following.

WordPress Esquela Theme Premium Responsive Header tutorial

Awesome! But we’re not done yet! If you try to click the menu bar, our links and socials will never show up.

So what do we do? Of course, we’ll use JavaScript to display our menu.

So go ahead to your files, open your js folder and open the script.js file.

Then copy the following code:

$(document).ready(function() {
    $('.menu-toggle').on('click', function(e) {
        $('nav').toggleClass('active');
    });
});Code language: JavaScript (javascript)

Save all your files.

You should end up with the following result when you click the menu button.

WordPress Theme Header Premium Tutorial

Conclusion

Congratulations! You have successfully learned not only how to use functions.php file but also how to create a responsive premium theme header for WordPress.

In the next tutorial, we’re going to learn how to create a hero banner with image and header texts.

For now, we would like to thank you for reading this post. If you think you have learned something from us, let us know below in the comments, we really love hearing from you!

If you have questions or maybe a request, contact us or comment below and we’ll reply to you as soon as we can.

Premium WordPress Theme Tutorial for Beginners 101

Welcome to our new tutorial series here at WeeklyHow. If you have been following us for quite a while then you probably know already that most of our topics are focusing on Shopify app development. However, this time, we will be giving you new lessons which are very different from Shopify.

You have read it from the title already. 🙂

In this tutorial series, we will be teaching you how to create premium WordPress themes from scratch using PHP, HTML5, CSS (Bootstrap 4.3), and JavaScript. We’ll cover all of the possible lessons that we currently know though we are also open for your requests so as we go along in this tutorial series, you can contact us and give us what you want to learn and we’ll cover that in the next lessons.

Getting Started

Before we begin building premium WordPress themes, we highly suggest doing research and planning first before structuring your files as it will be much easier to continue with the project.

We also suggest downloading website design mockups to make it easier for you to follow which design you want to achieve.

For this course, we’ll be following this design mockup created by Freepik. You may download the PSD file here.

Building Premium WordPress themes Tutorial for begineers 101

What is WordPress

First of all, before we get started, we would like to inform you that we are using content management systems (commonly known as CMS) called WordPress.

WordPress is a very popular platform commonly used for blogging purposes although starting from September 27, 2011, WordPress started its partnership with its own plugin called WooCommerce to also support e-commerce for selling products or services.

WordPress is an open-sourced content management system used by over 60 million websites all over the internet. It provides thousands of plugins that could help your website’s performance and traffic. It is free to use though you are required to host a web server to be able to use this CMS.

For this course, we will be using WordPress locally using Local by Flywheel.

Local by Flywheel - Your #1 local development tool for WordPress Theme Development

What is Local by FlyWheel

Local by Flywheel is a simple, super-fast and a completely free local development application designed to simplify the development process of WordPress developers.

Join FlyWheel for FREE and get a free SSL Certificate to keep your site secure!

We’re going to use this application instead, as it is very fast and easy to use. Although, we don’t discourage you to use your favorite local development application. If you want to use XAMPP or WAMPP, feel free to do so.

If you’re using Local by Flywheel too, then follow the steps below as we’ll create a new and fresh WordPress website.

Creating a new WordPress site

Open Local by Flywheel and click on Create a new site button.

Creating a new site using Local by Flywheel - WordPress theme development tutorial for beginners 101

Then enter the name of your site.

Local by FlyWheel - Creating a new website locally for WordPress Theme Development Tutorial

Next, enter your WordPress admin’s credentials. You may leave the advanced options set to no.

Setting Up WordPress using Local by FlyWheel for WordPress theme development tutorials for beginners

Click the Add site button and wait for the application to setup your website. If this is your first time using Local by Flywheel, you may encounter windows security alerts for Nginx and Mailhog.

Just click Allow access.

Local by FlyWheel windows security alerts

You may now access your WordPress site by clicking the view site button.

Viewing Websites made by Local by FlyWheel for WordPress

By default, WordPress will be using the Twenty Nineteen theme.

Later, we’re going to remove all of the themes available on our site and create our own theme.

Develop Premium WordPress Themes Locally using Local by FlyWheel for FREE

Accessing WordPress admin dashboard

To access your WordPress admin dashboard, click the admin button just beside the view site button.

Accessing WordPress admin dashboard using Local by FlyWheel

Enter your admin credentials.

WordPress login page for accessing admin dashboard

Welcome to WordPress! 🙂

WordPress Admin Dashboard created by Local by FlyWheel for WordPress Development

Creating premium WordPress themes

Now that everything is set up, we can now start working on our new theme.
For this course, we’ll be using Sublime as our code editor though we don’t discourage you to use your favorite editor. If you have Visual Studio or Notepad++, feel free to use them.

Accessing WordPress files

To access your WordPress files, go to your Local by Flywheel application and click on the right-arrow just below your site’s name.

You may also access your site’s folder by pressing right-click on your site under Local Sites and select Show Folder.

Accessing WordPress project files on Local by Flywheel

Once you open your site’s folder, you will see three folders such as app, conf, and logs.

Open the app folder.

Next, you will see the public folder, open that.

You should see the following files.

WordPress default files

Open the wp-content folder.

Next, the themes folder.

Once you open the themes folder, you will see folders that have the same name as the themes available in our WordPress website such as twenty-sixteen, twenty-seventeen, twenty-eighteen, and twenty nineteen.

WordPress themes folder

We’re going to create a new folder here so while we’re inside the themes folder, press right-click and select New -> Folder.

Let’s name this folder escuela.

Open the folder that we have just created and let’s create a new CSS file and name it style.css.

The Main Stylesheet (style.css)

The style.css file is the main stylesheet file required for every WordPress theme. It contains all the details about the theme that you’re developing including the name of the theme, the author, the description of the theme, the license, and the tags.

By default, your style.css should look something like below:

/*
Theme Name: Escuela
Theme URI: https://weeklyhow.com/example/dont-browse-this
Author: WeeklyHow
Author URI: https://weeklyhow.com/
Description: Lorem ipsum dolor sit amet, consectetur adipiscing elit, sed do eiusmod tempor incididunt ut labore et dolore magna aliqua. Ut enim ad minim veniam, quis nostrud exercitation ullamco laboris nisi ut aliquip ex ea commodo consequat. Duis aute irure dolor in reprehenderit in voluptate velit esse cillum dolore eu fugiat nulla pariatur. Excepteur sint occaecat cupidatat non proident, sunt in culpa qui officia deserunt mollit anim id est laborum.
License: GNU General Public License v2 or later
License URI: http://www.gnu.org/licenses/gpl-2.0.html
Text Domain: weeklyhow
Tags: responsive, mobile
*/Code language: JSON / JSON with Comments (json)

Feel free to modify the code above.

Save your style.css file and create a new PHP file and name it index.php.

The Main Template (index.php)

The main template is the file where you will call WordPress functions such as get_header() and get_footer().

Feel free to copy the following code in your index.php file.

<?php get_header(); ?>

<?php get_footer(); ?>Code language: HTML, XML (xml)

The Header File (header.php)

The header file (also known as header.php) is a template file used for displaying navigational bars or anything you want to display in most of your pages. This is where you will initialize all of your scripts and stylesheets that are required by your theme.

Inside our escuela folder, let’s create a new PHP file and name it header.php.

Then copy the following code.

<!DOCTYPE html>
<html lang="en">
	<head>
		<!-- Required meta tags -->
		<meta charset="utf-8">
		<meta name="viewport" content="width=device-width, initial-scale=1, shrink-to-fit=no">
		<!-- Bootstrap CSS -->
		<link rel="stylesheet" href="https://stackpath.bootstrapcdn.com/bootstrap/4.3.1/css/bootstrap.min.css">

		<title>Escuela WordPress Theme by WeeklyHow</title>
	</head>
	
	<body>Code language: HTML, XML (xml)

Don’t forget to save your script 🙂

The Footer File (footer.php)

Same with the header file, the footer file is a template file commonly used for displaying the footer section.

Once again, create a new PHP file and name it footer.php.

Then copy the following code.

		<script src="https://code.jquery.com/jquery-3.3.1.slim.min.js"></script>
		<script src="https://cdnjs.cloudflare.com/ajax/libs/popper.js/1.14.7/umd/popper.min.js"></script>
		<script src="https://stackpath.bootstrapcdn.com/bootstrap/4.3.1/js/bootstrap.min.js"></script>
	</body>
</html>Code language: HTML, XML (xml)

The Thumbnail (screenshot.png)

The thumbnail is where you can show the theme design. The thumbnail should be named screenshot.png, and should be placed only in the top-level directory of your theme folder.

The highly recommended image size for the thumbnail is 1200px wide and 900px tall.

For this course, we’ll be using the following thumbnail.

Feel free to download this image.

WordPress screenshot png thumbnail for WordPress Premium theme development

With everything that we have created, your theme files should look something like this.

WordPress basic theme files

Now head back to your WordPress dashboard and open the themes page.

Your theme should be presented there by now like below.

Developing Premium WordPress themes - Managing themes

To start using our premium WordPress theme select the theme and click the Activate button.

Managing WordPress themes

Now let’s browse our site again.

WeeklyHow WordPress Premium Theme Tutorial for Beginners 101

As you can see, our site is displaying nothing anymore. However, if we look at the code in the inspector, you will see that the code written in both header and footer files are being used. Perfect!

Now let’s go back to our main template file (index.php) and add a little message to see if everything actually works.

<?php get_header(); ?>
<h1>Hello World!</h1>
<p>Why do we always use "Hello World"? Too cliché right?</p>
<?php get_footer(); ?>Code language: HTML, XML (xml)

Let’s save it and see the results.

WeeklyHow WordPress Premium Theme Tutorial for Beginners 101 Results

Conclusion

Congratulations! You have successfully set up your WordPress premium theme. But wait! We’re not done yet. In the next post, we’re going to start working on the navigational bar and set up our header file. We’ll also introduce you to more template files that are very important for every WordPress theme.

For now, we would like to thank you for reading this post. If you think you have learned something from us, let us know below in the comments, we really love hearing from you!

If you have questions or maybe a request, contact us or comment below and we’ll reply to you as soon as we can.